Tenant Management
Searching Tenants
You can search tenants using the following criteria:
Searchable fields:
- ID or Tenant Name: Text input

Creating a New Tenant
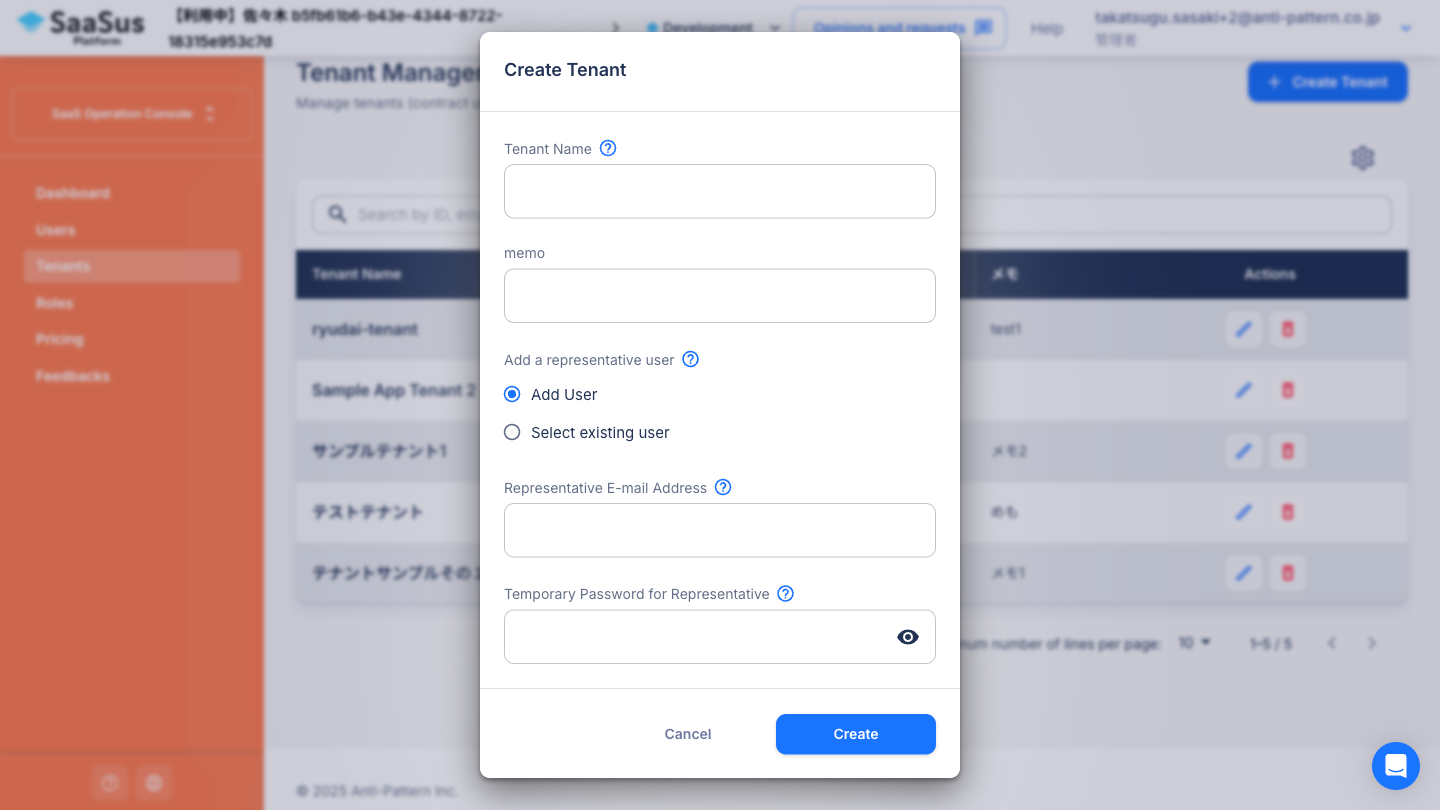
Click the “+ Create Tenant” button in the top right to open the tenant creation window.
Input fields:
| Field Name | Description |
|---|---|
| Tenant Name | The name displayed in your service |
| Tenant Attributes | Optional predefined attributes (e.g., industry, contract type) |
| Add a representative user | Select either Add User or Select existing user (radio) |
If “Add User” is selected:
| Field Name | Description |
|---|---|
| Representative E-mail Address | Used as the login ID for the new user |
| Temporary Password for Representative | One-time password used for initial login |
If “Select existing user” is selected:
- Choose from a list of registered user email addresses (autocomplete input)
info
- The newly created representative user will be automatically assigned to the tenant with the
adminrole. - If Stripe is integrated, billing emails will be sent to the Representative E-mail Address.
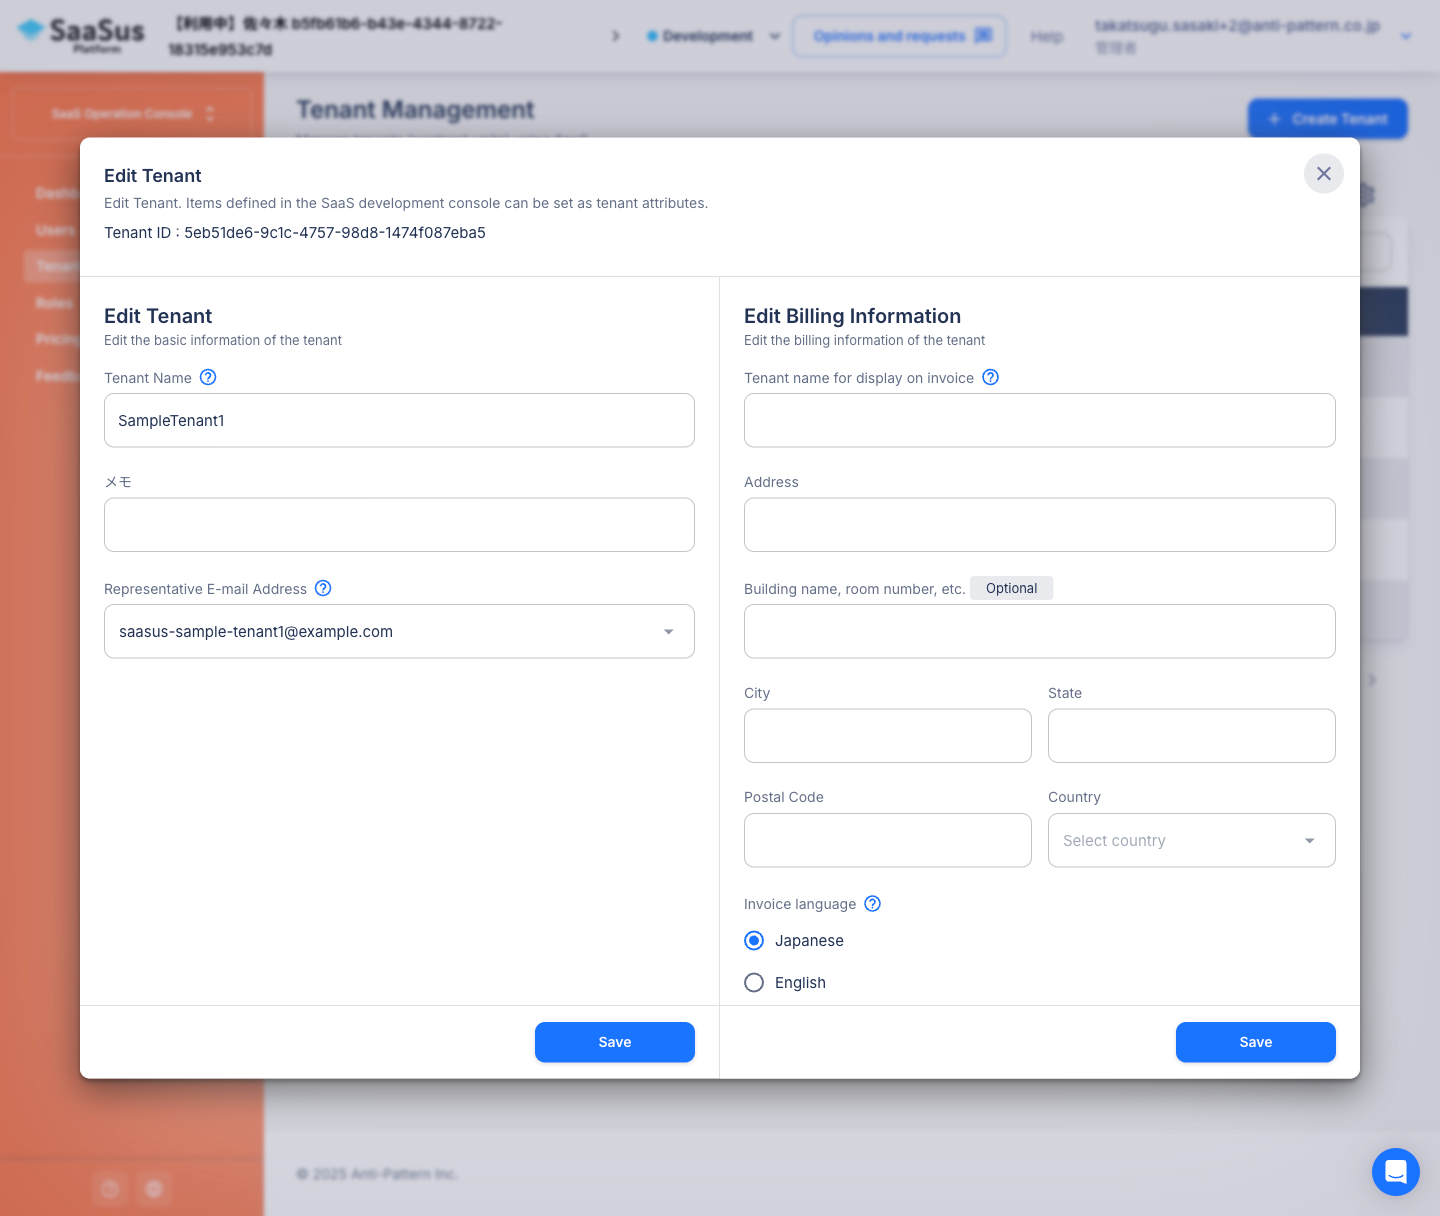
Editing a Tenant
Click the "Edit" icon in the list to open the edit window.
Edits are divided into two sections:
Editing Basic Information
| Field Name | Description |
|---|---|
| Tenant Name | Update the display name of the tenant |
| Tenant Attributes | Update predefined attributes (e.g., industry, contract type) |
| Representative E-mail Address | Select a user associated with the tenant as the representative address |
info
- If Stripe is integrated, billing emails will be sent to this address.
Editing Billing Information
You can update information displayed on invoices.
| Field Name | Description |
|---|---|
| Tenant Name (for Invoice) | Name that appears on the invoice |
| Address | Street address (e.g., block, lot, etc.) |
| Building name, room number, etc. | Building name, apartment, or room number |
| City | City, ward, town, or village |
| State | State or region (e.g., prefecture in Japan) |
| Postal Code | Postal or ZIP code |
| Country | Country name |
| Invoice Language | Japanese / English (radio selection) |
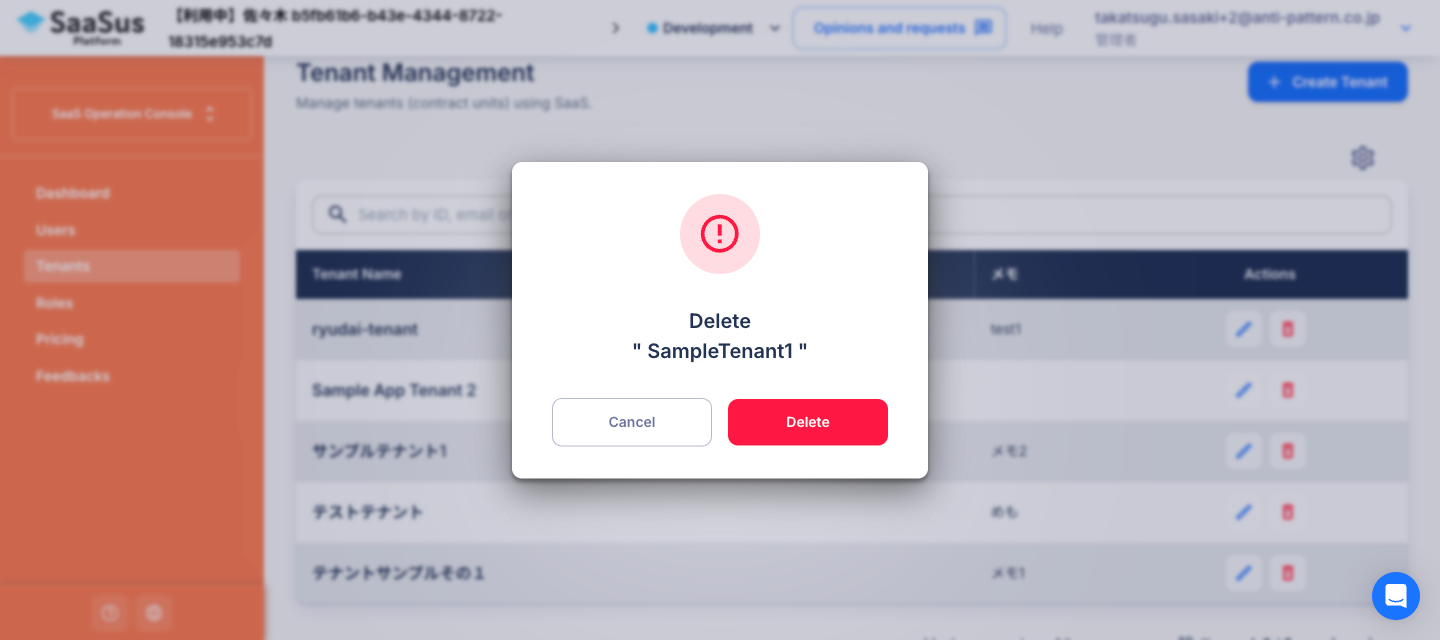
Deleting a Tenant
Click the "Delete" icon to open a confirmation window.