This document explains how to configure Multi-Factor Authentication (MFA) for both SaaSus Platform and SaaS applications.
Configuring Multi-Factor Authentication (MFA) for a SaaSus Platform Account
-
Click the user menu in the top-right header of the Development Console.
-
Click
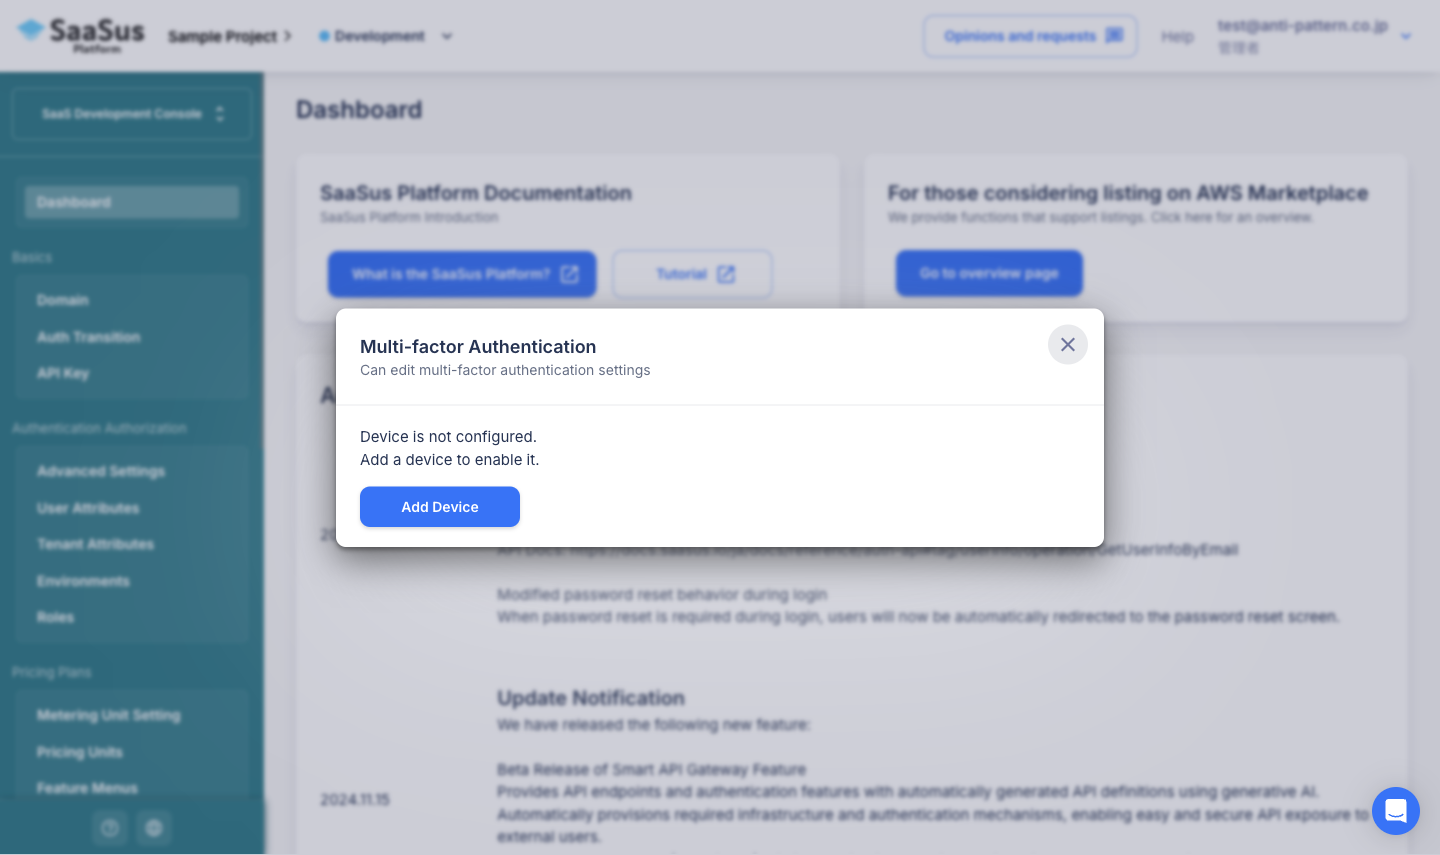
Multi-factor Authentication Setting. -
Click the
Add Devicebutton.
-
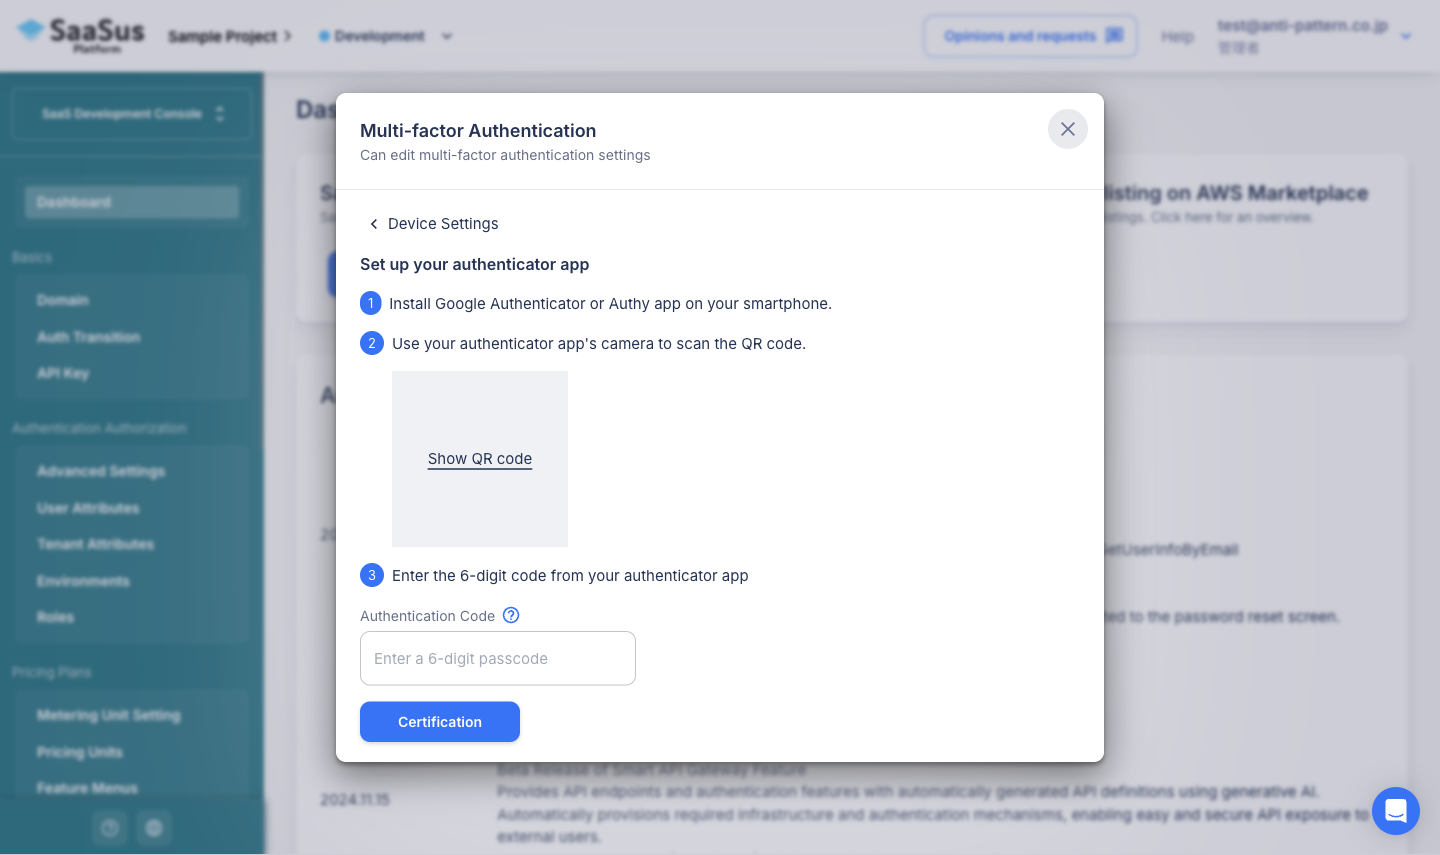
Click
Show QR Codeto display the QR code.
-
Scan the displayed QR code using Google Authenticator or Authy.
-
Enter the 6-digit code generated by the app and click
Certification. -
Once MFA is enabled, you will be required to enter a verification code upon login.
Implementing Multi-Factor Authentication in a SaaS Application
To enable MFA in a SaaS application, follow the steps below.
MFA Implementation
To enable MFA in a SaaS application, you need to integrate an additional authentication step into your login flow.
For details on API usage and implementation, please refer to the MFA Implementation (API Server) page.
Remember Trusted Devices
You can configure whether users' trusted devices should be remembered.
If a trusted device is remembered, users can skip MFA verification for subsequent logins.
How to Configure
The Remember Trusted Devices can be changed in the Authentication tab under the Advanced Settings in the Development Console.
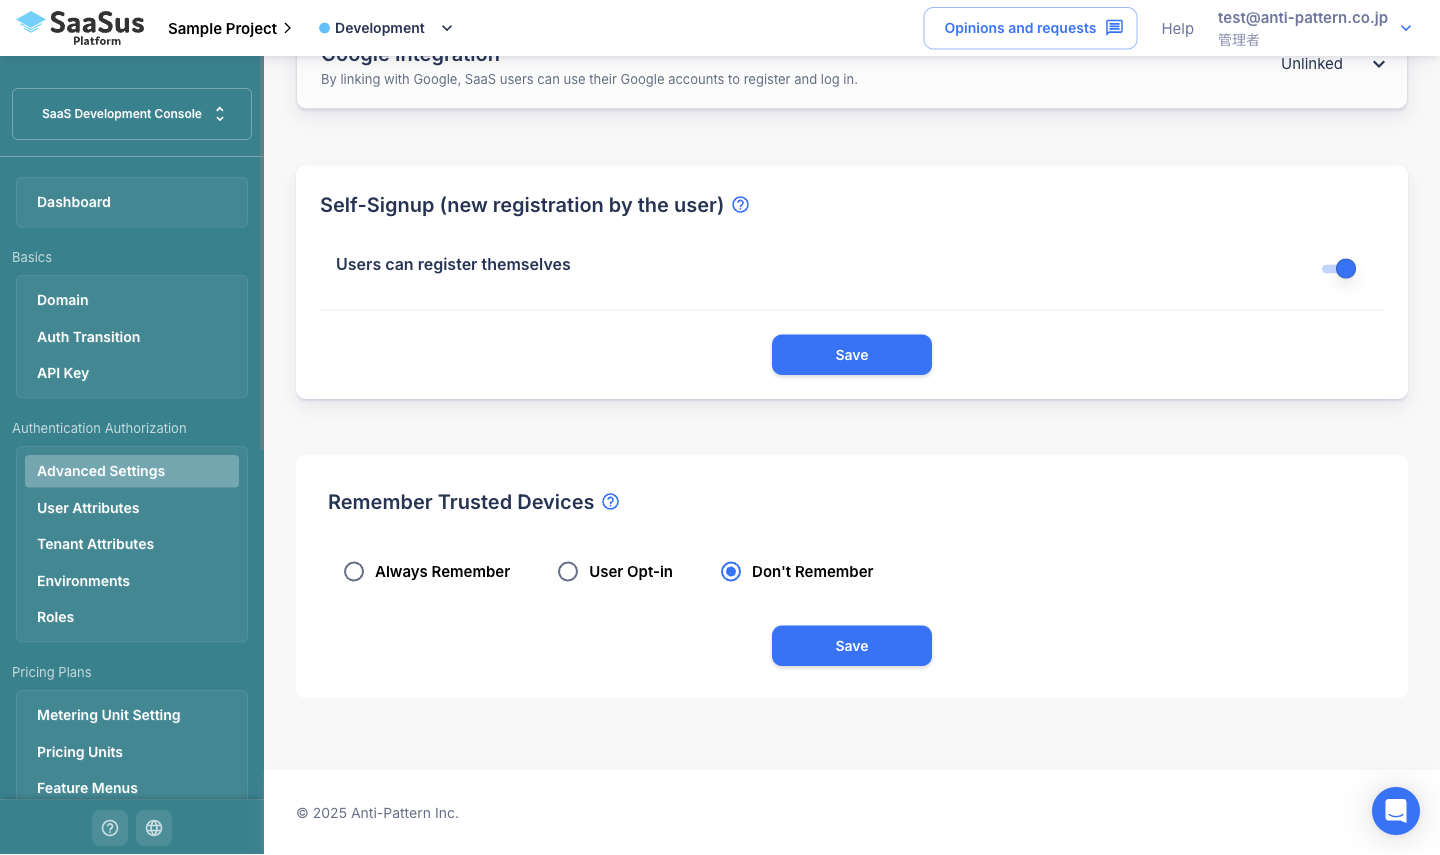
Available Configuration Options
| Option | Description |
|---|---|
| Always Remember | Automatically remembers all user devices, skipping MFA for subsequent logins. |
| User Opt-in | Displays a "Remember this device" checkbox on the login screen.
|
| Don't Remember | MFA is required for every login. |