Authentication Preference
Creating a SaaS consumer tenant
First, let's create two tenants for the sample application.
Click “Tenant management” on the side menu.
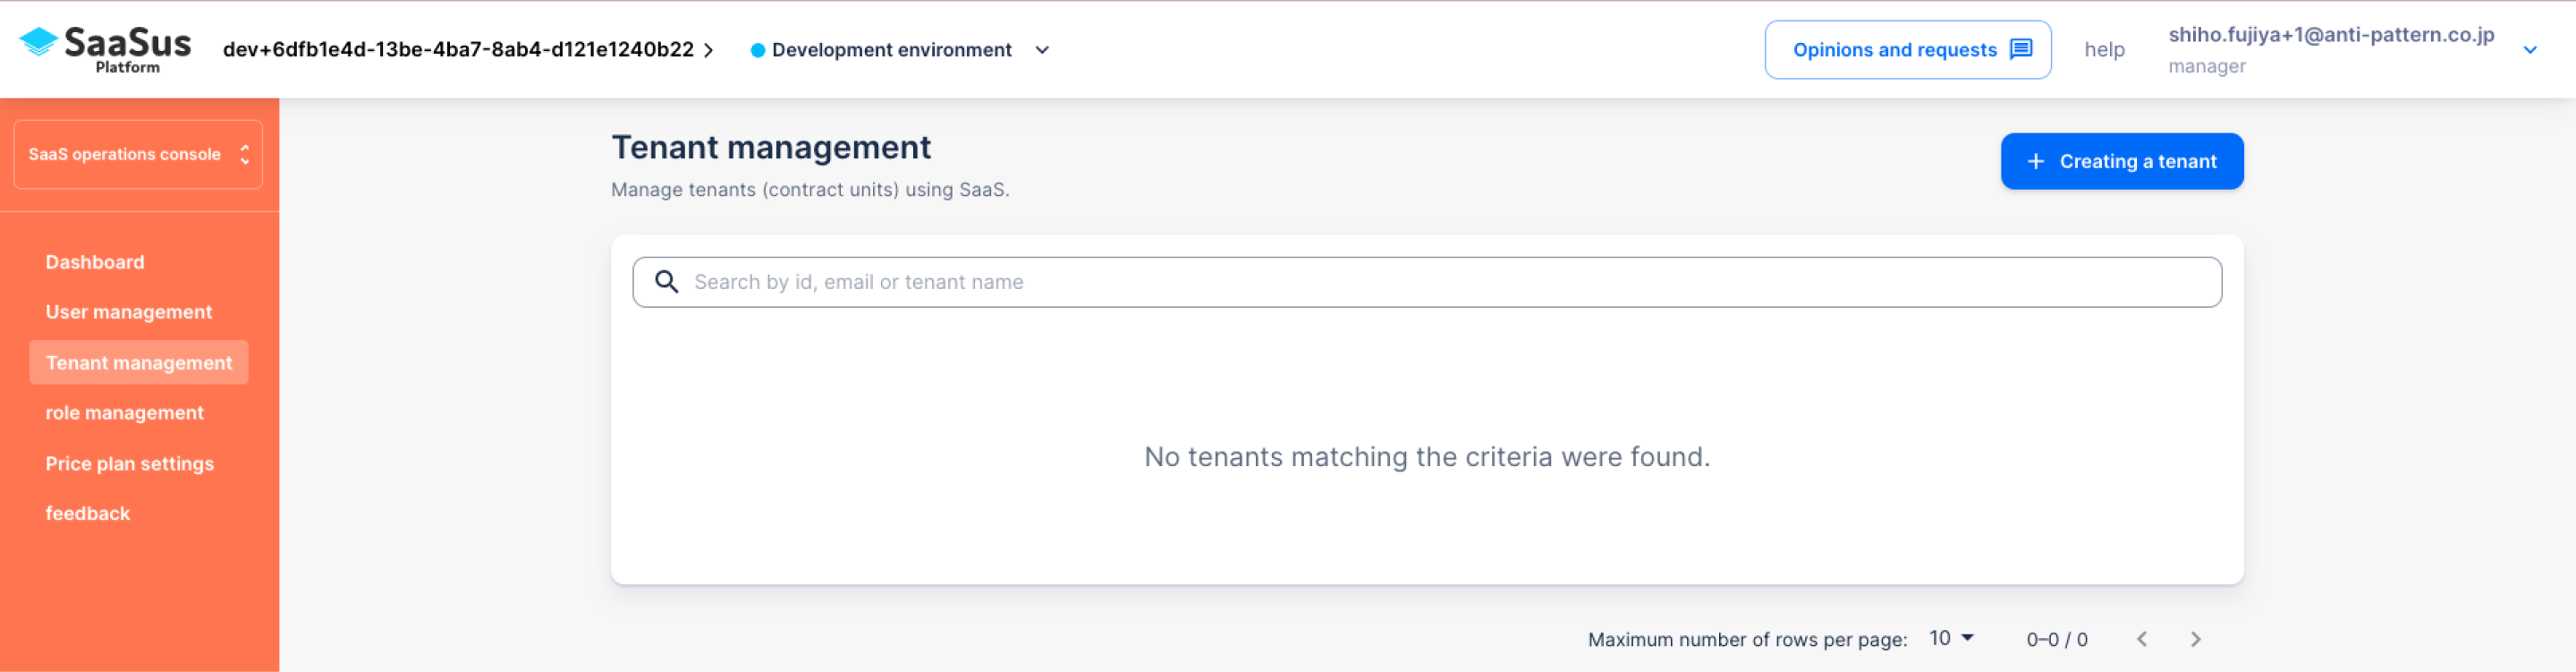
Click the “Creating a tenant” button to display a pop-up.
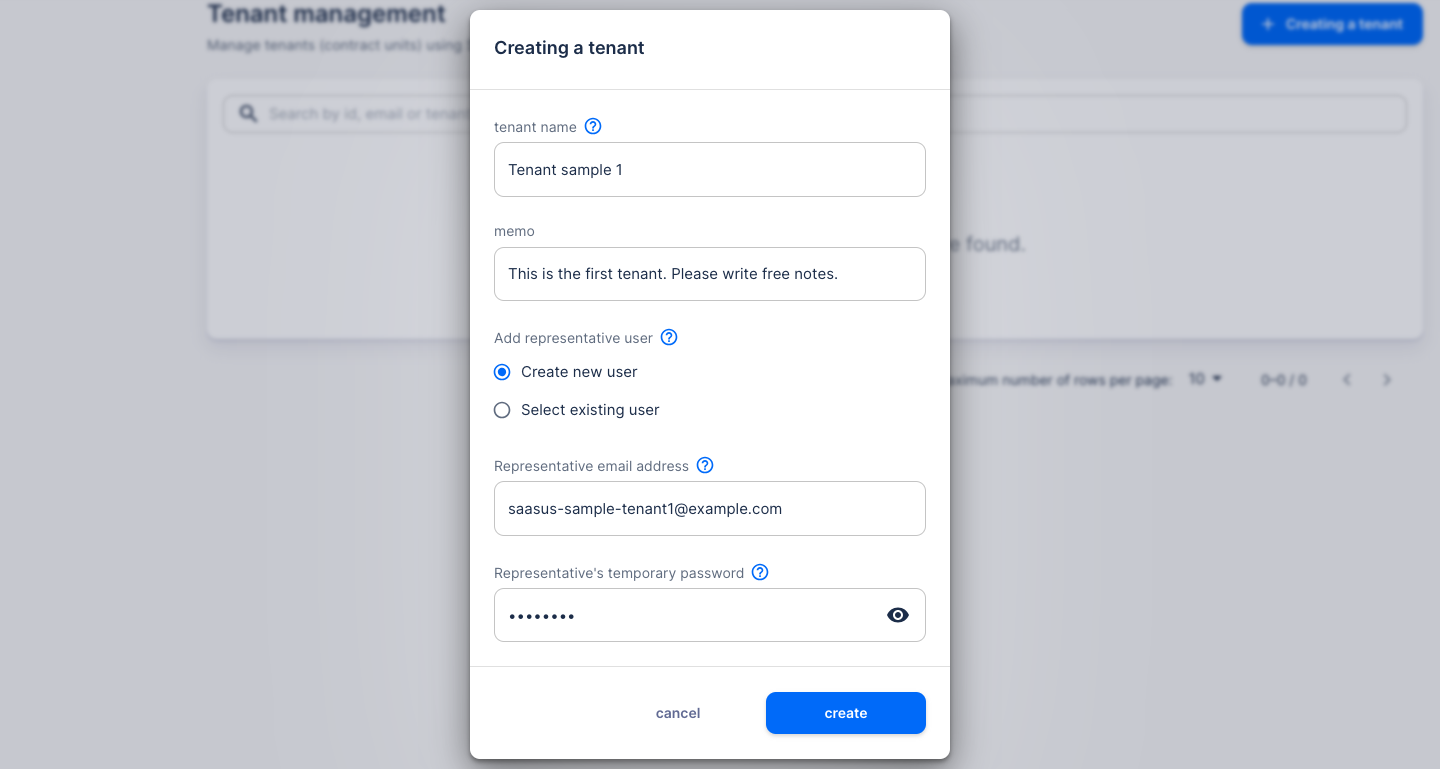
The tenant name, addition of representative user, representative email address, representative temporary password, and other tenant attributes added in Declare Additional Attribute To Tenantintroduced in Guides are displayed.
First one
- tenant name:Tenant sample 1
- memo:This is the attribute information defined in tenant attributes and can be set freely.
- Add representative user:Create a new user
- Representative email address: saasus-sample-tenant1@example.com
- Representative's temporary password: Password requirements such as G@2qYPQq
The second one
- tenant name:Sample app tenant 2
- memo:This is the attribute information defined in tenant attributes and can be set freely.
- Add representative user:Create a new user
- Representative email address: saasus-sample-tenant2@example.com
- Representative's temporary password: Password requirements such as irG_l88r
(There is no set rule, so you can enter other values as well.)
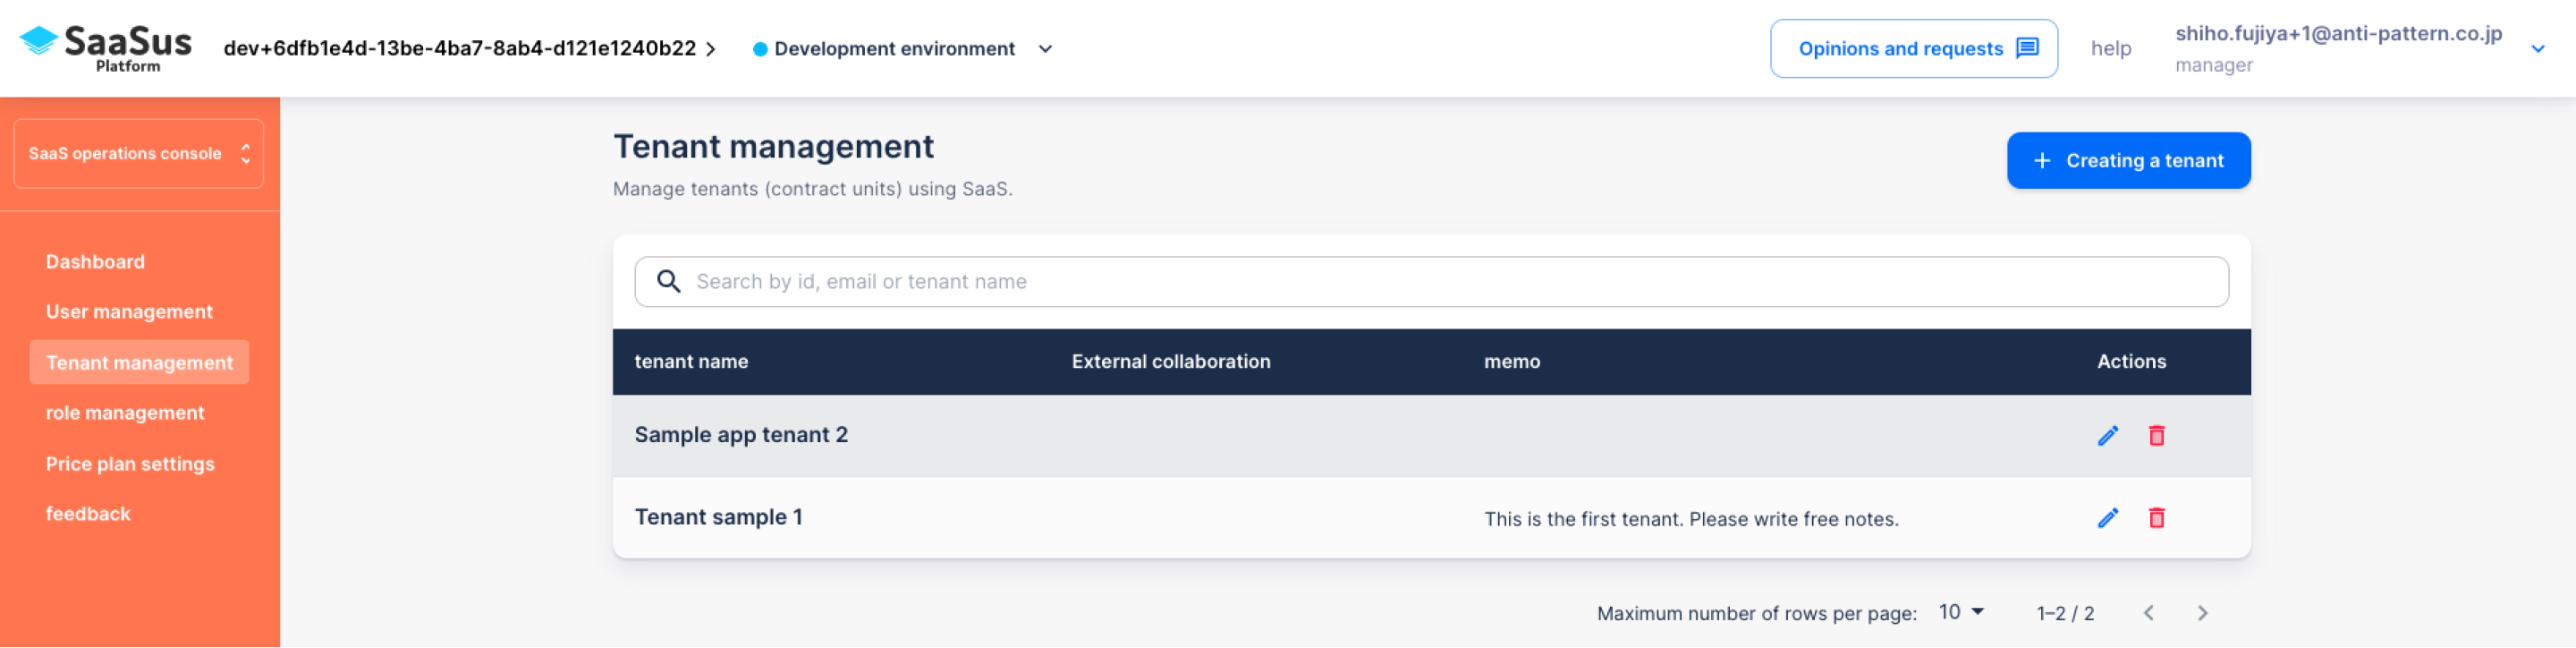
You have now created a tenant and one user belonging to that tenant.
Creating a SaaS user
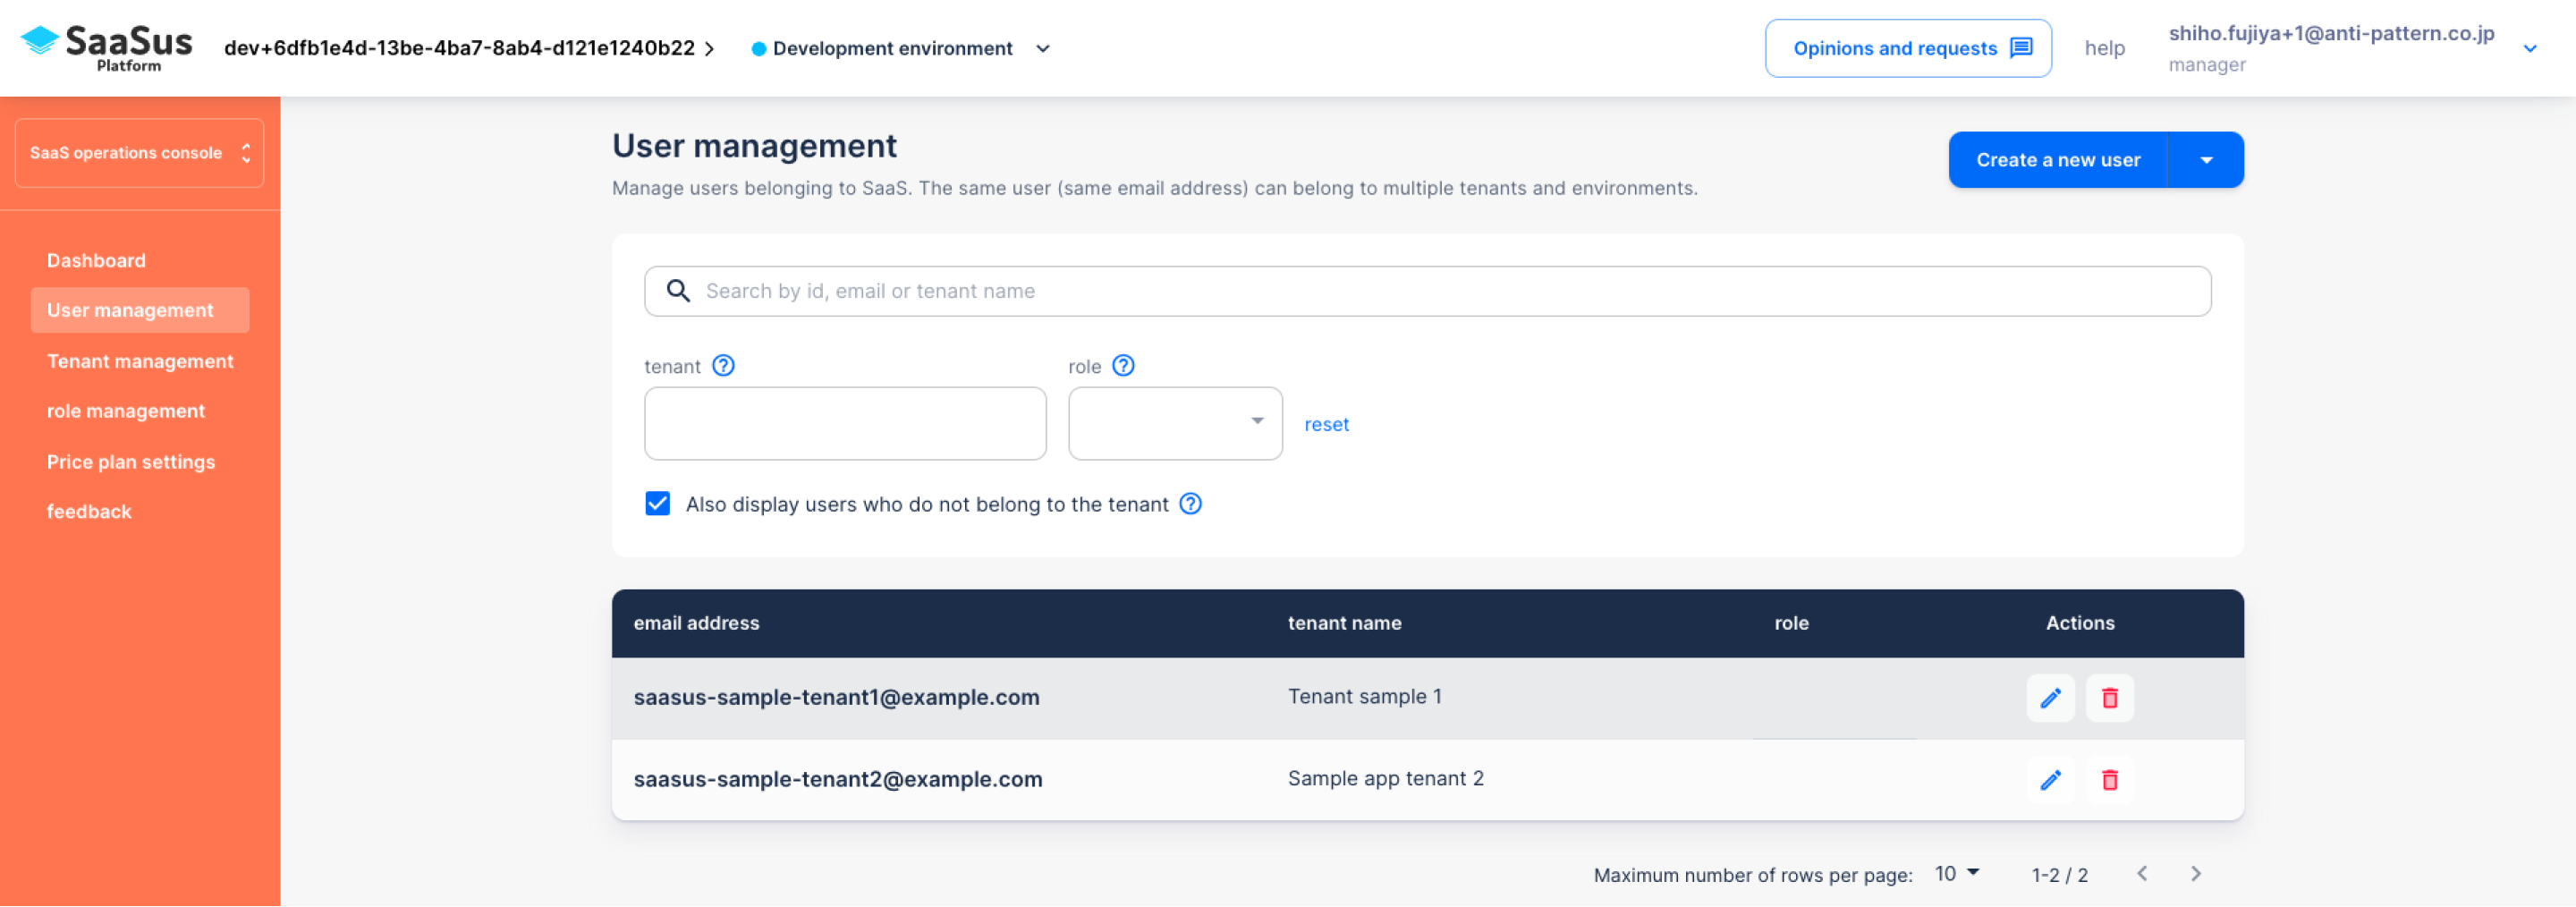
Now, let's take a look at the user list. Click "User management" from the side menu.
The user you created earlier is registered as the admin (SaaS administrator) role for each tenant and each environment.
The SaaSus Platform allows the concept of an "environment" to be used as a tenant for SaaS users.
For example, in a SaaS like Stripe that primarily uses APIs, SaaS users will need an environment for testing and developing integrations.
SaaS administrators can now define multiple environments, such as using an environment called a development environment to perform these tasks and an environment called a production environment for actual operations.
Depending on SaaS, multiple environments may not be necessary, so if you use a single environment, you only need to be aware of the production environment.
Now, let's register one user for each tenant.
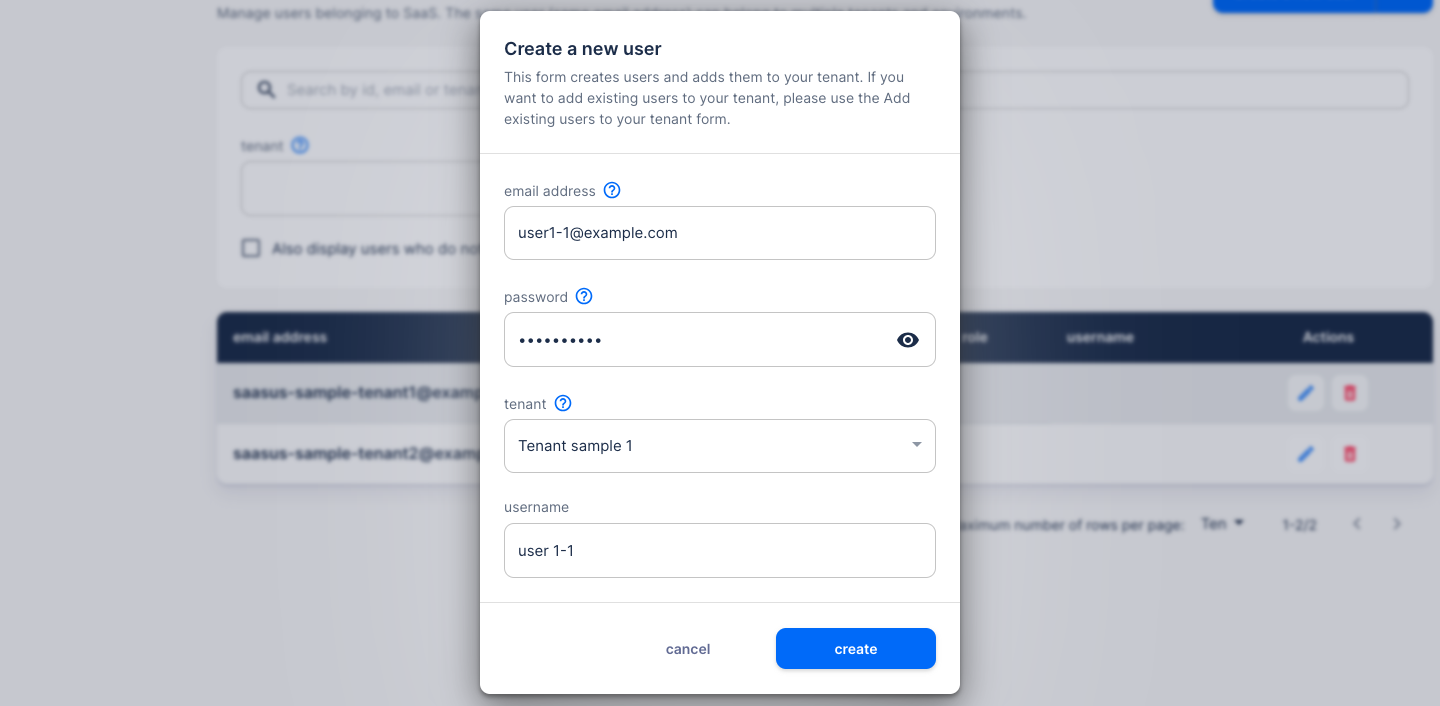
Click the "Create a new user" button in the upper right corner to display a popup.
The email address, password, tenant, and other user attributes added in Declare Additional Attribute To User, introduced in Guides, are displayed.
For now, let's register 4 people.
email address: user1-1@example.com
password: Meets password requirements
tenant: Tenant sample 1
username: User1-1
email address: user1-2@example.com
password: Meets password requirements
tenant: Tenant sample 1
username: User1-2
email address: user2-1@example.com
password: Meets password requirements
tenant: Sample app tenant 2
username: User2-1
email address: user2-2@example.com
password: Meets password requirements
tenant: Sample app tenant 2
username: User2-2
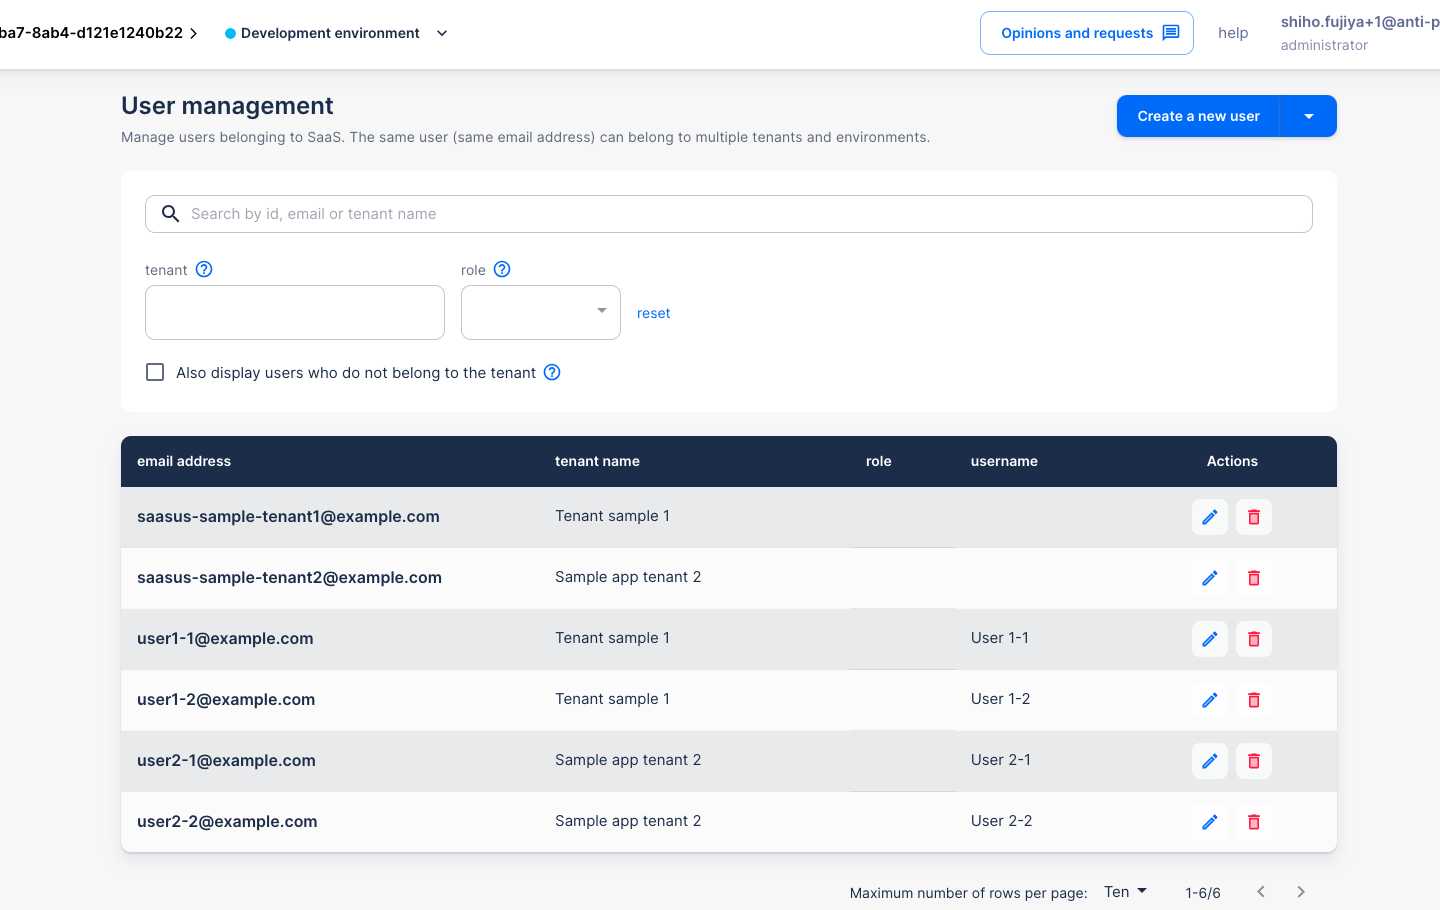
I was able to register 4 additional users.
Please assign appropriate roles to these users using the steps below.
To proceed smoothly with the following tutorial steps, it is essential to assign appropriate roles to users in advance.
Refer to the following page to complete this setup:
The following steps require programming knowledge.
Setting destination URL after authentication
Based on the domain name you configured, SaaSus Platform generates a login screen. After logging in, the authentication information is transferred to the SaaS side.
The URL of the SaaS to be taken over must be registered as the Callback URL.
Click "Transition destination after authentication" from the side menu to display the Callback URL setting screen.
Typically, you set the Callback URL based on the URL of the SaaS offering.
However, since we will be running the sample application locally this time, we will configure it as follows.
- For Laravel: http://localhost/callback
- For Express: http://localhost:3000/callback
Incorporating an Authentication Module
Next, integrate the authentication module provided by the SaaSus Platform.
In this application, all URI routes will require authentication. If a user is not authenticated, they will not be able to access the application.
Currently, authentication is handled in the following files:
- For Laravel:
api/routes/web.php
- For Express:
api/app.ts
You will replace the existing authentication logic with the one provided by SaaSus.
- Laravel (PHP)
- Express (TS)
Route::middleware('auth')->group(function () {
Route::get('/', function () {
return view('welcome');
});
Route::get('/dispatch', 'App\Http\Controllers\DispatchController@index')->name('dispatch');
Route::get('/board', 'App\Http\Controllers\MessageController@index')->name('board');
Route::post('/post', 'App\Http\Controllers\MessageController@post')->name('post');
});
require __DIR__ . '/auth.php';
app.use(
session({
secret: "secret",
resave: false,
saveUninitialized: false,
})
);
app.use(passport.initialize());
app.use(passport.session());
change
- Laravel (PHP)
- Express (TS)
// Route::middleware('auth')->group(function () {
// Route::get('/', function () {
// return view('welcome');
// });
// Use SaaSus SDK standard Auth Middleware
Route::middleware(\AntiPatternInc\Saasus\Laravel\Middleware\Auth::class)->group(function () {
Route::get('/dispatch', 'App\Http\Controllers\DispatchController@index')->name('dispatch');
Route::get('/board', 'App\Http\Controllers\MessageController@index')->name('board');
Route::post('/post', 'App\Http\Controllers\MessageController@post')->name('post');
Route::redirect('/', '/board');
});
// require __DIR__ . '/auth.php';
import { AuthMiddleware } from "saasus-sdk";
...
// app.use(
// session({
// secret: "secret",
// resave: false,
// saveUninitialized: false,
// })
// );
app.use(
["/chat", "/api/board", "/api/post", "/api/plan", "/api/tenant"],
AuthMiddleware
);
// app.use(passport.initialize());
// app.use(passport.session());
Removing Individual Authentication Logic (Express)
In Express, individual authentication logic was implemented for each route. These need to be removed.
- For Laravel: No changes are required
- For Express: Modify
api/routes/chat.ts
- Express (TS)
router.get(
"/",
(req: Request, res: Response, next: NextFunction) => {
if (req.isAuthenticated()) {
next();
} else {
res.redirect(302, "/login");
}
},
getChats
);
を
- Express (TS)
router.get("/", getChats);
Implementing the Callback URL Handler
Earlier, you defined the callback URL in the SaaSus development console as:
- For Laravel: http://localhost/callback
- For Express: http://localhost:3000/callback
Now you need to configure the application to handle requests at /callback
.
- For Laravel:
Add the following line to the end ofapi/routes/web.php
.
- Laravel (PHP)
// Use the SaaSus SDK standard Callback Controller to put the JWT into Cookies or Local Storage
Route::get('/callback', 'AntiPatternInc\Saasus\Laravel\Controllers\CallbackController@index');
Furthermore, to be able to use the View provided by the SaaSus SDK,
Add the path to api/config/view.php
.
- Laravel (PHP)
'paths' => [
resource_path('views'),
# ↓Add this line: Directory of views provided by SaaSus SDK
resource_path('../vendor/saasus-platform/saasus-sdk-php/src/Laravel/Views'),
],
- For Express:
Add animport
statement andapp.use
toapi/app.ts
to include the router that handles requests to the/callback
path.
- Express (TS)
import { router as callbackRouter } from "./routes/callback";
// Other code omitted
app.use("/callback", callbackRouter);
To handle GET requests to /callback
, create api/routes/callback.ts
and use the CallbackRouteFunction
provided by the SaaSus SDK.
- Express (TS)
import express from "express";
const router = express.Router();
import { CallbackRouteFunction } from "saasus-sdk";
router.get("/", CallbackRouteFunction);
export { router };
Create views/callback.ejs
as the screen to display after login (in this case, it will redirect to /chat
).
- Express (EJS)
<!DOCTYPE html>
<html>
<head>
<meta charset="utf-8" />
<meta name="viewport" content="width=device-width, initial-scale=1" />
<title>Auth Callback</title>
</head>
<body>
<script>
location.href = "/chat";
</script>
</body>
</html>
Once everything is set up, the authentication information configured in the SaaSus Platform will be passed as part of the request when it reaches your application’s controller.
- For Laravel: Add
Request
as a parameter to theindex
method inapi/app/Http/Controllers/MessageController.php
, and usedd
to check ifuserinfo
is included in$request
. - For Express: Inside the
getChats
method inapi/controllers/chat.ts
, useconsole.log
to check ifuserinfo
is present inreq
.
- Laravel (PHP)
- Express (TS)
public function index(Request $request)
{
// Check whether user information is being passed from SaaSus Platform
dd($request->userinfo);
const getChats = async (req: Request, res: Response) => {
// Check whether user information is being passed from SaaSus Platform
console.dir(req.userInfo,{depth:null});
Up to this point, we have established the basics of collaboration.
Log in from SaaSus Platform and check the operation.
Verify SaaSus SDK integration
Display the login screen created with SaaSus Platform.
Please display the login screen of the domain you have set, such as https://auth.sample.saasus.jp.
When you log in with the user email address and password you created earlier, you will be redirected to the URL you set in Callback URL along with your credentials.
For example, let's log in as user1-1@example.com.
- For Laravel, if the previous code is working correctly, the user information should be displayed on the screen after login.
- For Express, first run the following command in the terminal to enable log output, then proceed to log in.
repo$ docker compose logs -f
- Laravel (PHP)
- Express (Docker Logs)
array:3 [▼
"email" => "user1-1@example.com"
"id" => "f6a02019-1306-431f-b93d-3a756b312481"
"tenants" => array:1 [▼
0 => array:7 [▼
"back_office_staff_email" => "saasus-sample-tenant1@example.com"
"completed_sign_up" => true
"envs" => array:1 [▼
0 => array:3 [▼
"id" => 1
"name" => "dev"
"roles" => array:1 [▼
0 => array:2 [▼
"display_name" => "General users"
"role_name" => "user"
]
]
]
]
"id" => "7b639774-6fba-4b26-b580-f3d755876a4b"
"name" => "Tenant sample 1"
"plan_id" => "bc011444-a9f1-41c0-8251-bc8928b09ee7"
"user_attribute" => array:1 [▼
"username" => "user1-1"
]
]
]
]
{
email: 'user1-1@example.com',
id: '951fe2e3-b89b-40cf-95db-2fc11f09cbdf',
tenants: [
{
back_office_staff_email: 'saasus-sample-tenant1@example.com',
completed_sign_up: true,
envs: [
{
id: 3,
name: 'prod',
roles: [ { display_name: 'General User', role_name: 'user' } ]
}
],
id: '2d76c5ed-8462-4de0-b107-97bb97b7e9e2',
is_paid: true,
name: 'Tenant Sample 1',
plan_id: 'ddb8b9e9-5fe4-48cc-846e-b9031552877a',
user_attribute: { username: 'user1-1' }
}
],
user_attribute: {}
You can see that the user information and tenant information that were set in SaaSus Platform earlier can be obtained on the application side.
The redirect destination URL is now received by the SaaSus SDK standard Callback process (http://localhost/callback), and in that process, the browser's Local Storage or remember authentication information in a cookie.
Then, the SaaSus SDK's Auth Middleware uses the SaaSus Platform to verify the authentication information, retrieve the user information, and pack it into the Request object.
Processing then moves to the application's controller, so at this point the application already has information about the logged-in person.
Now, let's use this information to make our bulletin board application multi-tenant-enabled.
Multi-tenancy of sample application
- For Laravel:
api/app/Http/Controllers/MessageController.php
- For Express:
api/controllers/api/board.ts
This is the main process, so let's add the process to make it multi-tenant compatible here.
First, change the display part. Let's rewrite the whole part below.
- Laravel (PHP)
- Express (TS)
public function index(Request $request)
{
// Various user information and tenant information are entered in $request->userinfo, so use it
$messages = Message::where('tenant_id', $request->userinfo['tenants'][0]['id'])->get();
return view('messageBoard.index', ['messages' => $messages, 'plans' => $this::PLANS, 'tenant_name' => $request->userinfo['tenants'][0]['name']]);
}
const getChats = async (req: Request, res: Response) => {
try {
const messages = await db.Messages.findAll({
where: {
tenant_id: req.userInfo?.tenants[0].id,
},
});
res.render("chat", {
messages: messages,
plans: PLANS,
tenant_name: req.userInfo?.tenants[0].name,
});
} catch (error) {
console.error(error);
res.redirect("/chat");
}
};
In this way, the DB will be searched based on the tenant ID that has been passed.
Next is the posting part.
- Laravel (PHP)
- Express (TS)
public function post(Request $request)
{
$validated = $request->validate([
'message' => 'required|max:255'
]);
// Get various information from userinfo of $request and use it for judgment
$message = Message::create([
'tenant_id' => $request->userinfo['tenants'][0]['id'],
'user_id' => $request->userinfo['tenants'][0]['user_attribute']['username'],
'message' => $request->message,
]);
$request->session()->regenerateToken();
return redirect()->route('board');
}
const postChats = async (req: Request, res: Response) => {
const mes = req.body.message;
const tenantId = req.userInfo?.tenants[0].id || "";
const userName =
req.userInfo?.tenants[0].user_attribute.username;
try {
await db.Messages.create({
tenant_id: tenantId,
user_id: userName,
message: mes,
});
} catch (error) {
console.error(error);
}
res.redirect("/chat");
};
Based on the passed user attributes, the tenant ID and user name are stored as a set.
Let's try displaying the user ID on the screen display as well.
- For Express: No changes are needed
- For Laravel: Edit
api/resources/views/messageBoard/index.blade.php
Around line 32, change $message->user->name
to $message->user_id
.
Before correction:
<div class="mt-4">
<p>
{{ $message->user->name }}
<span class="text-xs text-gray-500">
{{ $message->created_at->format('Y/m/d H:i') }}
</span>
</p>
After correction:
<div class="mt-4">
<p>
{{ $message->user_id }}
<span class="text-xs text-gray-500">
{{ $message->created_at->format('Y/m/d H:i') }}
</span>
</p>
Multi-tenant support is now possible.
Now, let's log in and try it out.
As before, log in from the login screen created with SaaSus Platform.
When you log in, you will see that the tenant name has changed to the one you set earlier in the SaaS development console.
I don't have any data yet, so I'll post some.
I have confirmed that the username is also displayed.
Now go back to the login screen, log in as user1-2@example.com, and try posting some posts.
Of course it will be reflected on the screen.
Now, let's log in as the user of the other tenant user2-1@example.com.
You can see that the tenant name display has changed and the contents are now empty.
I have confirmed that I can only access information for my own tenant.
Now, after making a few posts in the same way, log in as user2-2@example.com and check that you can display information for the same tenant.
In this way, separation of each tenant is completed.
As for the separation method this time, we used a pool type model to perform separation within the same DB and perform tenant separation using a simple method. Even if you select a tenant separation method according to your requirements, such as schema separation or database separation, you can similarly obtain and implement tenant information using the SaaSus SDK.
Now that we have separated the tenants, let's implement the fee-related functions.