Prepare SaaS Platform
Creating a SaaSus Platform Account
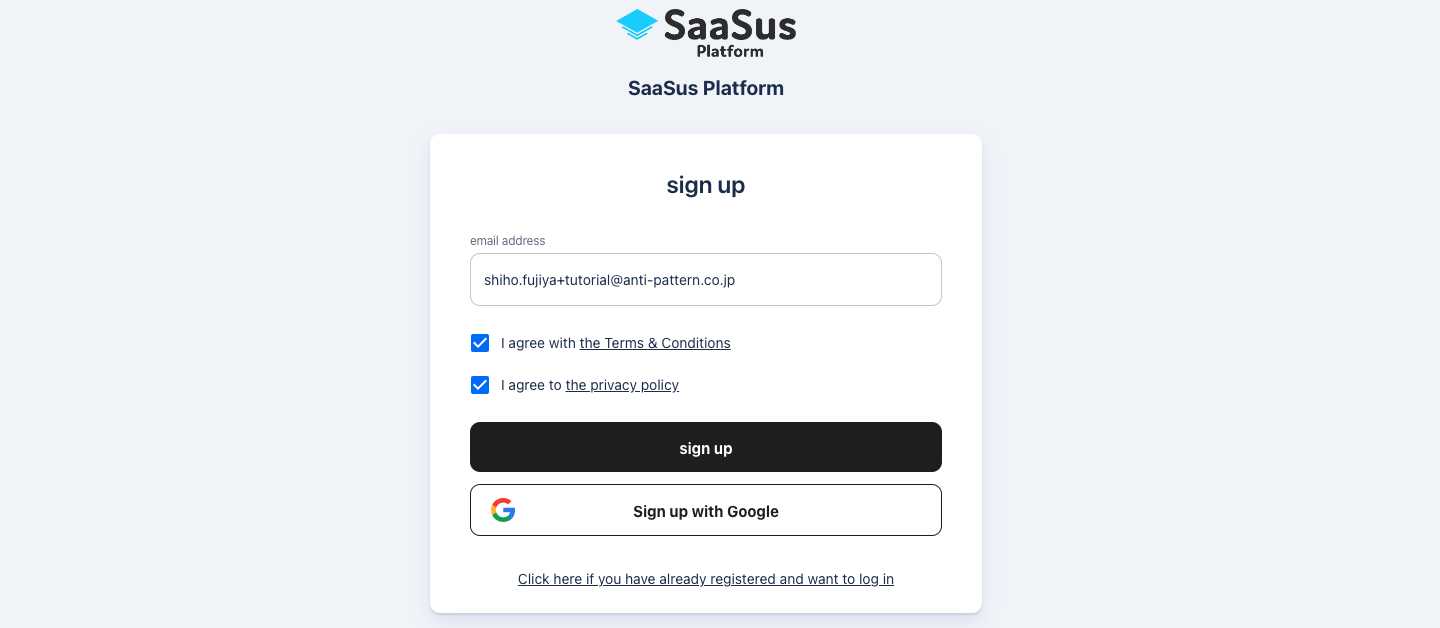
First, let's create an account on SaaSus Platform.
Display the new registration screen and register using your email address.
https://auth.saasus.io/sign-up
Please enter your email address, read the terms of use and privacy policy, and check the box if you agree. Then click the new registration button.
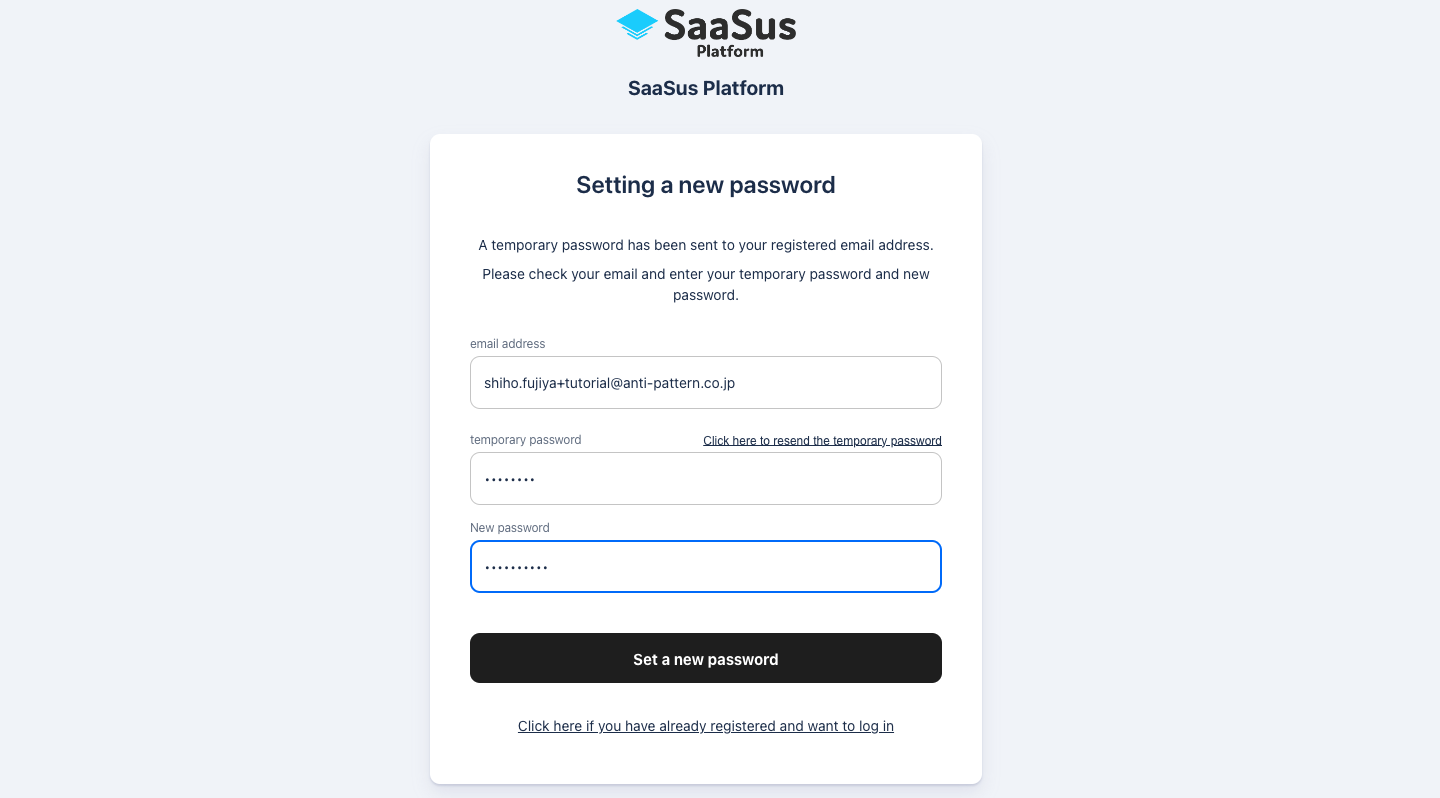
A temporary password will be sent to the email address you entered. Enter the temporary password you received and the new password you want to register. Press the "Set new password" button to activate your account.
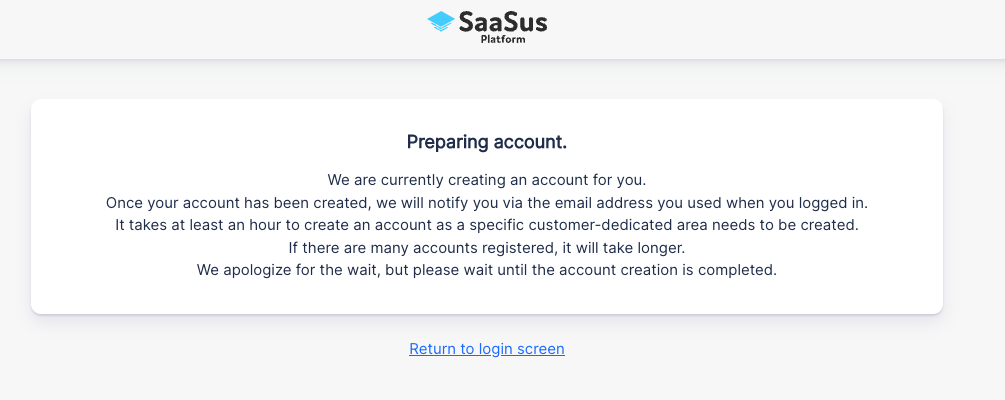
When you register with SaaSus Platform for the first time, we will create a tenant exclusively for you. This will take around an hour as we are creating an AWS account specifically for you. Once your account creation is complete, you will receive instructions at the email address you provided earlier.
Logging into the SaaSus Platform Console
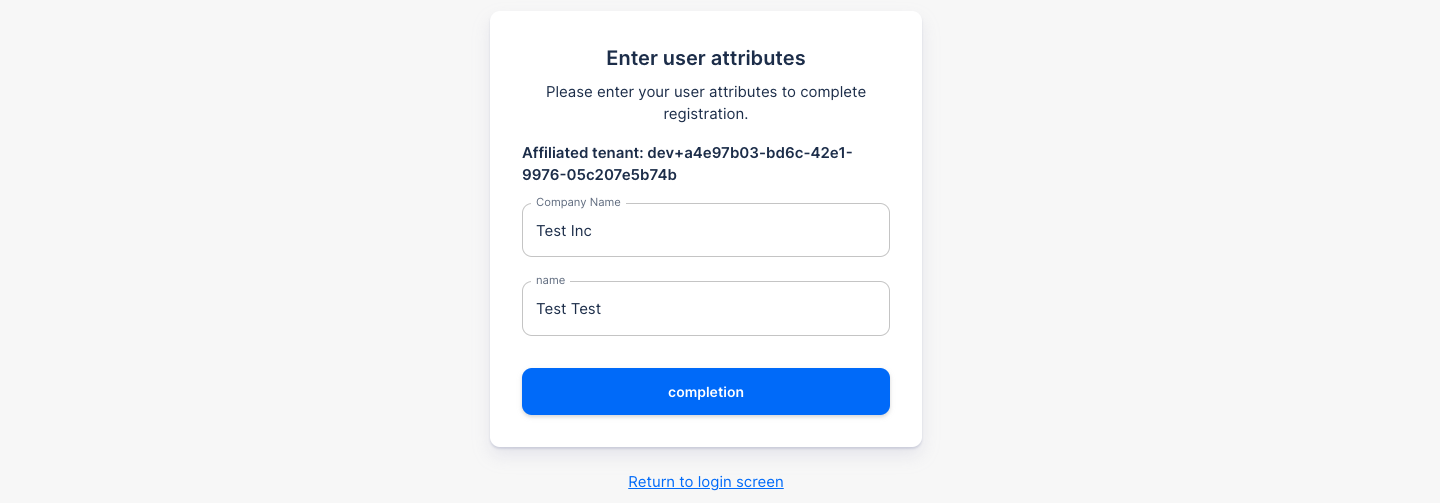
When you log in after the tenant is created, you will be asked to enter user attributes as shown above, so please enter your company name and name.
After entering the information, a transition screen to each console of the tenant will be displayed.
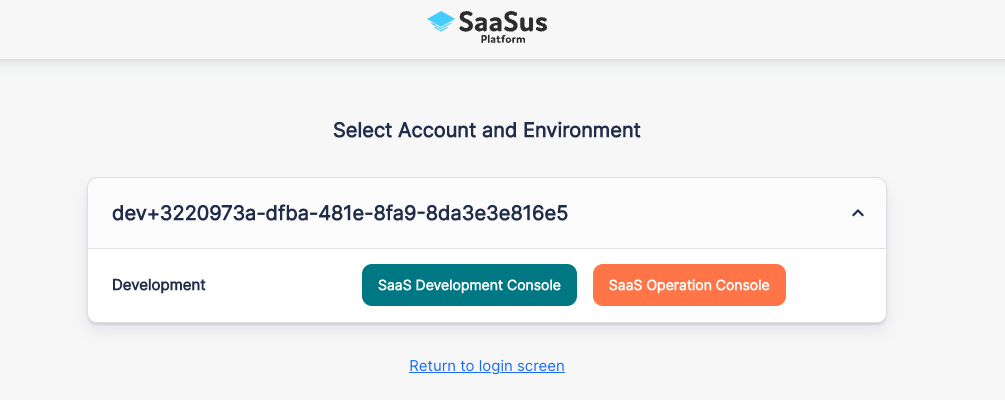
SaaS Development Console is a console for setting up SaaS construction.
SaaS Operation Console is a console for managing SaaS.
By setting a domain on the SaaSus Platform, you can define the base domain used for automatically generating the login screen and for sending emails. For details on how to set a domain, please see Domain and Redirect Settings.
※It is possible to proceed with the tutorial without setting up a domain.
The automatically generated login screen can display your service name and icon, and also include links to your terms of use and privacy policy.
For customization instructions, please refer to Basic App Settings.
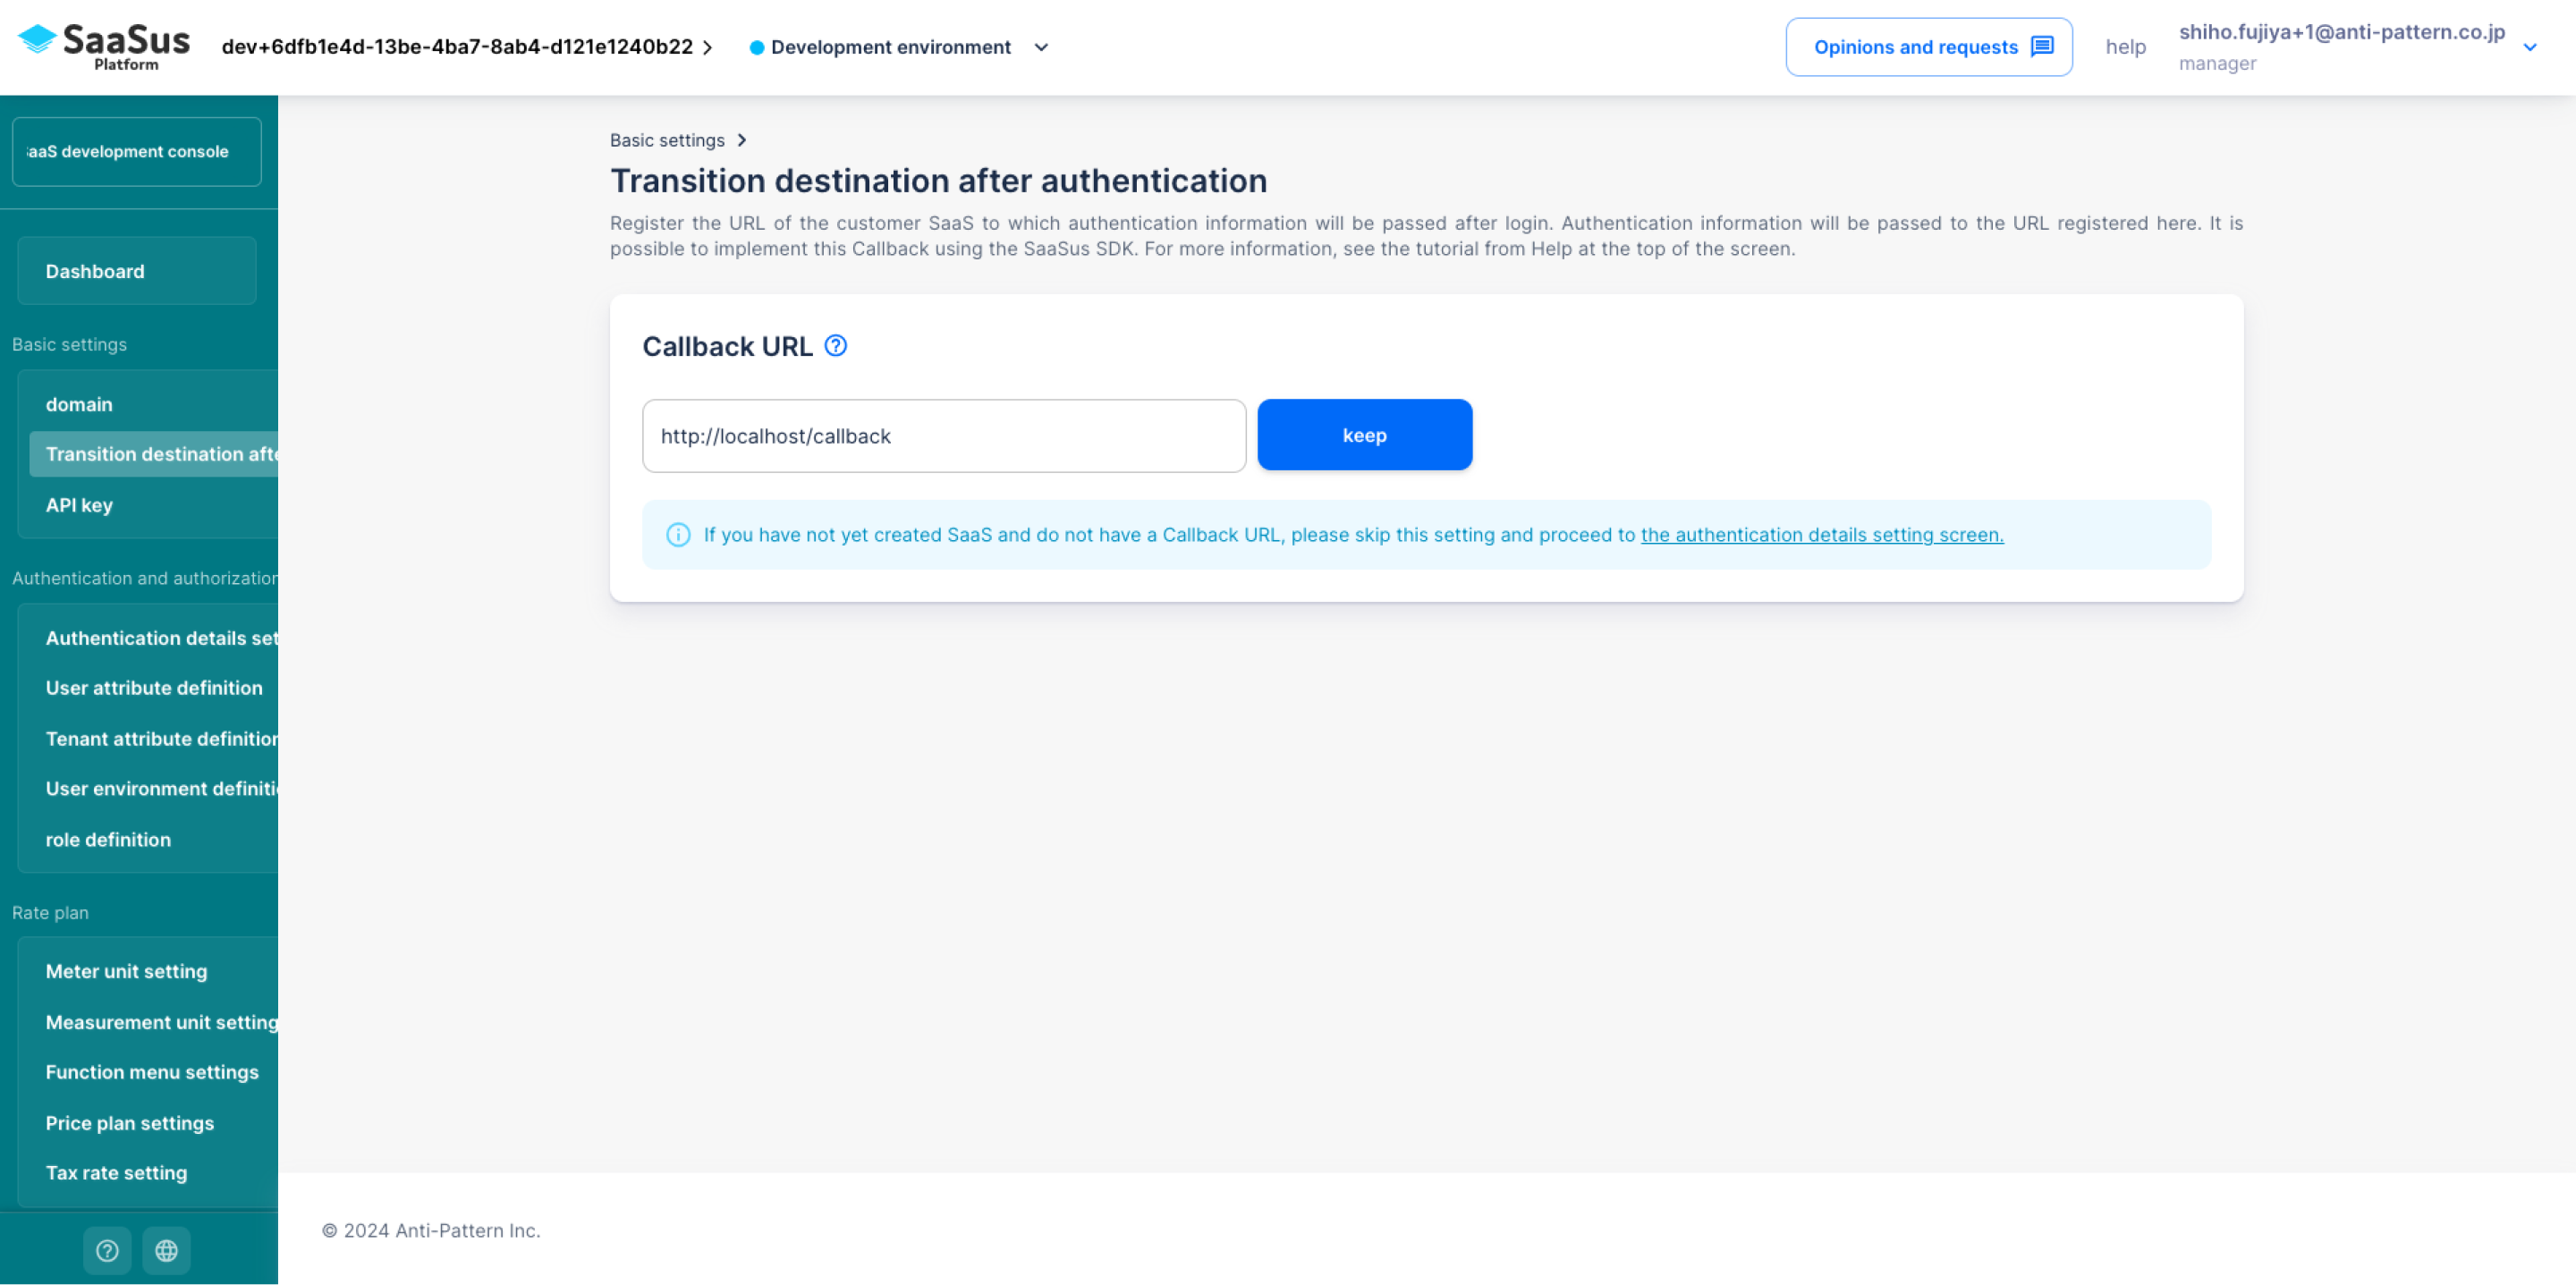
Setting destination URL after authentication
Based on the domain name you configured, SaaSus Platform generates a login screen. After logging in, the authentication information is transferred to the SaaS side.
The URL of the SaaS to be taken over must be registered as the Callback URL.
Click "Transition destination after authentication" from the side menu to display the Callback URL setting screen.
Typically, you set the Callback URL based on the URL of the SaaS offering.
However, since we will be running the sample application locally this time, we will configure it as follows.
Once you have configured the Callback URL, there are a few additional settings that must be completed before continuing with the tutorial.
To proceed smoothly with the upcoming tutorial steps, it is essential to define additional attributes for users and tenants, and to configure roles in advance.
Please complete the following setup beforehand:
The following steps assume that these configurations have already been completed.
Once the SaaSus Platform is ready, we will incorporate it into the sample application.