Sample Application Overview
This is an implementation example of an actual SaaS application using SaaSus Platform. You can learn by running essential SaaS features such as authentication, tenant management, and billing functionality.
Key Features
- Practical: Covers features used in actual SaaS applications
- React + TypeScript: Uses React for the frontend
- Multi-language Support: Implementation examples in Go, Python, Java, and C#
Implementation Approach
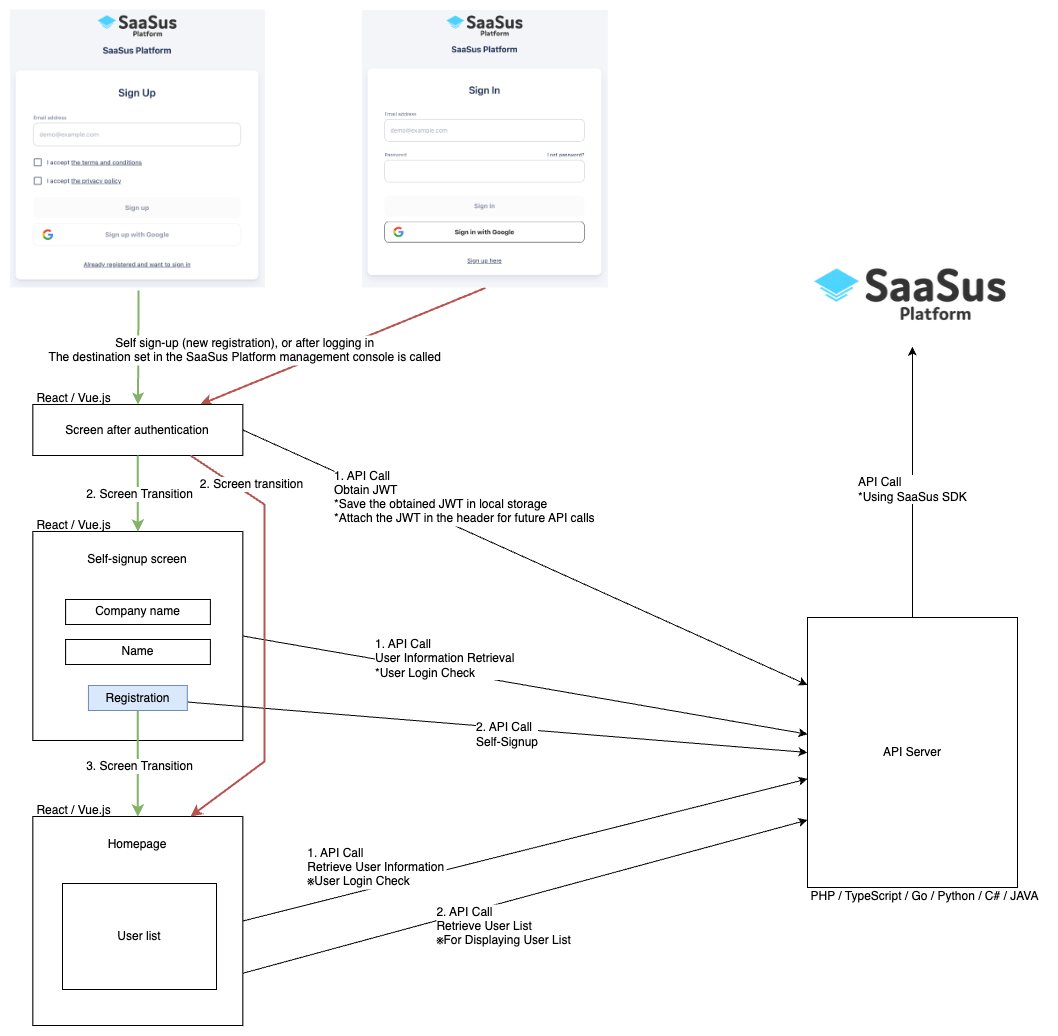
This sample application is implemented as an API Server version.
API Server Version Characteristics
This is an implementation approach where the backend is configured as an API server, with the following characteristics:
- Store the token (JWT), which is the authentication information for the SaaSus Platform, in the browser's local storage
- SaaS Platform users authenticate themselves using JWT
- The frontend is implemented with React
- The backend API server is implemented in Go / Python / Java / C#
Process Flow (Login to User List Display)
Implemented Screens and Features
Authentication-Related Screens
Callback.tsx - Post-authentication Redirect Screen
- Receives authentication information from SaaSus Platform
- Saves JWT token to local storage
- Automatically redirects to appropriate screen based on user role
- ※Not displayed to users as it's a redirect process
SelfSignUp.tsx - Self Sign-up Screen
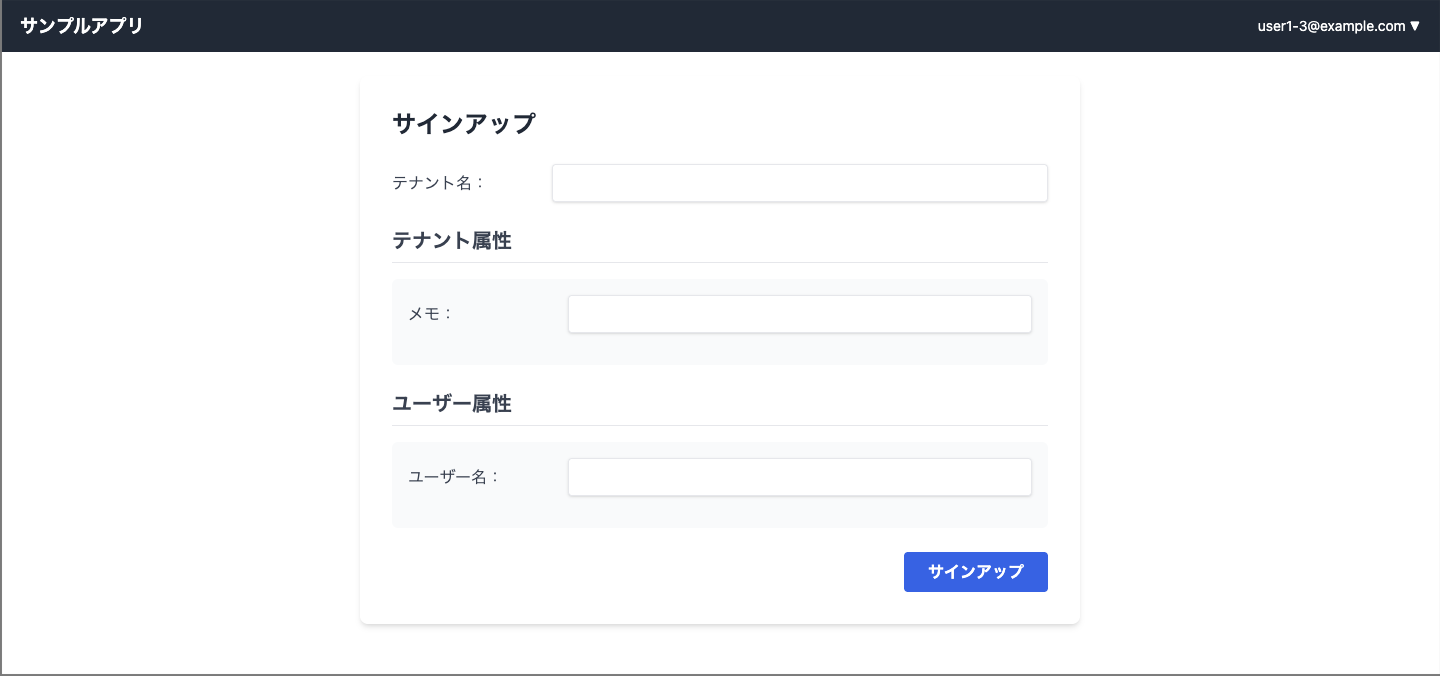
- New users can create their own tenant
- Tenant name input
- User attribute and tenant attribute settings
- Input fields by attribute type (string, number, boolean, date)
User & Tenant Management Screens
TenantList.tsx - Tenant List Screen
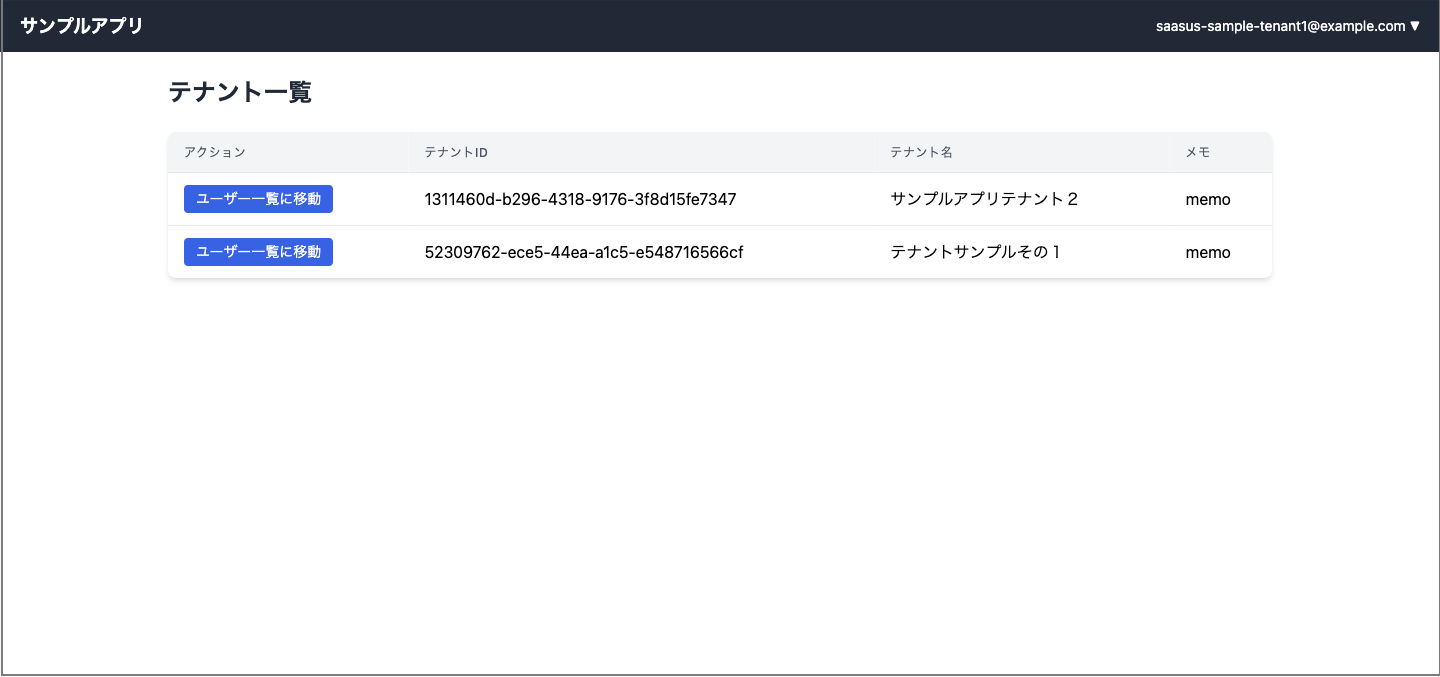
- For users belonging to multiple tenants
- Display tenant attributes (configured/unconfigured display)
- Navigation to user list screen for each tenant
UserPage.tsx - User List Screen (Main Screen)
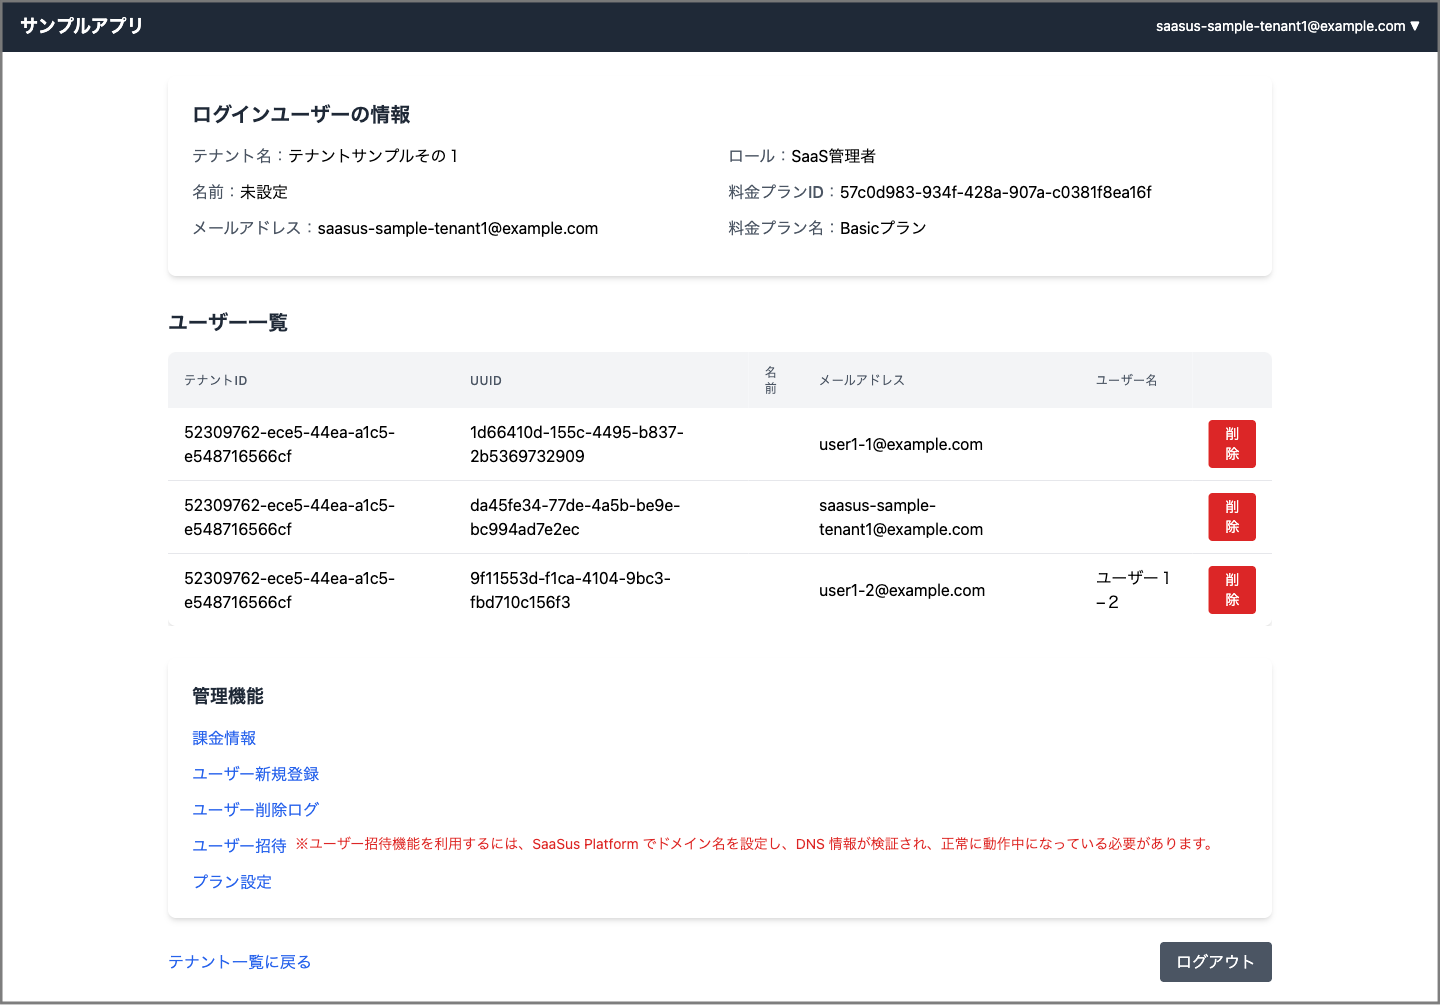
- Login User Information Display: Tenant name, name, email address, role, pricing plan
- User List Table: Display all users within tenant
- User Attribute Display: Dynamic display of custom attributes
- Admin Function Links: Links to functions displayed only to administrators
- User Deletion Function: User deletion with administrator privileges
User Management Functions
UserRegister.tsx - User Registration Screen
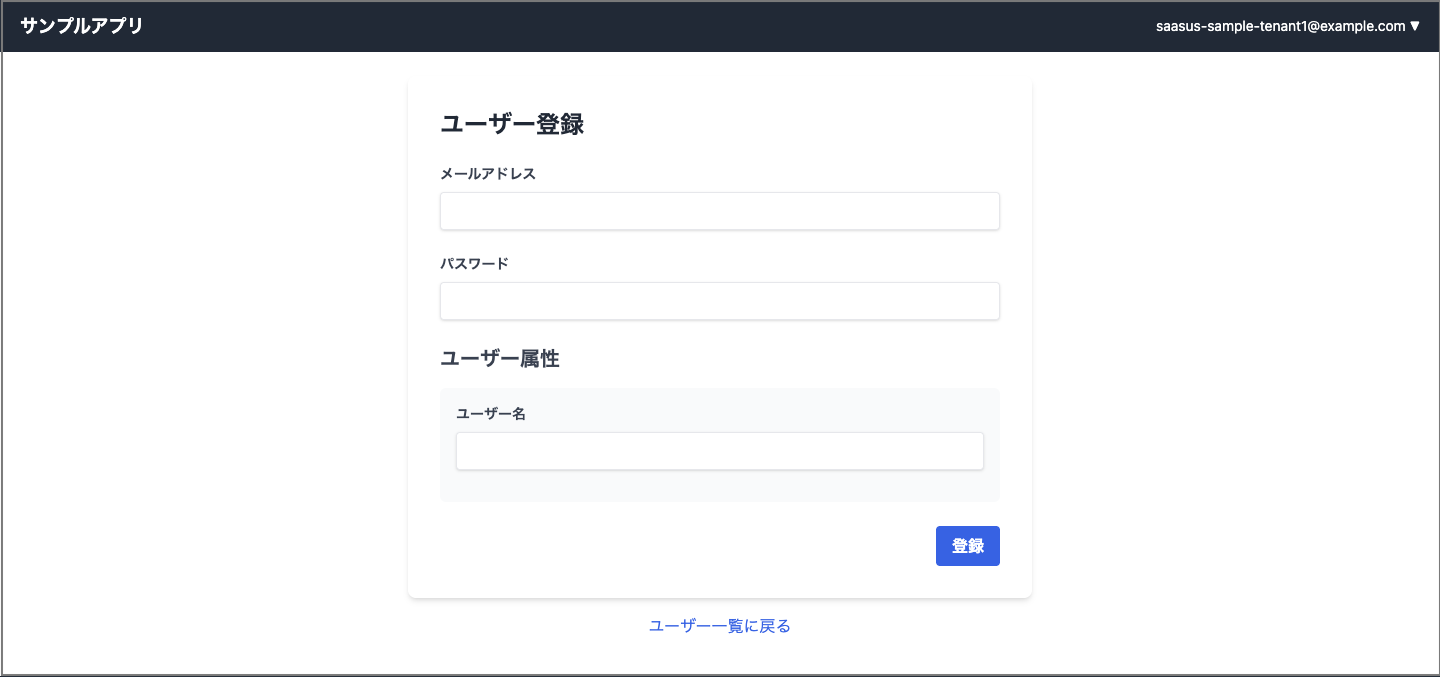
- Email address and password input
- User attribute settings
- Input field support by attribute type
UserInvitation.tsx - User Invitation Screen
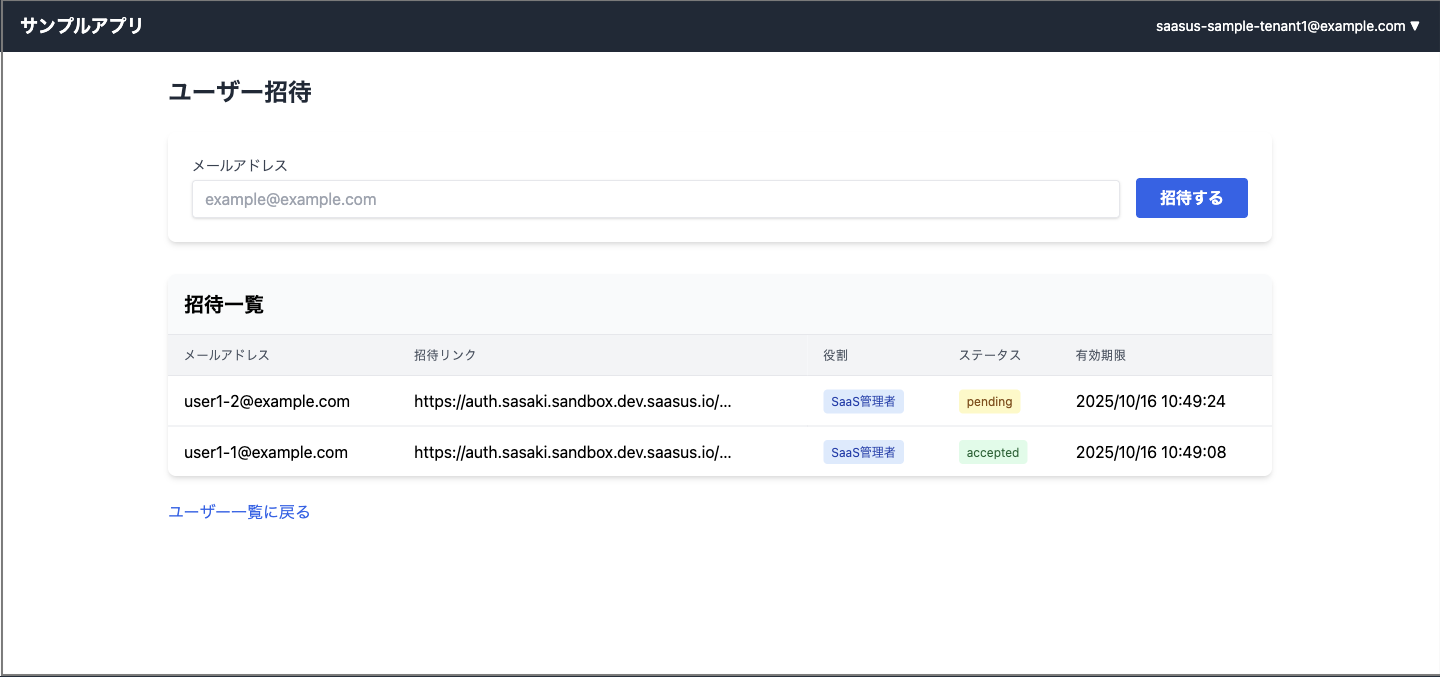
- Send invitations via email address
- Display invitation list (email, invitation link, role, status, expiration date)
- Invitation status management
DeleteUserLog.tsx - User Deletion Log Screen
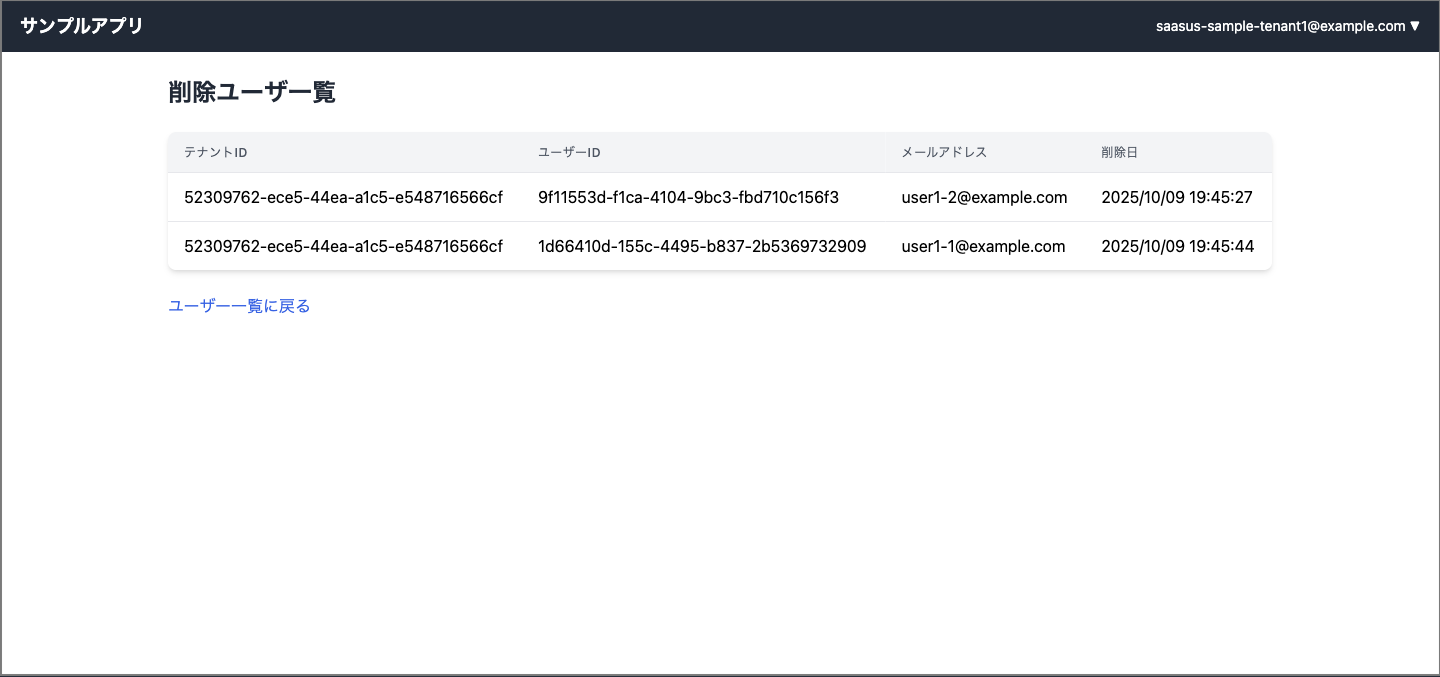
- Display history of deleted users
- Tenant ID, User ID, email address, deletion date and time
Billing & Metering Functions
PlanSettings.tsx - Plan Settings Screen
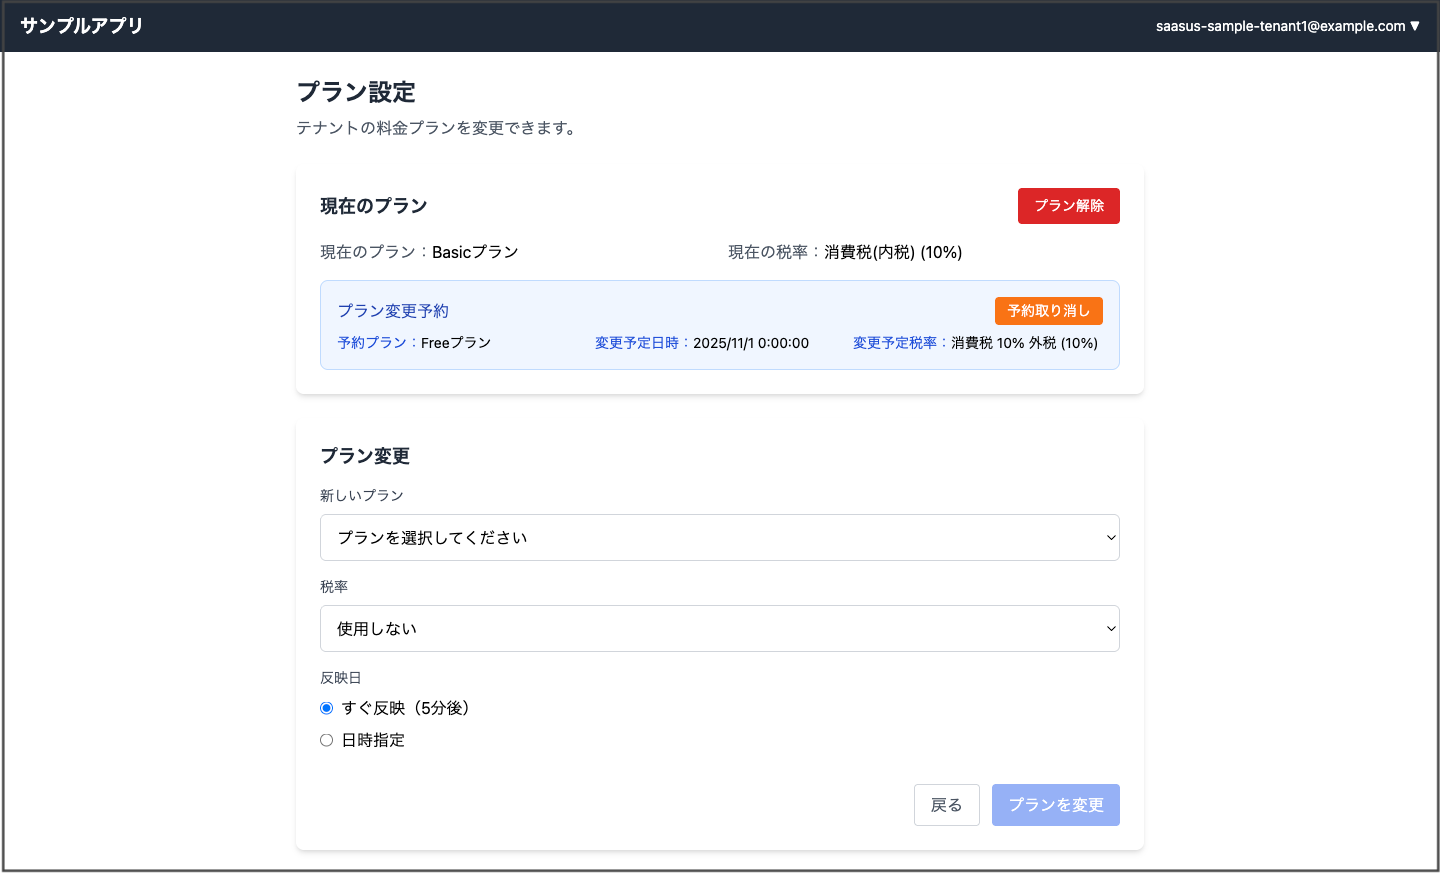
- Current Plan Display: Plan name, tax rate, change reservation information
- Plan Change Function: New plan selection, tax rate settings
- Effective Date Settings: Immediate reflection (5 minutes later) or date/time specification
- Plan Cancellation Function: Cancellation of current plan
- Reservation Management: Cancellation of plan change reservations
- Edit Restrictions: Edit lock when changes are scheduled soon
BillingDashboard.tsx - Billing Information Dashboard

- Billing Summary: Total amount by currency, number of measurement units
- Pricing Plan Information: Plan details, tax rate information
- Period Selection: Monthly/yearly billing period selection
- Billing Information by Measurement Unit: Detailed display of usage and billing amounts
- Real-time Meter Updates: Inline editing (+/- buttons)
- Meter Update Modal: Increase/decrease with arbitrary values, history correction
Security Functions
UserMfaSettingDialog.tsx - Multi-Factor Authentication Settings Dialog
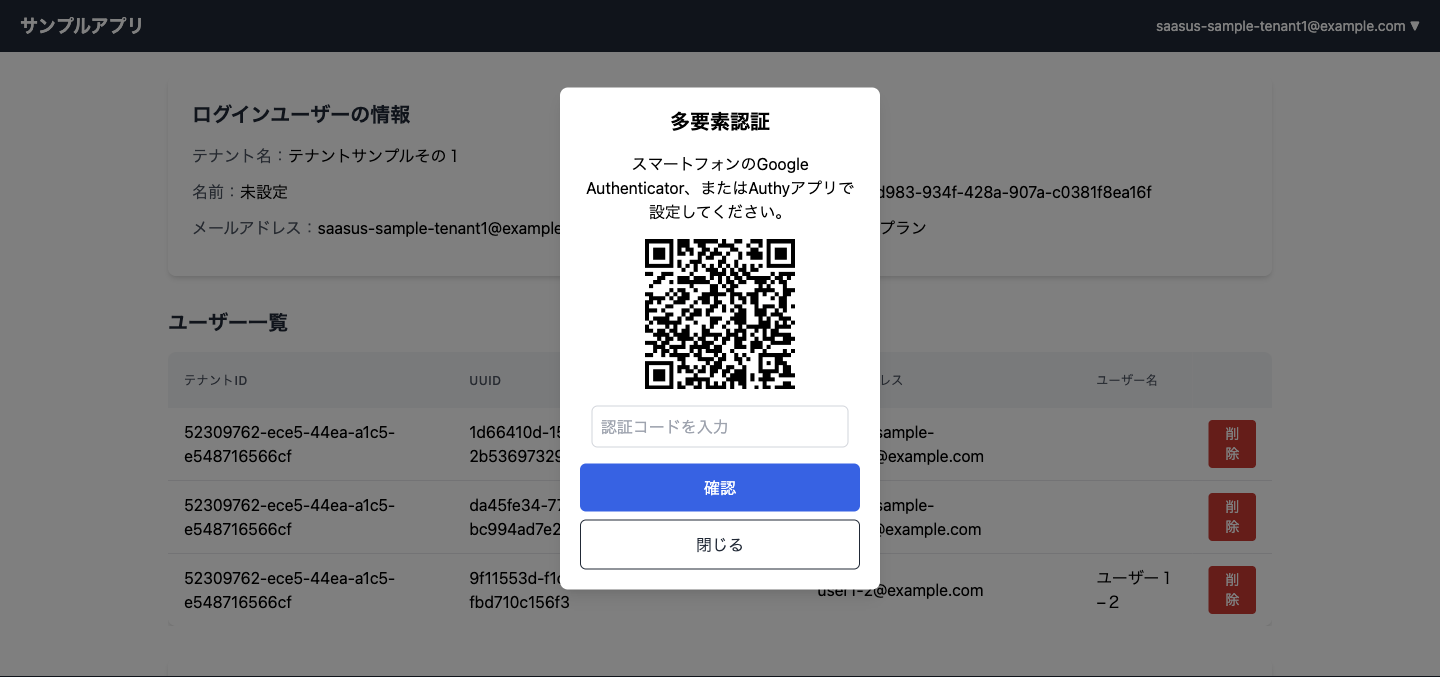 *This QR code contains dummy data for demonstration purposes only and cannot be used for actual authentication.
- MFA Status Check: Check enabled/disabled status
- QR Code Generation: Display QR code for Google Authenticator etc.
- Authentication Code Verification: Verification of 6-digit codes generated by authenticator apps
- MFA Enable/Disable: Toggle settings
- Device Re-registration: Setup on new devices
Implemented Features
Custom Attribute Functions
- Flexible setting and display of user and tenant attributes
- Support for various attribute types such as string, number, boolean, date
- Automatic validation of attribute values
Metering
- Real-time usage updates
- Simple increase/decrease operations through inline editing
- Function to correct past usage data
Permission Control
- Function restrictions and display control by role
- Implementation of functions accessible only to administrators
- Screen display switching according to user permissions
Activity History Log
- Detailed behavior tracking through
X-SaaSus-Refererheader - Distinction between page display and action execution
Setup Instructions
Prerequisites
- Node.js: 16 or higher
- Development Environment: Development environment for each language (Go, Python, Java, C#)
- SaaSus Platform: Account and project setup
Setup Instructions
1. SaaSus Platform Configuration
- Set post-authentication redirect URL in SaaS development console (
http://localhost:3000/callback) - Obtain required configuration values:
- Login screen URL
- API keys and other authentication information
2. Frontend Setup
# Clone repository
git clone https://github.com/saasus-platform/implementation-sample-front-react.git
cd implementation-sample-front-react

# Environment variable setup
cp .env.example .env
vi .env
Configure the following in the .env file:
# Set the login URL obtained from SaaSus Platform Management Console
REACT_APP_LOGIN_URL=https://auth.xxxxxxxxxx.com
# Install dependencies
npm install

# Start development server
npm start
3. Backend Setup
Select and set up the appropriate repository for each language. Please refer to the README of each repository for detailed setup instructions:
- Go (Echo): Setup Instructions
- Python (FastAPI): Setup Instructions
- Java (Spring): Setup Instructions
- C# (.NET): Setup Instructions
4. Operation Verification
- Access frontend
- Verify login functionality
- Verify each feature operation
Other Implementation Approaches
For serverless version implementation, please refer to the following document: