(New Screen) Search, Edit, Create, or Assign Users to Tenants
User Management has two modes: "Old Screen" and "New Screen".
You can switch between them using the toggle next to the page heading.
For old screen operations, see (Old Screen) Search, Edit, Create, or Assign Users to Tenants.
Overview
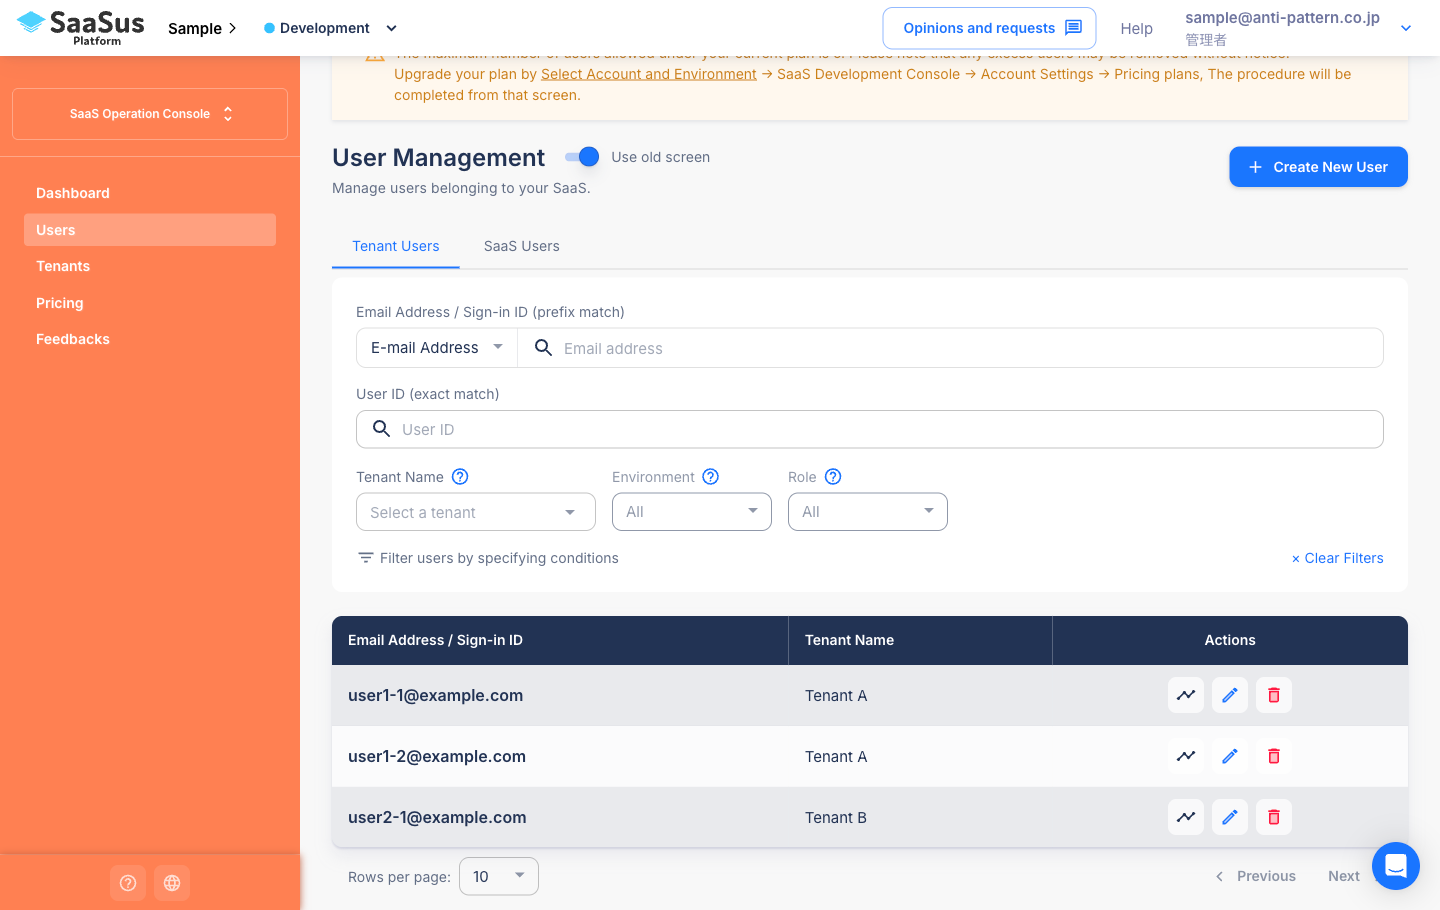
The user list is split into two tabs: "Tenant Users" and "SaaS Users".
Search is performed server-side, providing fast results even with a large number of users.
Switching Screens
A toggle switch appears next to the "User Management" page heading.
- OFF (default): Displays the old screen. Label reads "Use new screen".
- ON: Displays the new screen. Label reads "Use old screen".
A confirmation dialog appears only on the first switch.
Your selection is saved in the browser and persists across sessions.

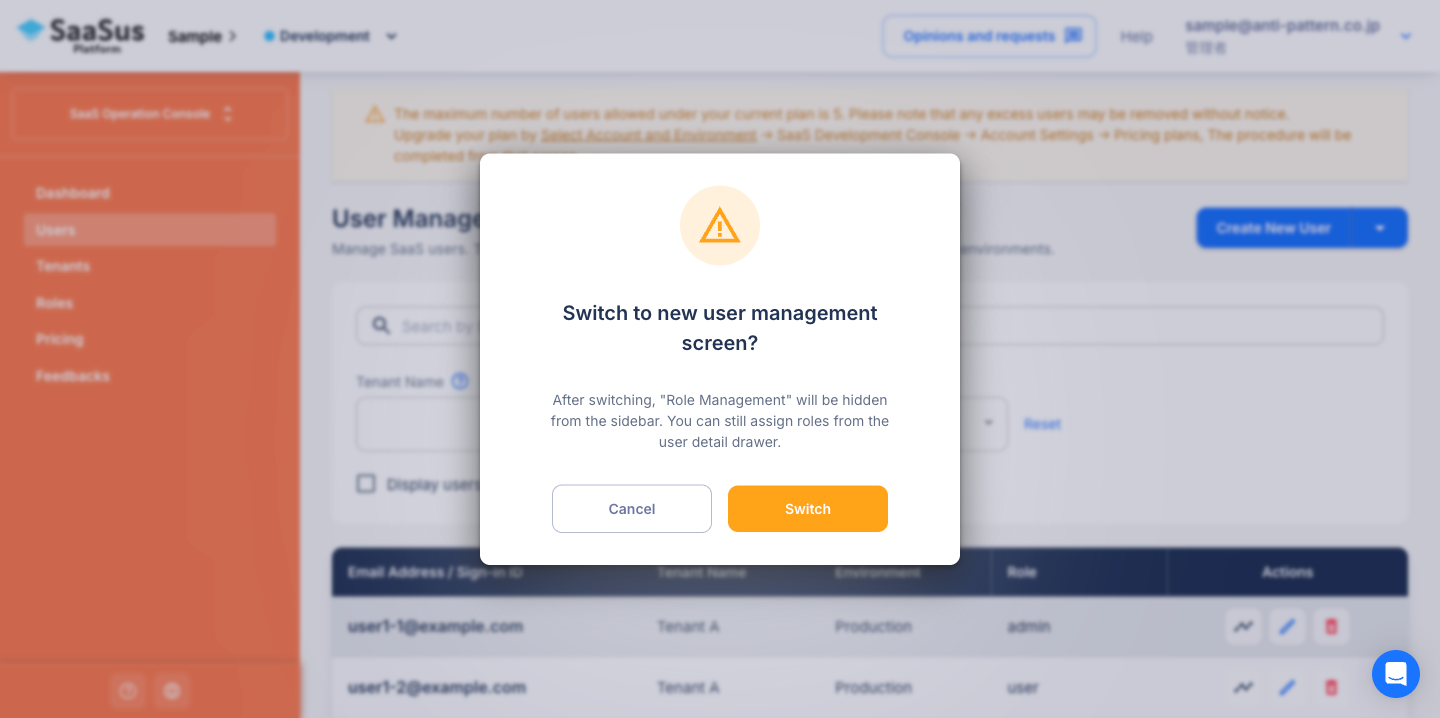
When the new screen is enabled, the "Role Management" menu is hidden from the sidebar.
Role assignment is performed within the user detail drawer.
Tenant Users Tab
Displays users who belong to a tenant.
Search and Filters
You can filter users by the following criteria:
| Field | Input Type | Search Method |
|---|---|---|
| Email / Login ID | Text input | Prefix match |
| User ID | Text input | Exact match |
| Tenant | Autocomplete | Selection |
| Environment | Select box | Selection |
| Role | Select box | Selection |
Selecting a tenant enables the Environment and Role filters.
List and Pagination
Search results are displayed in a table format.
You can change the number of rows per page and navigate using "Previous" and "Next" buttons.
Editing Users
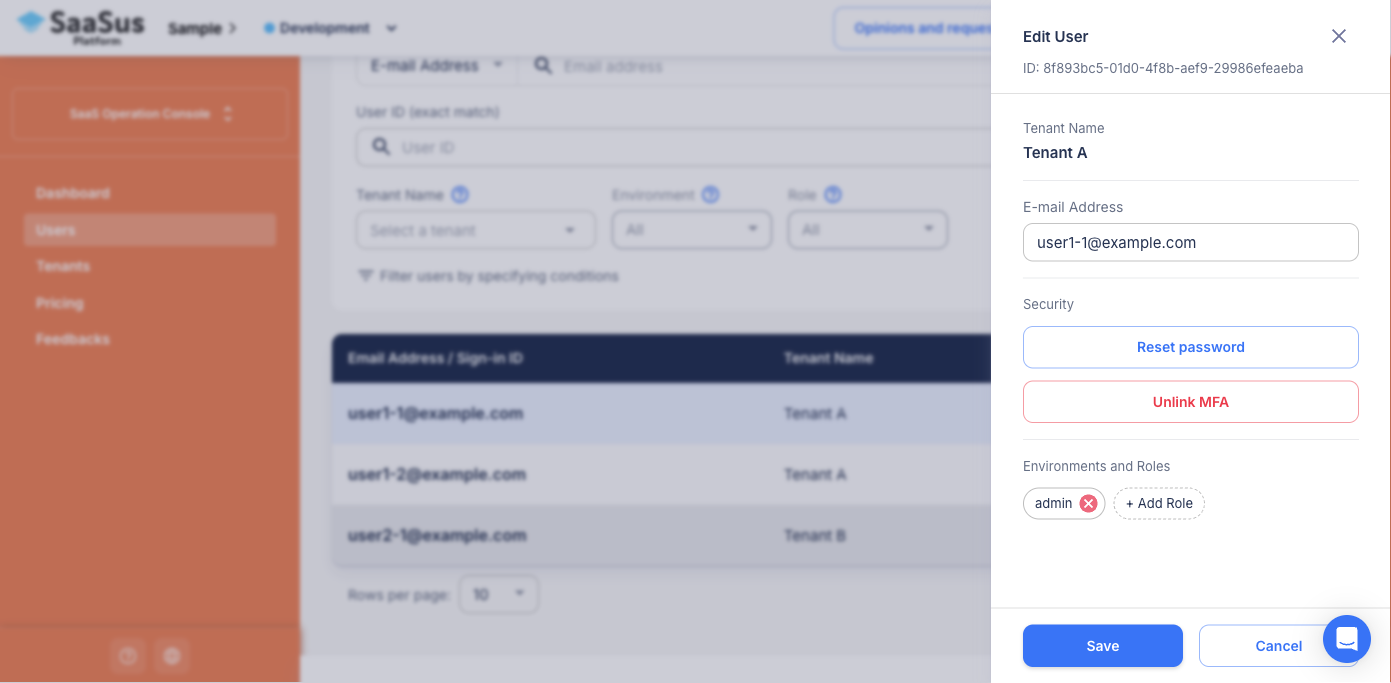
Click the edit icon on a row to open a side drawer on the right.
The side drawer allows the following operations:
Editable fields:
- Basic information (email or login ID)
- User attributes (username, department, etc.)
- Environment and role assignments
Available actions:
- Password reset
- MFA removal
Deleting Users
Click the delete icon on a row to display a confirmation dialog.
You can choose from two deletion methods:
- Remove from tenant: Removes the user from the selected tenant only.
- Remove from SaaS: Permanently deletes the user from SaaSus Platform and removes them from all tenants.
SaaS Users Tab
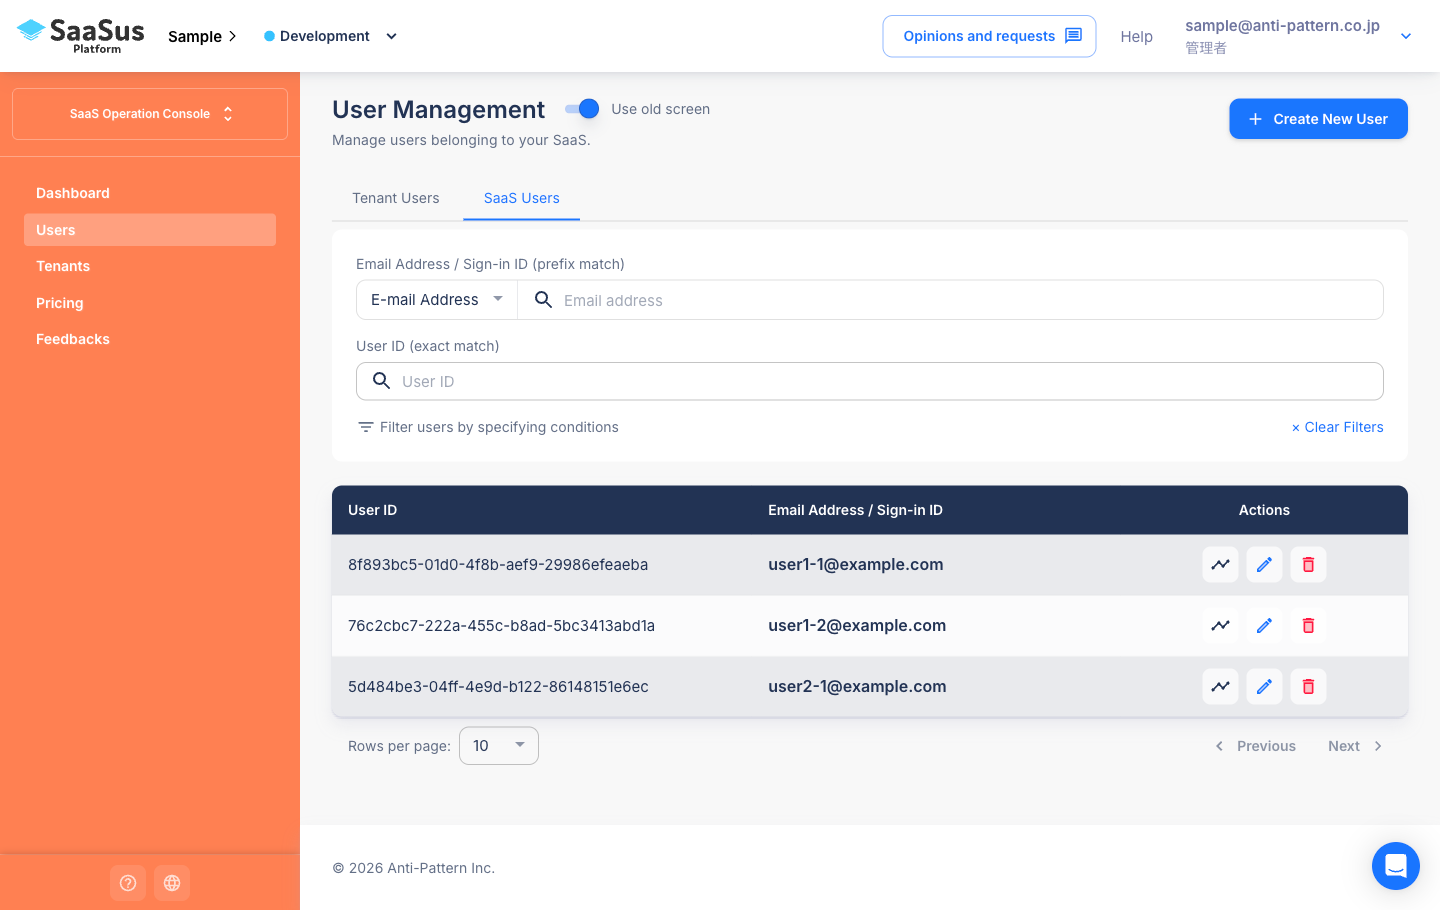
Displays all users registered in SaaS, regardless of tenant membership.
This allows SaaS-level user management.
Search and Filters
| Field | Input Type | Search Method |
|---|---|---|
| Email / Login ID | Text input | Prefix match |
| User ID | Text input | Exact match |
Editing Users
Editing works the same as the Tenant Users tab, using a side drawer.
In the SaaS Users tab drawer, you can view all tenants the user belongs to.
Deleting Users
Click the delete icon to display a confirmation dialog for SaaS deletion.
Only "Remove from SaaS" is available in the SaaS Users tab.
Creating New Users
Click the "Create New User" button at the top right of the screen to open the creation dialog.
The input fields are the same as the old screen.
For details, see (Old Screen) Search, Edit, Create, or Assign Users to Tenants > Create a New User.