Embed the SaaSus SDK into your Web Application and make it multi-tenant
Embed the SaaSus SDK in your web application
*Programming knowledge is required
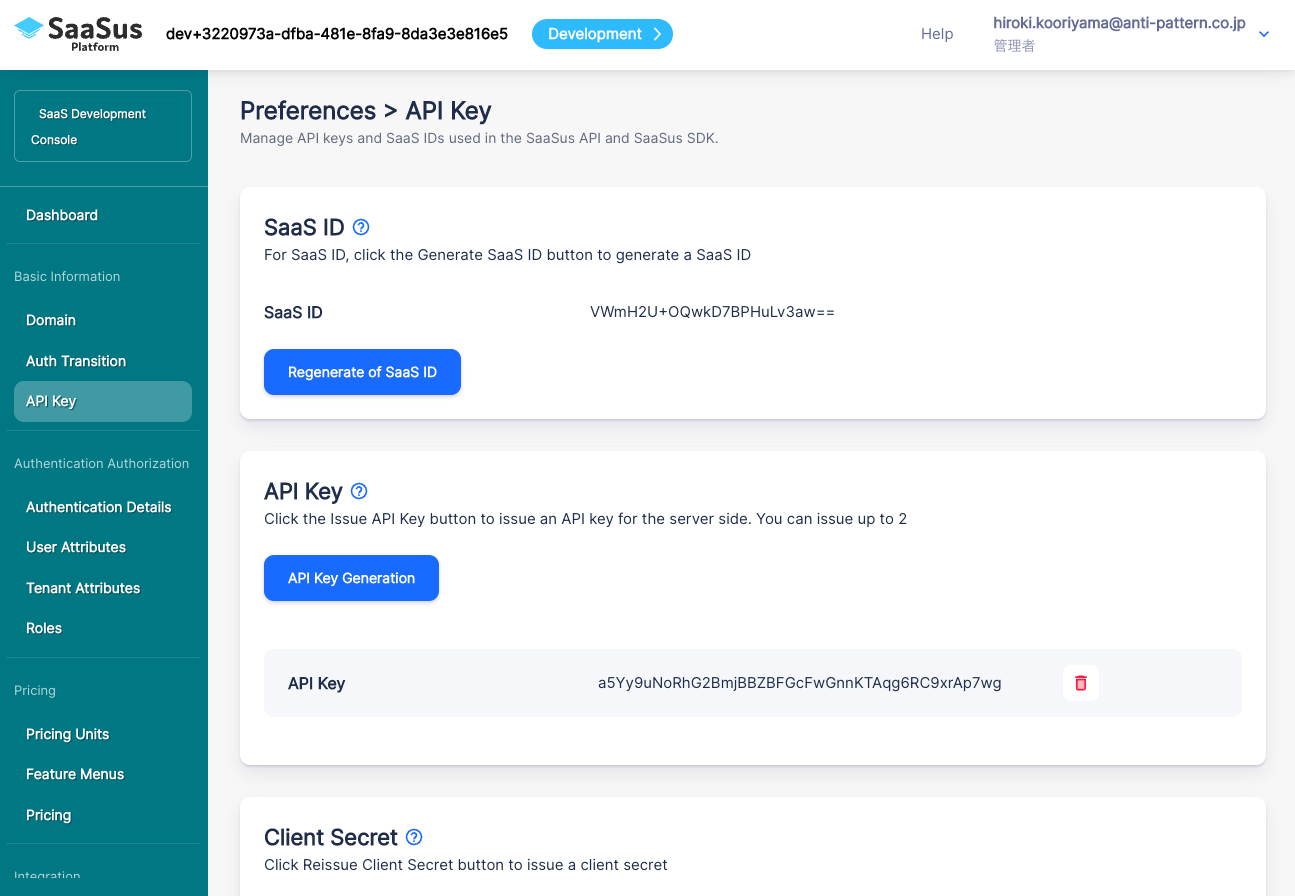
Reconfirm SaaS ID, API Key and Client Secret
First, check the API key on the SaaSus Development Console. Use this in your application settings
(Be careful not to expose your API key to other people. The API key displayed in this tutorial has already been deactivated.)
Prepare to use the SaaSus SDK
Open the sample application we prepared earlier in the development environment.
As mentioned at the beginning, the docker container has been started using init.sh, and
please check that the sample application is running at http://localhost/board for PHP,
or at http://localhost/login/ for Node.js.
First, to easily use the SaaSus Platform, embed the SaaSus SDK into your application.
For PHP, use composer.
For Next.js, use npm.
Open a terminal and set up the SDK.
- PHP
- Node.js
repo$ docker compose exec php bash
root@xxx:/var/www# cd api
root@xxx:/var/www/api# composer config repositories.saasus-platform/saasus-sdk-php vcs https://github.com/saasus-platform/saasus-sdk-php
root@xxx:/var/www/api# composer require saasus-platform/saasus-sdk-php
repo$ docker compose exec node bash
root@xxx:/app# npm install saasus-sdk
root@xxx:/app# exit
After installing the SaaSus SDK, define the environment variables necessary for using the SaaSus SDK.
Create a .env file by copying the .env.example file in the api directory and edit the following part at the bottom of the .env file
### for SaaS Platform
SAASUS_SAAS_ID="saasid_98tjo3wifaoua (SaaS ID of the screen)"
SAASUS_API_KEY="apikey_kjntowjfoasnkjntwonsflajsno4as (Screen API KEY)"
SAASUS_SECRET_KEY=" (screen client secret)"
SAASUS_LOGIN_URL="https://auth.sample.saasus.jp/ (Login screen URL)"
SAASUS_SAAS_ID, SAASUS_API_KEY, SAASUS_SECRET_KEY are the SaaS ID, API Key, and client secret displayed on the console page,
SAASUS_LOGIN_URL sets the URL of the login page created on the SaaSus development console.
Include Authentication Module
Next, include the SaaSus Platform authentication module.
In this application, authentication is required for all URI routes. If authentication is not successful, the application will be unavailable.
This time, there are only a few API calls, so we're simply specifying them directly when calling axios, but it might be better to standardize them using middleware or something similar.
The current situation is
For PHP, use api/routes/web.php
For Node.js, use api/app.ts
The authentication function is used in this section, so replace it with the SaaSus authentication function.
Default code
- PHP
- Node.js
Route::middleware('auth')->group(function () {
   Route::get('/', function () {
       return view('welcome');
   });
   Route::get('/dispatch', 'App\Http\Controllers\DispatchController@index')->name('dispatch');
   Route::get('/board', 'App\Http\Controllers\MessageController@index')->name('board');
   Route::post('/post', 'App\Http\Controllers\MessageController@post')->name('post');
});

require __DIR__ . '/auth.php';
app.use(
  session({
    secret: "secret",
    resave: false,
    saveUninitialized: false,
  })
);
app.use(passport.initialize());
app.use(passport.session());
Change to the following in order to incorporate the SaaSus authentication function
- PHP
- Node.js
// Route::middleware('auth')->group(function () {
//     Route::get('/', function () {
//         return view('welcome');
//     });
// Use SaaSus SDK standard Auth Middleware
Route::middleware(\AntiPatternInc\Saasus\Laravel\Middleware\Auth::class)->group(function () {
   Route::get('/dispatch', 'App\Http\Controllers\DispatchController@index')->name('dispatch');
   Route::get('/board', 'App\Http\Controllers\MessageController@index')->name('board');
   Route::post('/post', 'App\Http\Controllers\MessageController@post')->name('post');

   Route::redirect('/', '/board');
});

// require __DIR__ . '/auth.php';
import { AuthMiddleware } from "saasus-sdk";
...
// app.use(
//   session({
//     secret: "secret",
//     resave: false,
//     saveUninitialized: false,
//   })
// );
app.use(
  ["/chat", "/api/board", "/api/post", "/api/plan", "/api/tenant"],
  AuthMiddleware
);
// app.use(passport.initialize());
// app.use(passport.session());
Since the SaaSus authentication middleware has been applied, individual authentication checks for each route are no longer necessary.
For PHP (No changes required).
For Node.js, update api/routes/chat.ts.
Before change:
- Node.js
router.get(
  "/",
  (req: Request, res: Response, next: NextFunction) => {
    if (req.isAuthenticated()) {
      next();
    } else {
      res.redirect(302, "/login");
    }
  },
  getChats
);
Revised:
- Node.js
router.get("/", getChats);
And then, prepare an endpoint to receive the callback from the authentication screen.
Earlier, in the SaaSus Development Console, we defined the callback URL as
so we’ll set it up to receive at /callback.
For PHP, add the following to the last line of api/routes/web.php
- PHP
// Use the SaaSus SDK standard Callback Controller to put the JWT into Cookies or Local Storage
Route::get('/callback', 'AntiPatternInc\Saasus\Laravel\Controllers\CallbackController@index');
Furthermore, to be able to use the View provided by the SaaSus SDK,
Add the path to api/config/view.php.
- PHP
   'paths' => [
       resource_path('views'),
       # ↓Add this line: Directory of views provided by SaaSus SDK
       resource_path('../vendor/saasus-platform/saasus-sdk-php/src/Laravel/Views'),
   ],
For Node.js, Add the import statement and app.use to api/app.ts to define the route.
- Node.js
import { router as callbackRouter } from "./routes/callback";

// Other code omitted

app.use("/callback", callbackRouter);
To implement the /callback endpoint, create api/routes/callback.ts and add the following code.
- Node.js
import express from "express";
const router = express.Router();
import { CallbackRouteFunction } from "saasus-sdk";

router.get("/", CallbackRouteFunction);

export { router };
Create api/views/callback.ejs and add the following:
- Node.js
<!DOCTYPE html>
<html>
  <head>
    <meta charset="utf-8" />
    <meta name="viewport" content="width=device-width, initial-scale=1" />

    <title>Auth Callback</title>
  </head>

  <body>
    <script>
      location.href = "/chat";
    </script>
  </body>
</html>
With the settings up to this point, the authentication information set in SaaSus Platform will be passed as part of the request when the application's Controller is reached.
For PHP, add a Request argument to index in api/app/Http/Controllers/MessageController.php and use dd to check if userinfo is included in $request.
For Node.js, add a Request argument to getChats in api/controllers/chat.ts and use console.log to check if userinfo is included in req.
- PHP
- Node.js
   public function index(Request $request)
   {
       // Check if user information is passed from SaaSus Platform
       dd($request->userinfo);
const getChats = async (req: Request, res: Response) => {
  // Check whether user information is being passed from SaaSus Platform
  console.dir(req.userInfo,{depth:null});
Once this step is completed the basic SDK setup is complete.
Now, log in from the SaaSus Platform and check the operation.
Confirmation of SaaSus SDK Integration
Access the login page created on the SaaSus Platform.
Access the login page on the domain set on the console, such as https://auth.sample.saasus.jp.
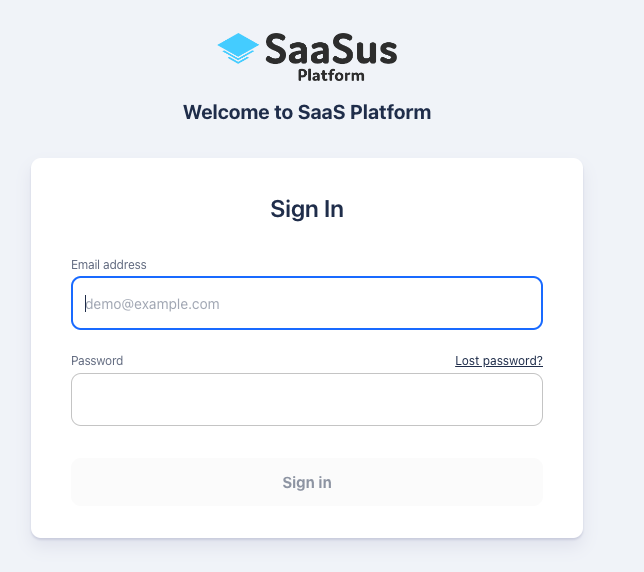
Log in with the email address and password of the user created earlier, then the page will be redirected to the URL set in the Callback URL along with the authentication information.
For example, log in with user1-1@example.com.
In PHP, if the code provided earlier is functioning correctly, it should display something like this after logging in.
For Node.js, open your terminal and execute the following command.
repo$ docker compose logs -f
- PHP
- Node.js
array:3 [▼
  "email" => "user1-1@example.com"
  "id" => "f6a02019-1306-431f-b93d-3a756b312481"
  "tenants" => array:1 [▼
    0 => array:7 [▼
      "back_office_staff_email" => "saasus-sample-tenant1@example.com"
      "completed_sign_up" => true
      "envs" => array:1 [▼
        0 => array:3 [▼
          "id" => 1
          "name" => "dev"
          "roles" => array:1 [▼
            0 => array:2 [▼
              "display_name" => "General User"
              "role_name" => "user"
            ]
          ]
        ]
      ]
      "id" => "7b639774-6fba-4b26-b580-f3d755876a4b"
      "name" => "Tenant Sample 1"
      "plan_id" => "bc011444-a9f1-41c0-8251-bc8928b09ee7"
      "user_attribute" => array:1 [▼
        "username" => "user1-1"
      ]
    ]
  ]
]
{
  email: 'user1-1@example.com',
  id: '951fe2e3-b89b-40cf-95db-2fc11f09cbdf',
  tenants: [
    {
      back_office_staff_email: 'saasus-sample-tenant1@example.com',
      completed_sign_up: true,
      envs: [
        {
          id: 3,
          name: 'prod',
          roles: [ { display_name: 'General User', role_name: 'user' } ]
        }
      ],
      id: '2d76c5ed-8462-4de0-b107-97bb97b7e9e2',
      is_paid: true,
      name: 'Tenant Sample 1',
      plan_id: 'ddb8b9e9-5fe4-48cc-846e-b9031552877a',
      user_attribute: { username: 'user1-1' }
    }
  ],
  user_attribute: {}
On the application side, you can see that the user information and tenant information set earlier on the SaaSus Platform.
The redirect URL is received by the Callback processing of the SaaS SDK standard (http://localhost/callback), and in that process the authentication information is stored in the browser's local storage and cookies.
Then, with the Auth Middleware of the SaaSus SDK, use the SaaSus Platform to validate the authentication information, get the user information, and put in the Request object.
After that, the application's controller will take over, so at this point the application already has the logged-in person's information.
Now let's use this information to make the sample bulletin board application multi-tenant ready!
Making the Sample Application Multi-Tenant
For PHP, api/app/Http/Controllers/MessageController.php
For Node.js, api/controllers/chat.ts
This is the main process, so let's add the process to make it multi-tenant compatible here.
First, change the display part. Let's rewrite the whole part below.
- PHP
- Node.js
   public function index(Request $request)
   {
      // $request->userinfo contains various user information and tenant information, so use it
      $messages = Message::where('tenant_id', $request->userinfo['tenants'][0]['id'])->get();
      return view('messageBoard.index', ['messages' => $messages, 'plans' => $this::PLANS, 'tenant_name' => $request->userinfo['tenants'][0]['name']]);
   }
const getChats = async (req: Request, res: Response) => {
  try {
    const messages = await db.Messages.findAll({
      where: {
        tenant_id: req.userInfo?.tenants[0].id,
      },
    });
    res.render("chat", {
      messages: messages,
      plans: PLANS,
      tenant_name: req.userInfo?.tenants[0].name,
    });
  } catch (error) {
    console.error(error);
    res.redirect("/chat");
  }
};
In this way, search the DB based on the passed tenant ID.
Below is the post function.
- PHP
- Node.js
   public function post(Request $request)
   {
      $validated = $request->validate([
          'message' => 'required|max:255'
      ]);

      // Acquire various information from userinfo of $request and use it for judgment
      $message = Message::create([
          'tenant_id' => $request->userinfo['tenants'][0]['id'],
          'user_id' => $request->userinfo['tenants'][0]['user_attribute']['username'],
          'message' => $request->message,
      ]);

      $request->session()->regenerateToken();
      return redirect()->route('board');
   }
const postChats = async (req: Request, res: Response) => {
  const mes = req.body.message;
  // Acquire various information from userinfo of $request and use it for judgment
  const tenantId = req.userInfo?.tenants[0].id || "";
  const userName =
    req.userInfo?.tenants[0].user_attribute.username;
  try {
    await db.Messages.create({
      tenant_id: tenantId,
      user_id: userName,
      message: mes,
    });
  } catch (error) {
    console.error(error);
  }
  res.redirect("/chat");
};
Store tenant ID and user name as a set based on the passed user attributes.
Next, display the user ID on the page display.
For PHP, edit api/resources/views/messageBoard/index.blade.php.
Around line 32, change $message->user->name to $message->user_id.
Before change:
                   <div class="mt-4">
                       <p>
                           {{ $message->user->name }}
                           <span class="text-xs text-gray-500">
                               {{ $message->created_at->format('Y/m/d H:i') }}
                           </span>
                       </p>
Revised:
                   <div class="mt-4">
                       <p>
                           {{ $message->user_id }}
                           <span class="text-xs text-gray-500">
                               {{ $message->created_at->format('Y/m/d H:i') }}
                           </span>
                       </p>
No modifications are required for Node.js.
Multi-tenant support is now available!
Now log in and try it out.
As before, log in from the login page created on the SaaSus Platform.
When you log in, you can see that the tenant name has changed to what was set in the SaaS development console earlier.
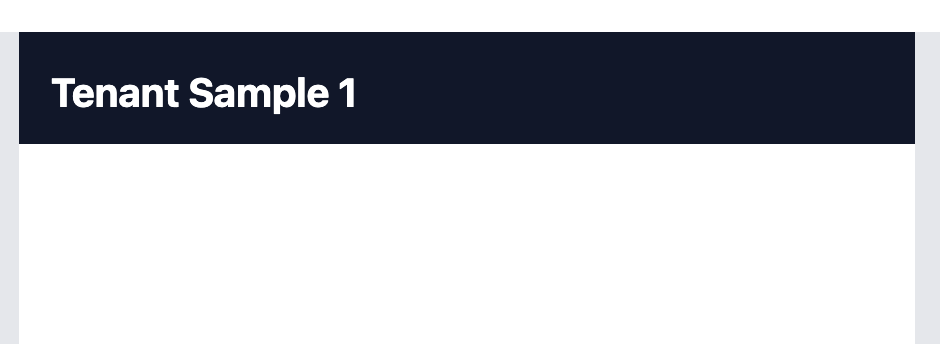
There isn't any data yet, so let's post some.
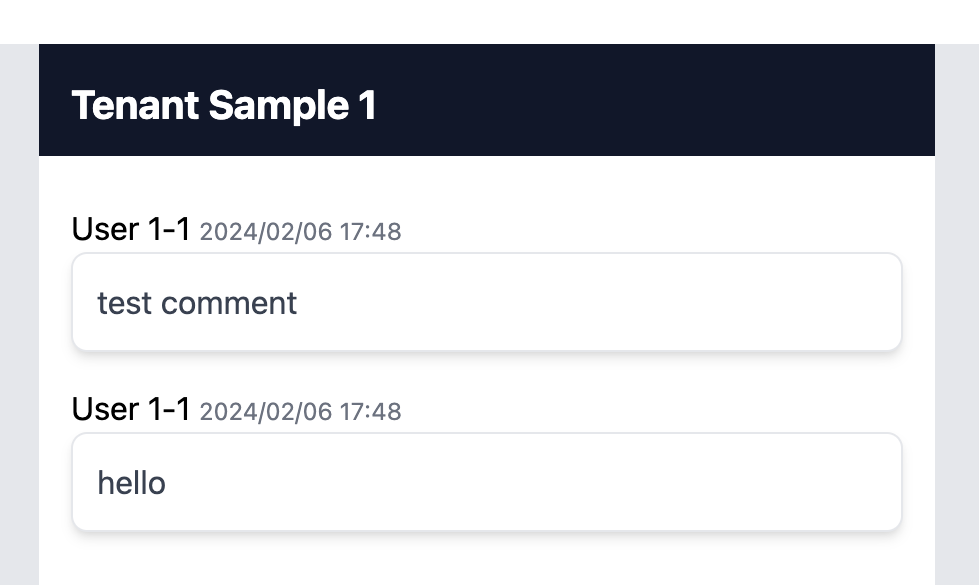
The user name is also displayed.
Go back to the login screen, and log in as user1-2@example.com, and make some posts.
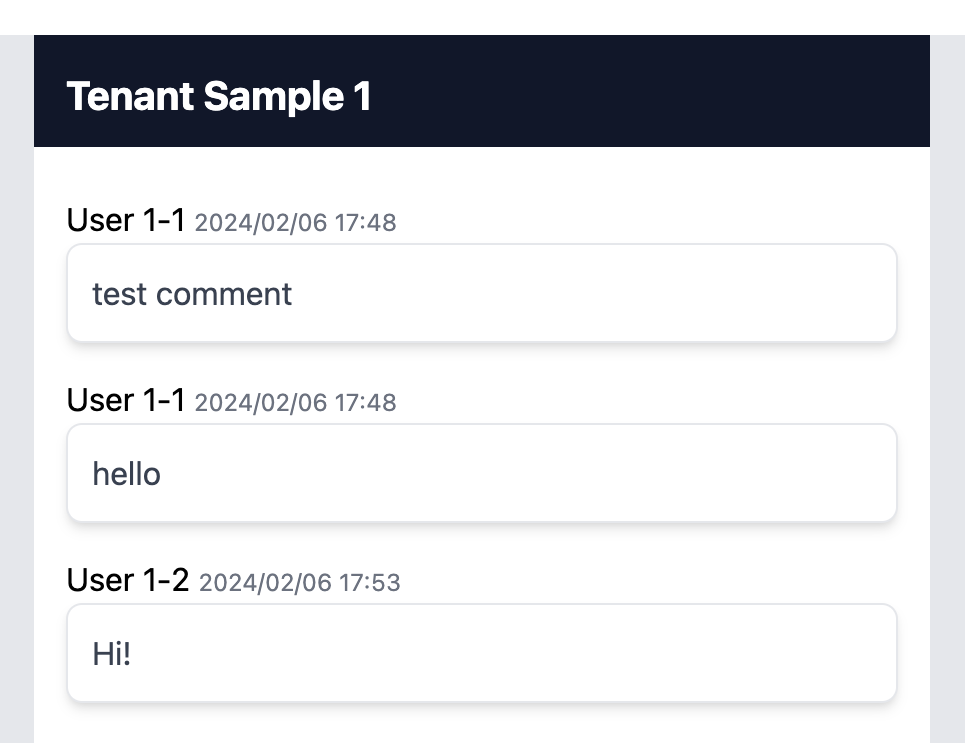
It will be reflected on the page.
Next log in with another tenant's user, user2-1@example.com
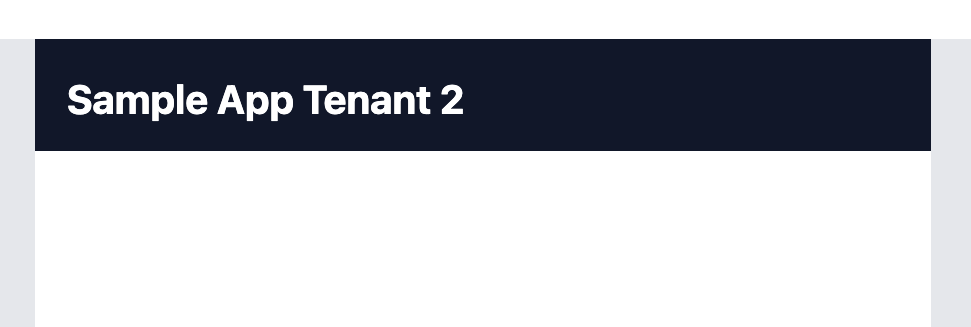
The displayed tenant name has changed, and the content is empty.
This shows that displayed information is limited to each specific tenant.
Now, after posting several posts in the same way, log in with user2-2@example.com and confirm that the information of the same tenant can be displayed.
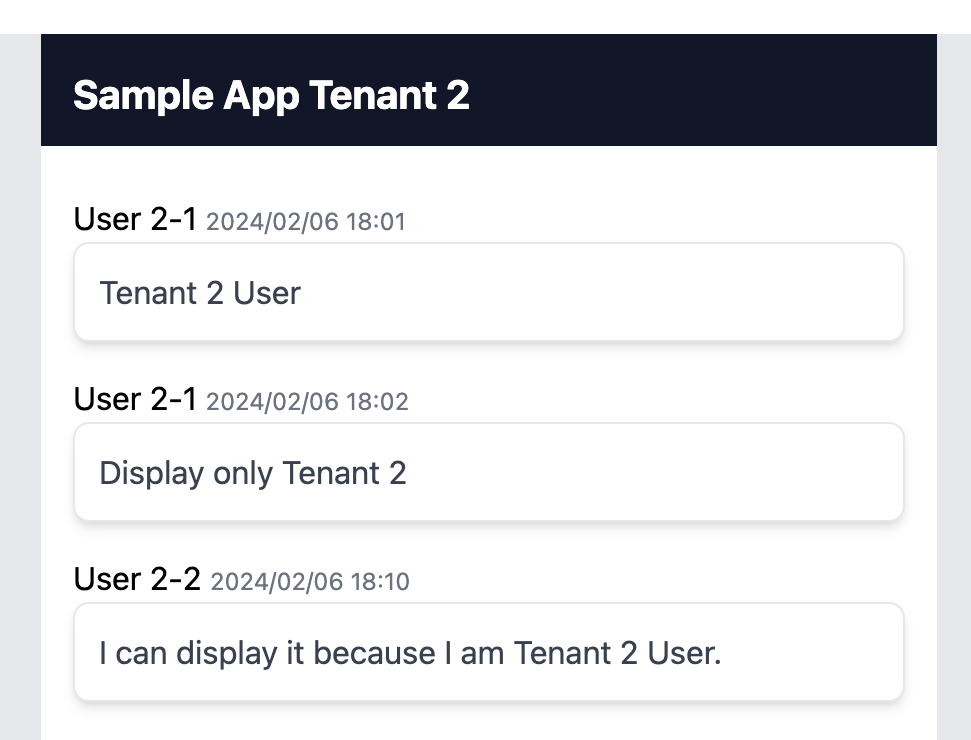
Thus, per-tenant isolation is complete.
As for the current separation method, a pool model to separate tenants within the same DB and separated tenants using a simple method. Even if a different tenant separation method per your requirements, such as schema separation or database separation, you can also use the SaaSus SDK to acquire tenant information and implement it.
Now that the tenants are separated, next is the implementation of billing-related functions.
Let's implement the first steps of pricing, metering, and billing. For billing, we use a billing SaaS called Stripe. If you don't use Stripe, skip the billing part.