SaaS Management using the SaaS Operation Console
Manage SaaS with SaaS Operation Console
Switch Consoles
The SaaS operations console allows you to use functions for SaaS operations such as tenant management and user management.
When you click "SaaS Development Console" on the left menu bar, the option of "SaaS Operation Console" will be displayed.

Up until now, I believe you were logged in to the SaaS Development Console, so click "SaaS Operations Console" to switch to the SaaS Operations Console.
Create a SaaS Consumer Tenant
First, let's create two tenants for the sample application.
Click "Tenant Management" on the side menu
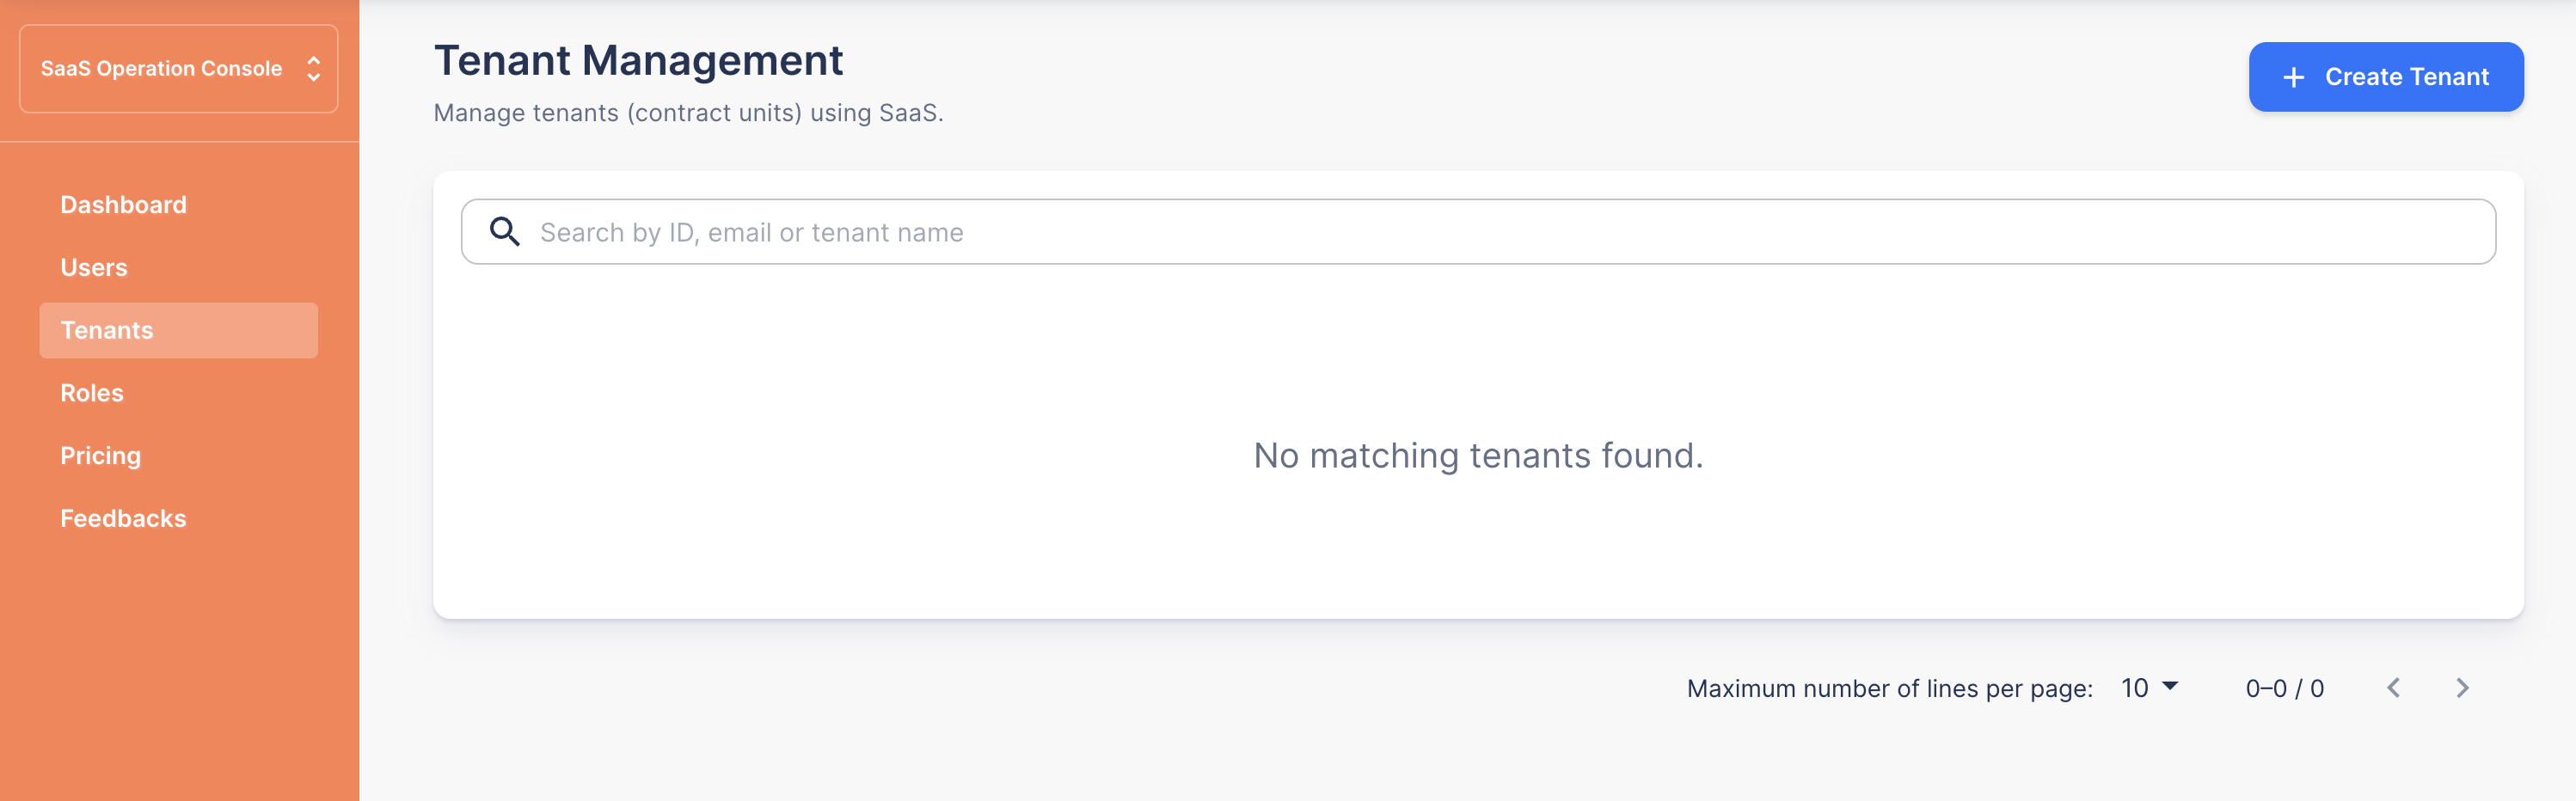
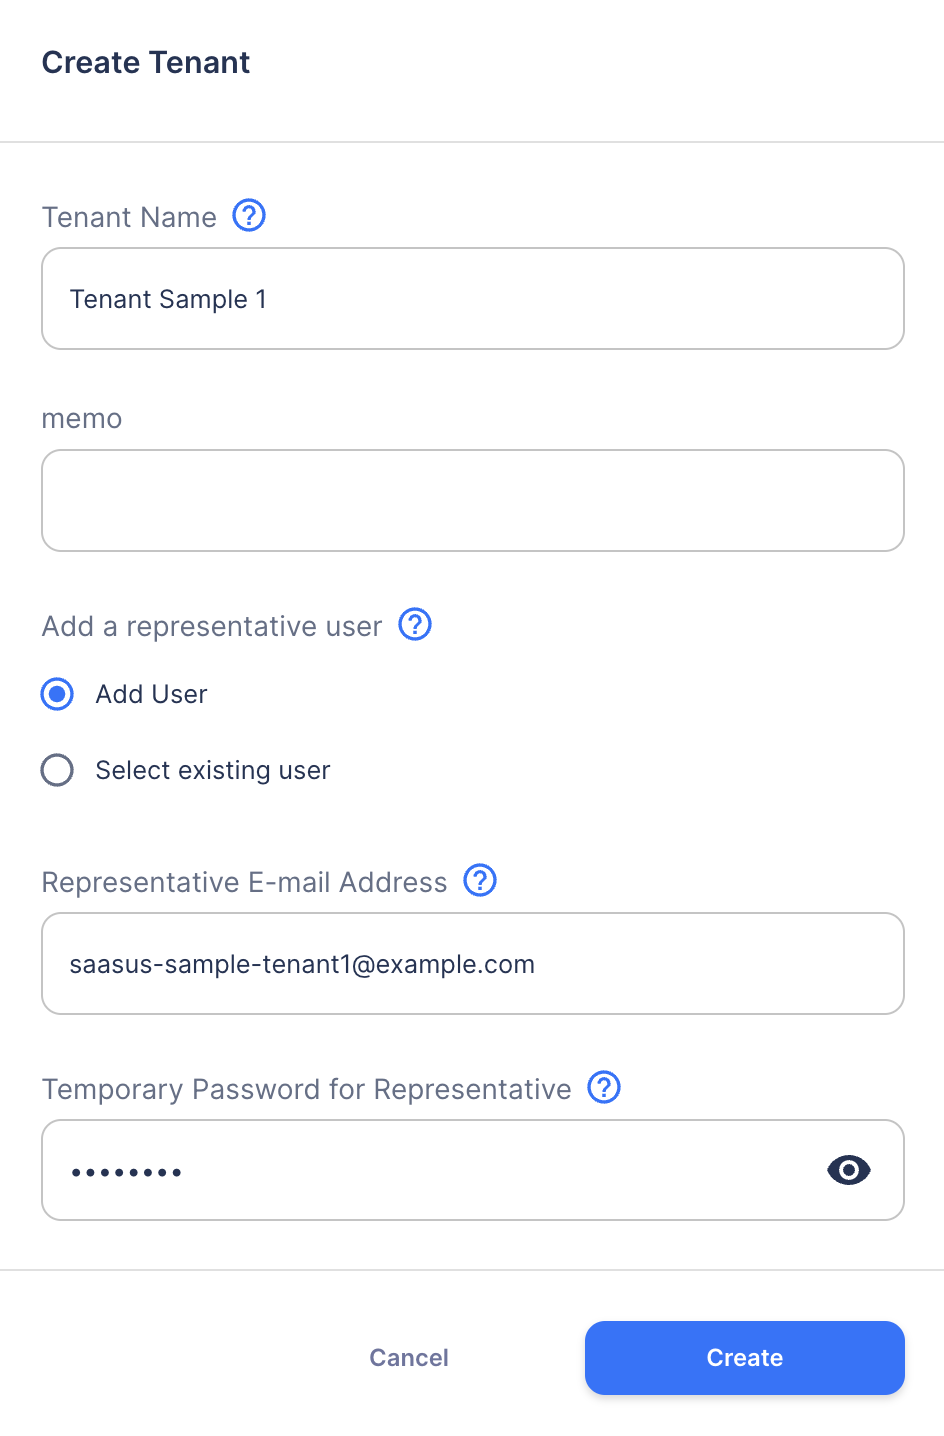
Click the Create Tenant button
First example tenant
- Name: Tenant Sample 1
- Primary Email Address: saasus-sample-tenant1@example.com
- Representative's password: Temporary password that meets the requirements such as G@2qYPQq
Second example tenant
- Name: Sample App Tenant 2
- Primary email address: saasus-sample-tenant2@example.com
- Representative's password: Temporary password that meets the requirements such as irG_l88r
(There are no rules to these values so others can be input)
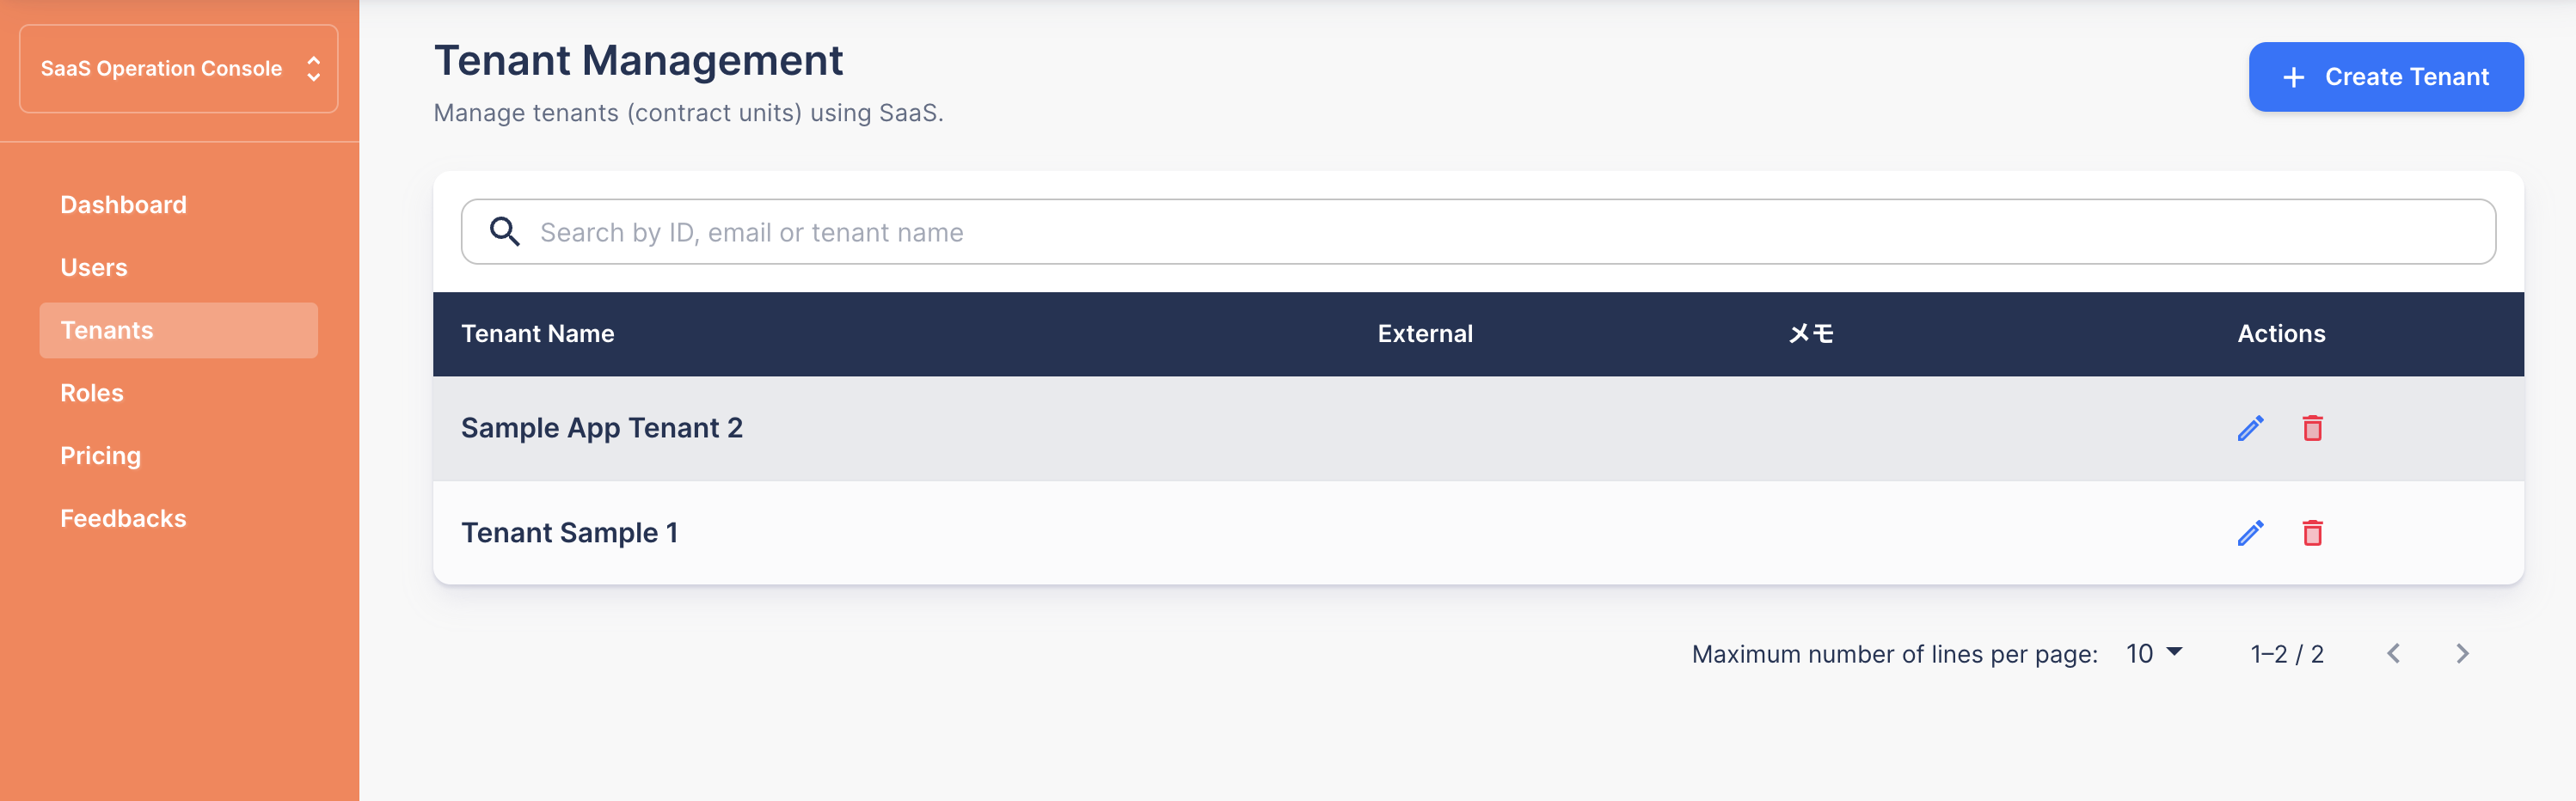
You have now created a tenant and one user for each tenant that belongs to that tenant.
Creating SaaS Users
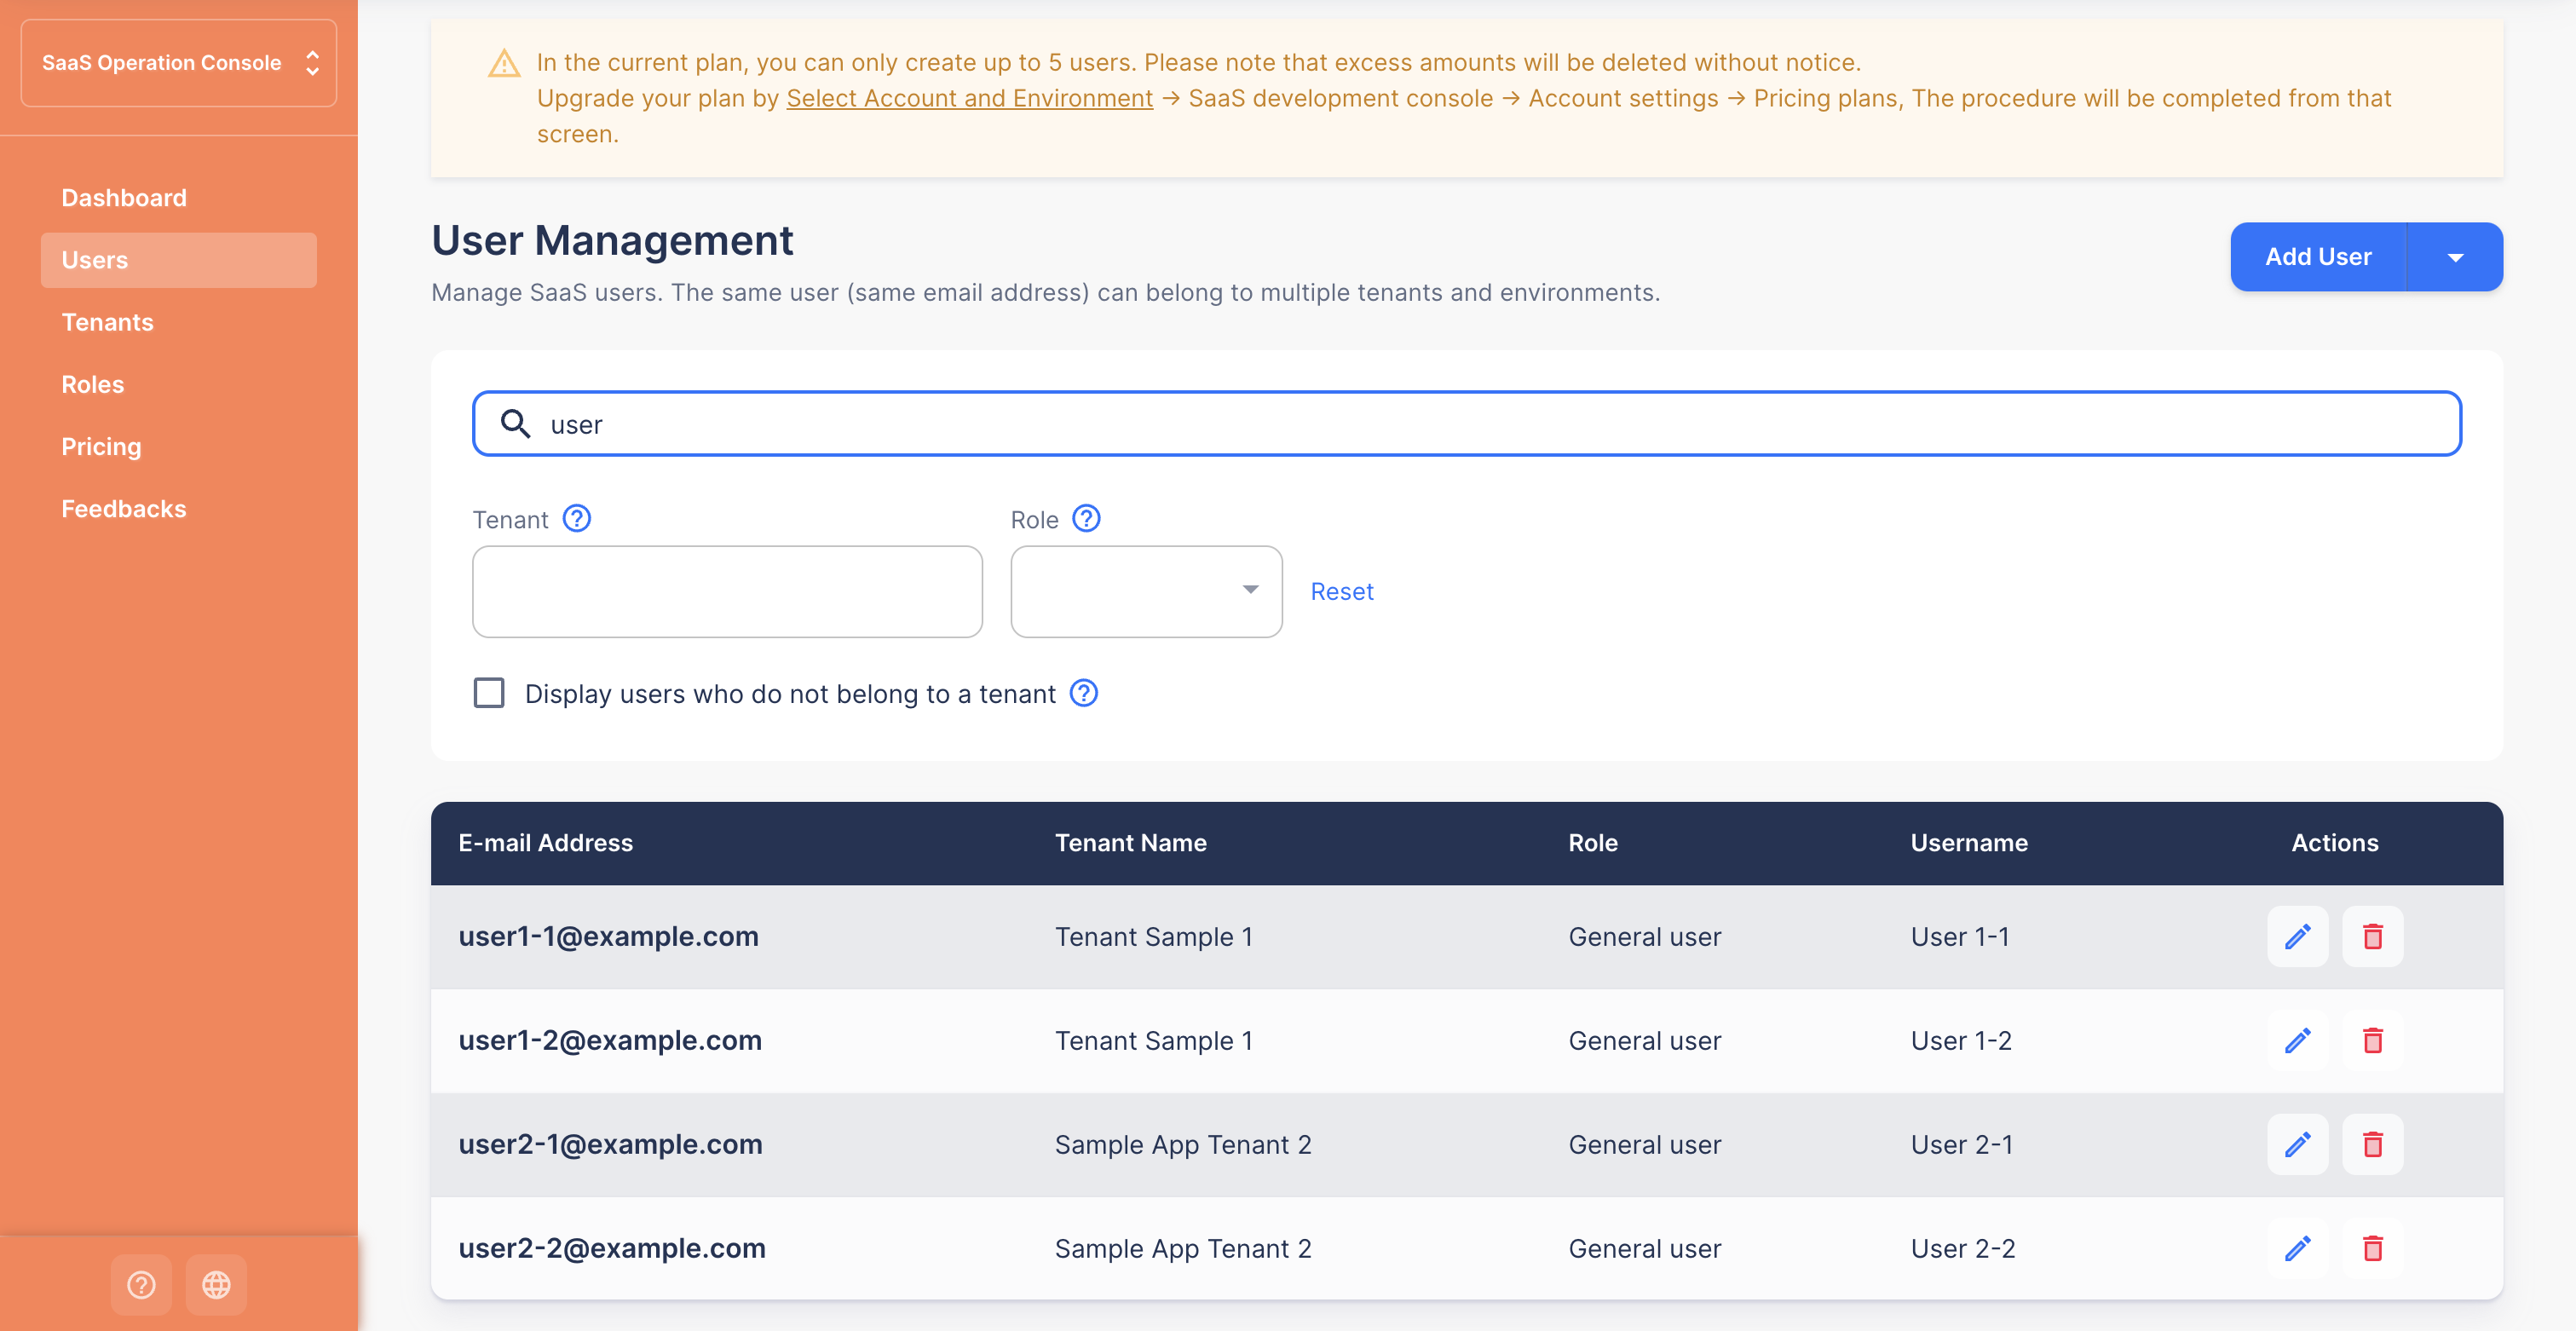
Let's take a look at the user list. Click User Management from the side menu.
The user created earlier is registered as the admin (SaaS administrator) role for each tenant and each environment.
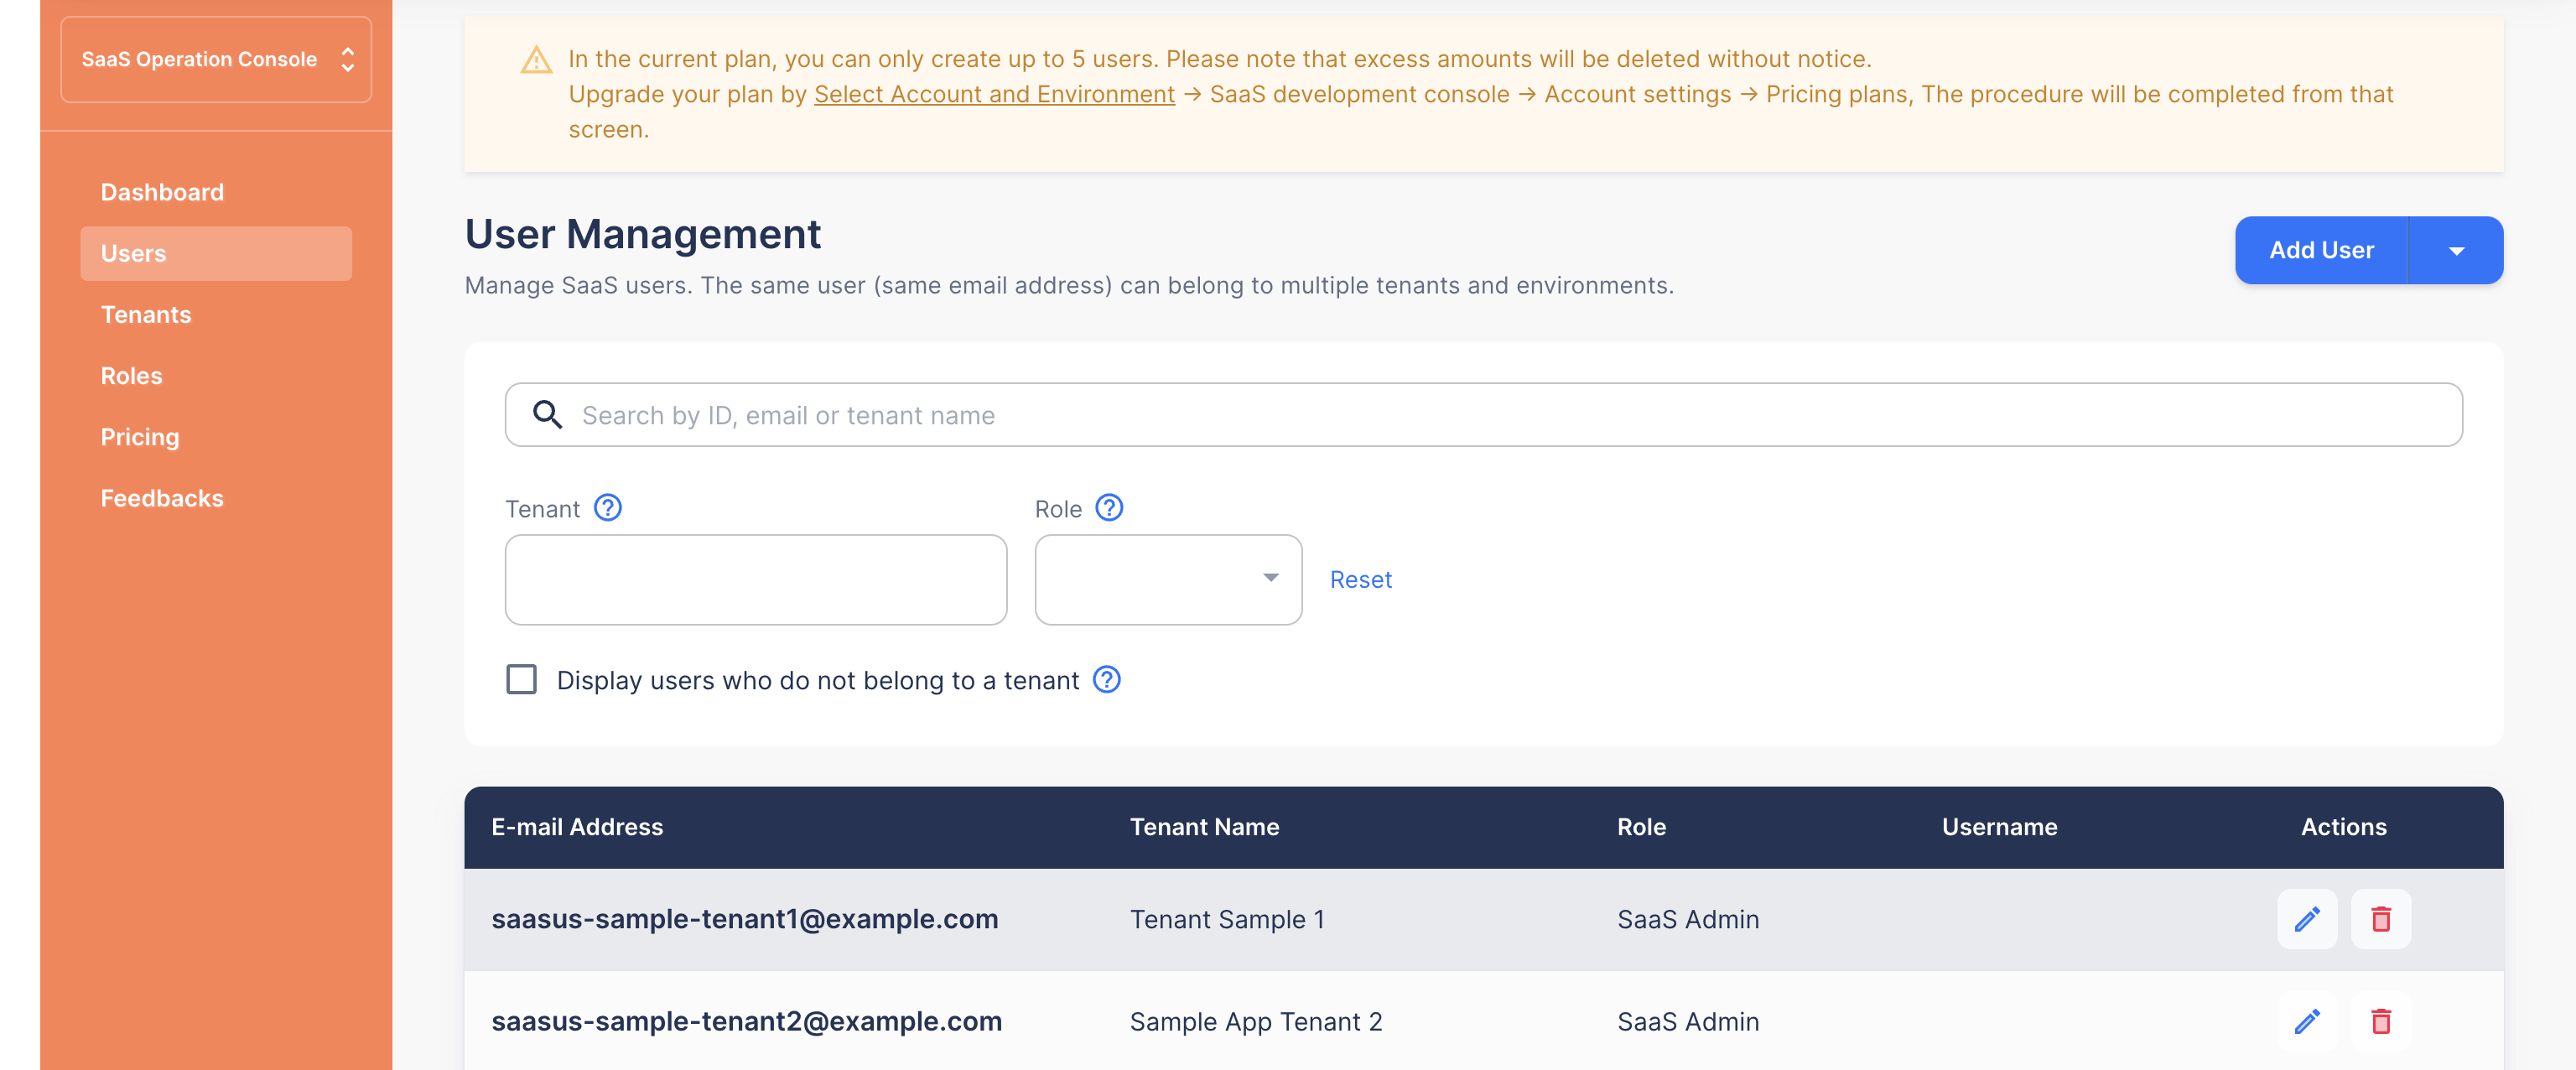
- Depending on the SaaS, multiple environments may not be necessary, so if you use a single environment, just take prod into consideration.
Now, let's register one user for each tenant.
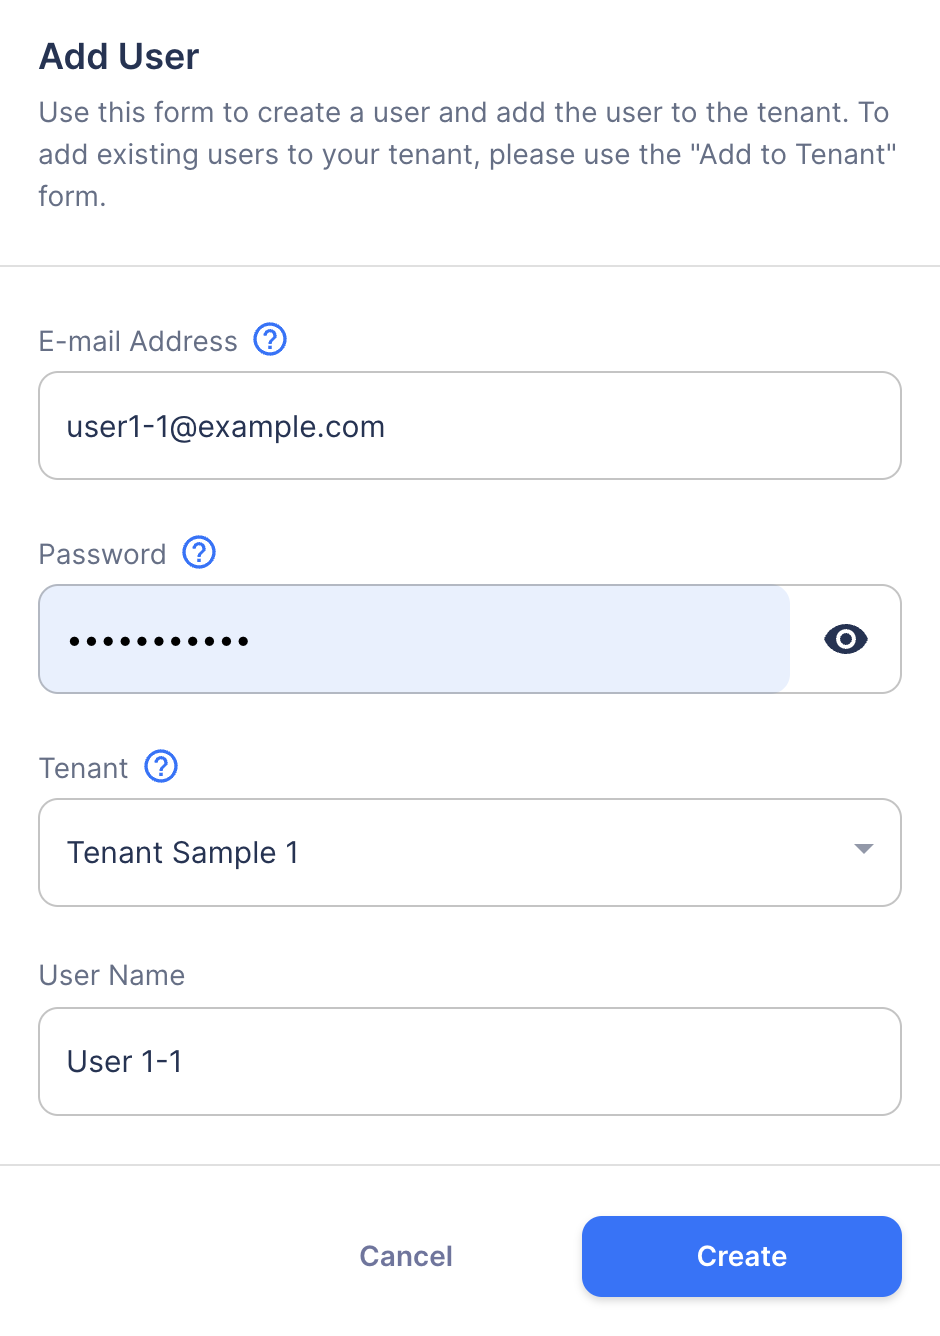
Click the "Create User" button on the top right
For now, let's register 4 people.
Email Address: user1-1@example.com
Password: password that meets the password requirements
Tenant: Tenant Sample 1
Username: User 1-1
Email Address: user1-2@example.com
Password: password that meets the password requirements
Tenant: Tenant sample #1
Username: User 1-2
Email Address: user2-1@example.com
Password: password that meets the password requirements
Tenant: Sample application tenant 2
Username: User 2-1
Email Address: user2-2@example.com
Password: password that meets the password requirements
Tenant: Sample application tenant 2
Username: User 2-2

4 additional users have been registered.
Now let's add roles to these users.
Add Role to User
Click "Role Management" on the side menu
Search for the role you want to add.
First, let's give user 1-1 and user 1-2 the role of "general user" for "development" on "tenant sample 1".
Enter the above conditions and click Search.
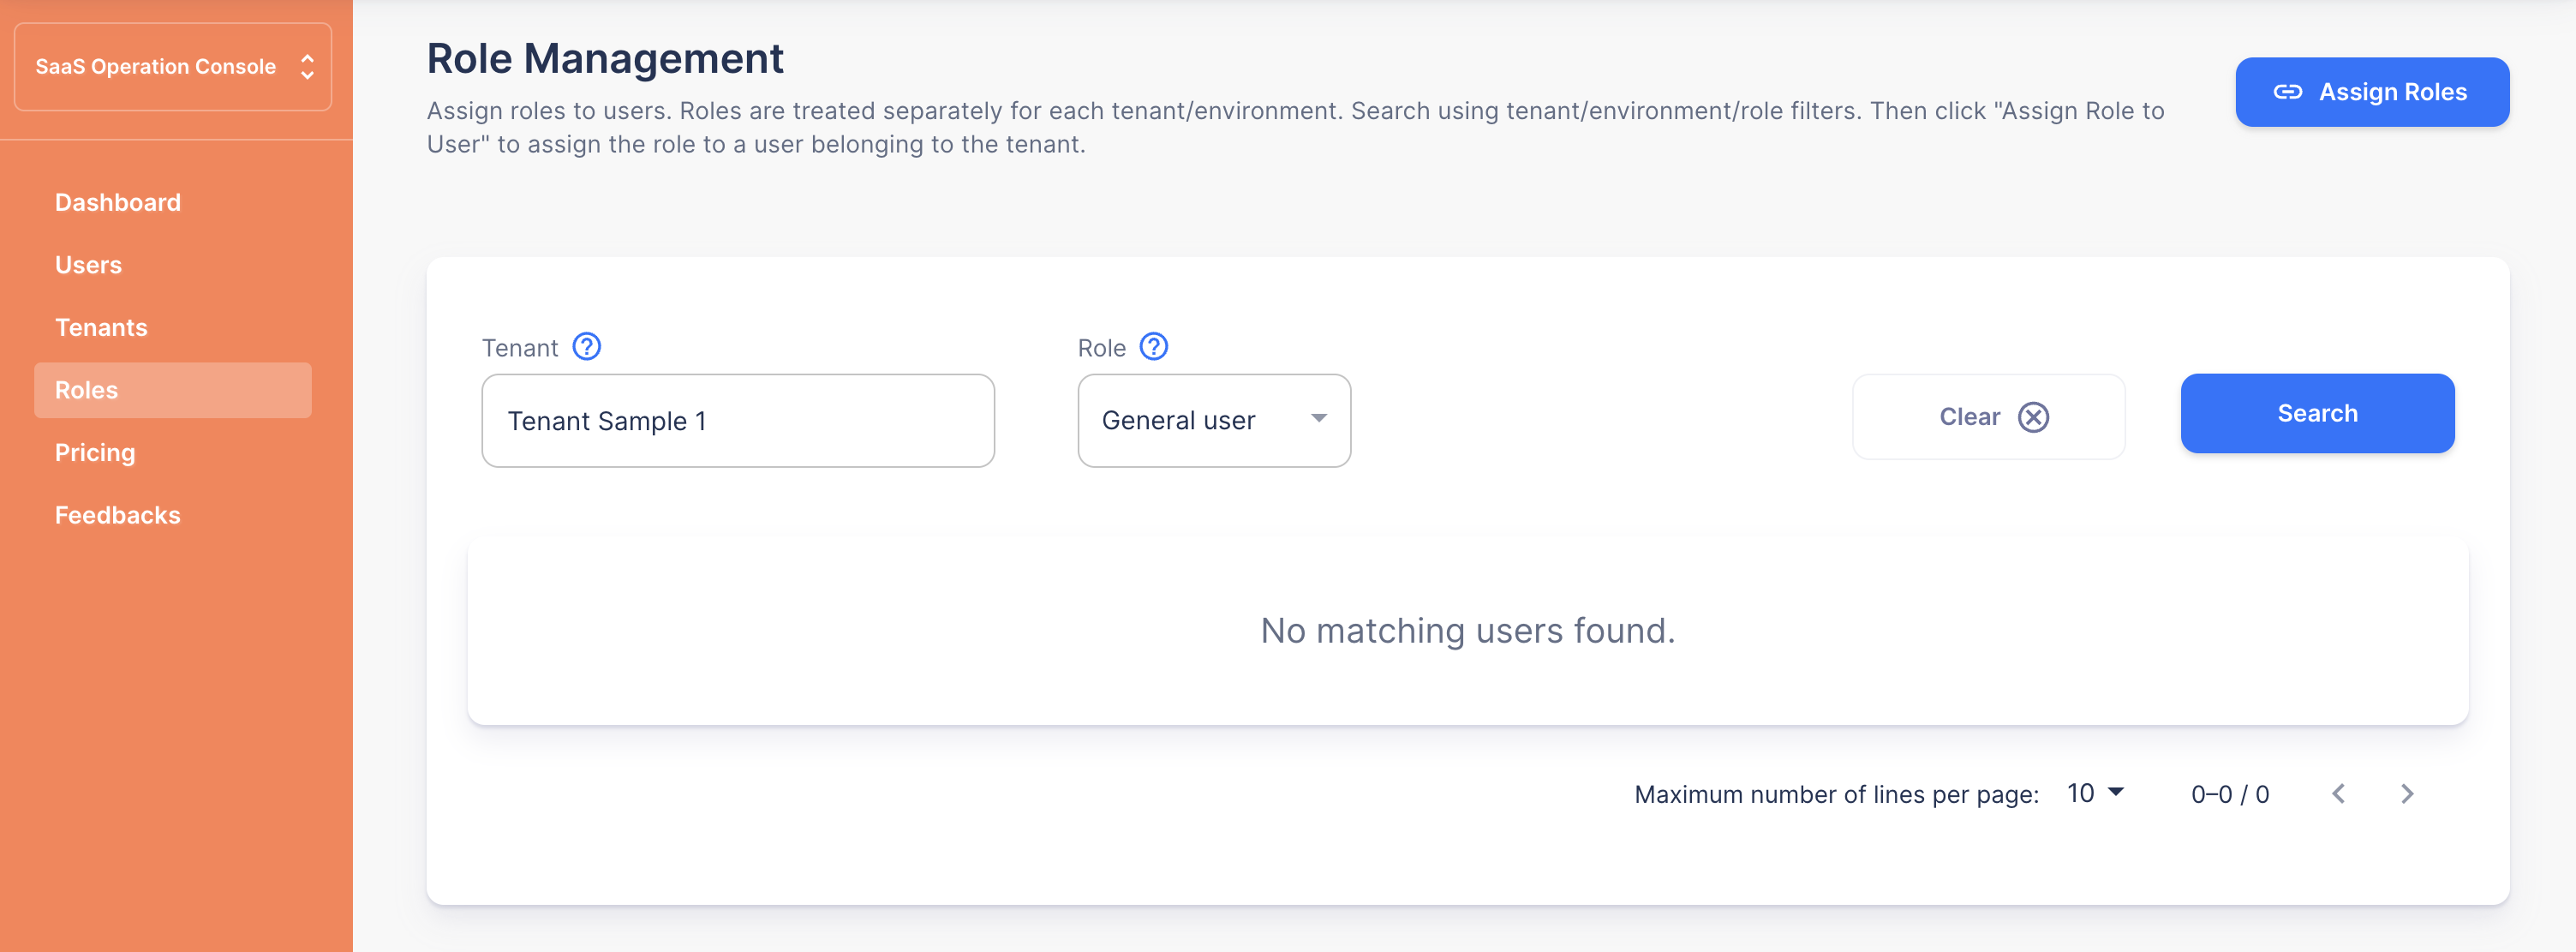
None are displayed because there are no users with this role yet.
Now, assign roles by clicking "Grant Roles to Users" on the upper right.
Select the email addresses of User 1-1 and User 1-2 and click Add
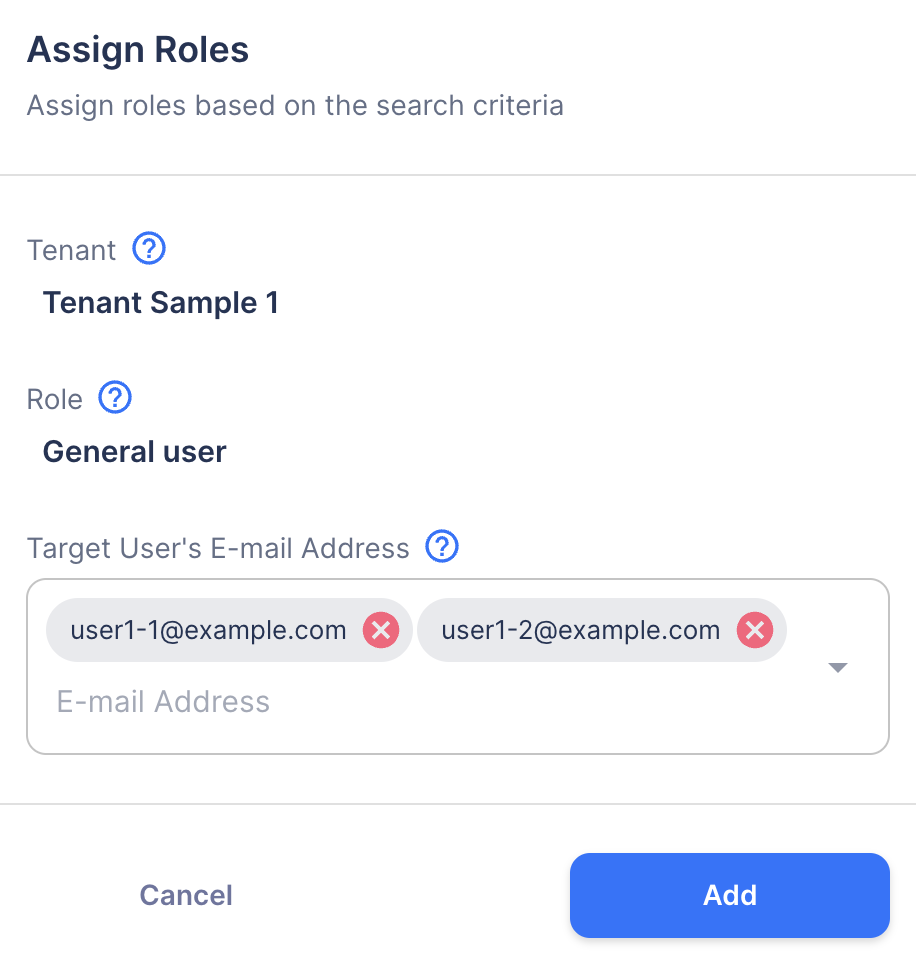
Role added to user
In the same way, give user 2-1 and user 2-2 the role of "general user" for "development" on "sample application tenant 2".
Let's check whether the role has been granted on the user management screen as well. Click "User Management" in the side menu to confirm.
Preparations for SaaS operation are now complete.
Now let's turn your web application into SaaS!