Prepare SaaS Platform
*You can also watch the entire process via video.
https://www.youtube.com/watch?v=deSkPJ-zTgw
Preparing the SaaSus Platform
Creating a SaaSus Platform Account
First, let's create a SaaSus Platform account.
Access the registration screen and perform new registration using your own email address.
https://auth.saasus.io/sign-up
Enter your email address and desired password, read the terms of use and privacy policy, check if you agree, and press the sign up button.

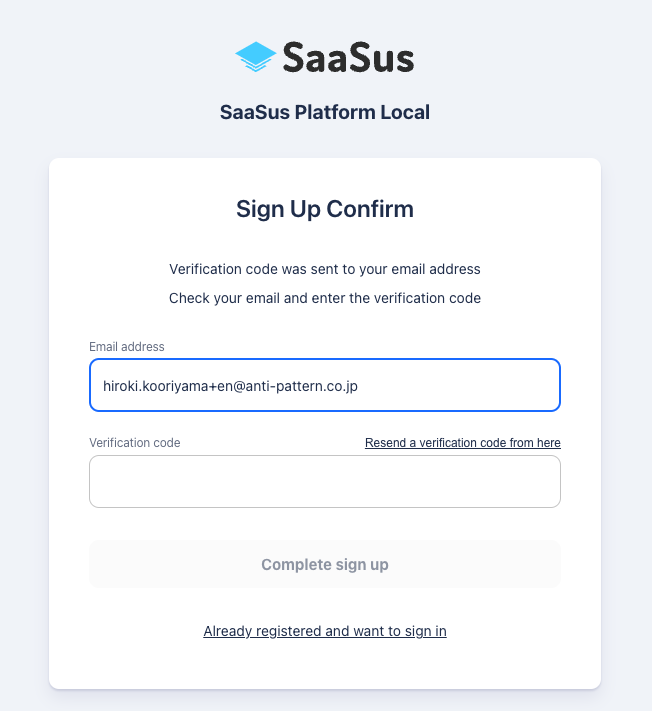
A verification code will be sent to the email address you entered, enter it to activate your account
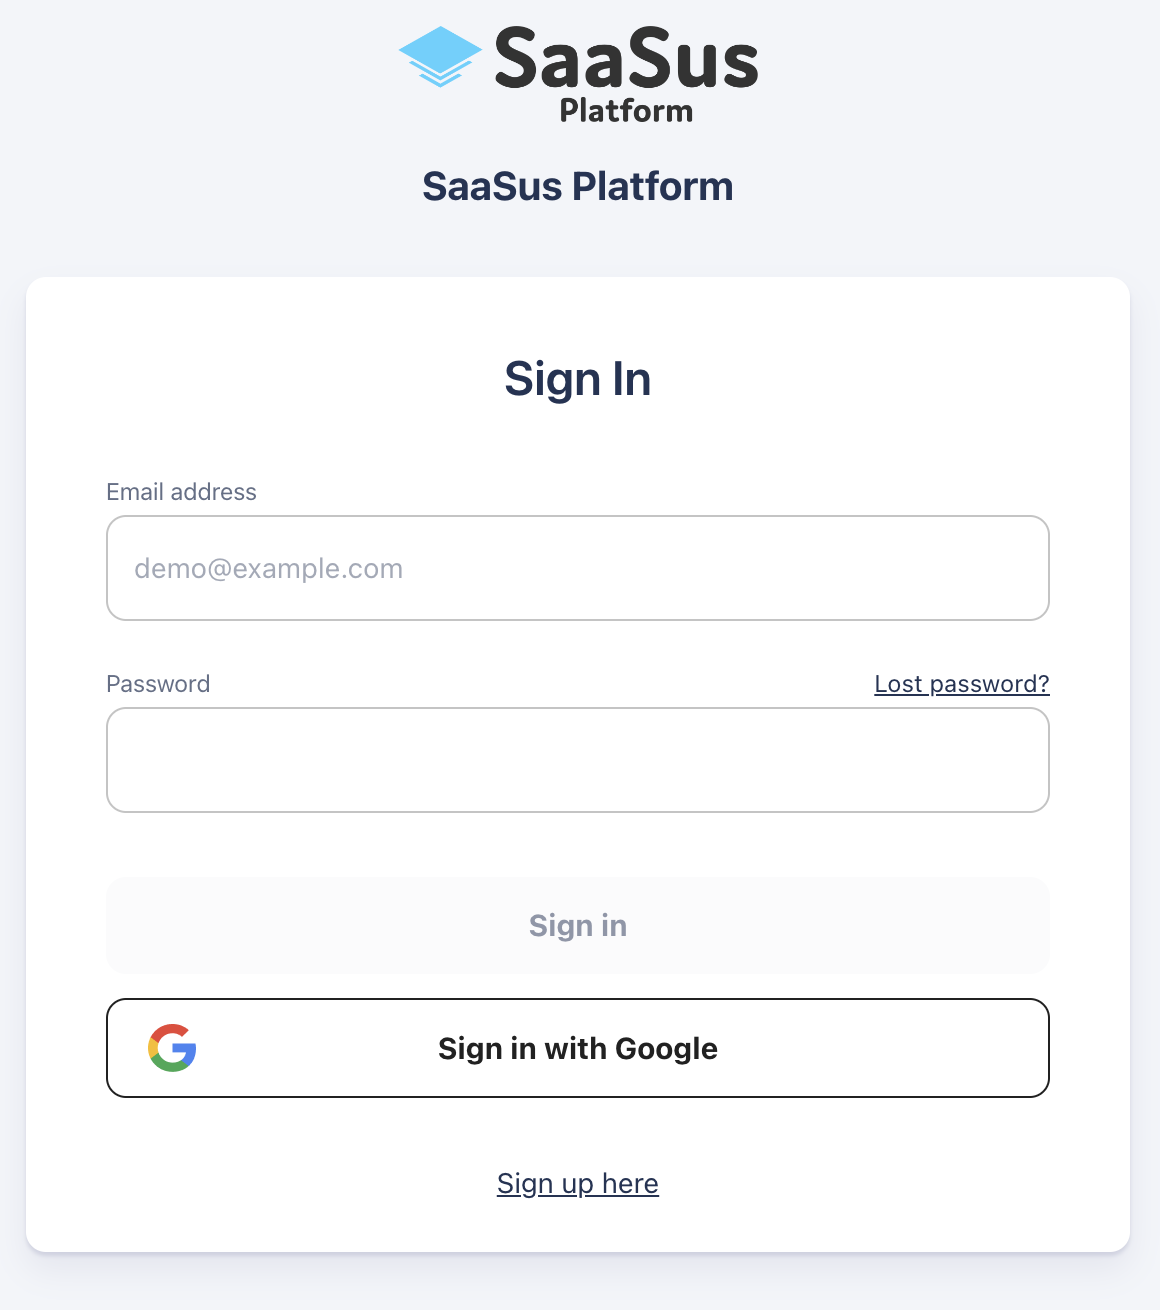
After verification is completed, the login screen will be displayed
Log in with the email address and password you registered with earlier.
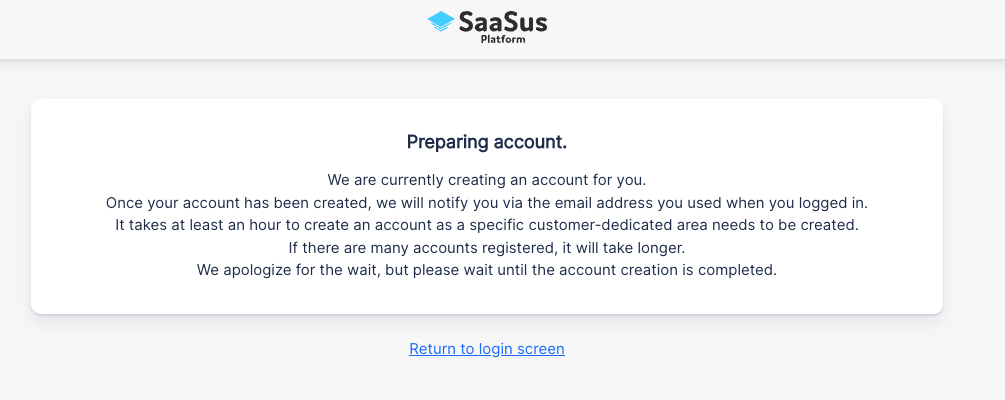
When you register for the SaaSus Platform for the first time, we will create a tenant exclusively for you. This takes at least an hour because we will create a customer-dedicated AWS account. Once your account has been created, you will receive an email to the email address you provided.
Logging into the Console
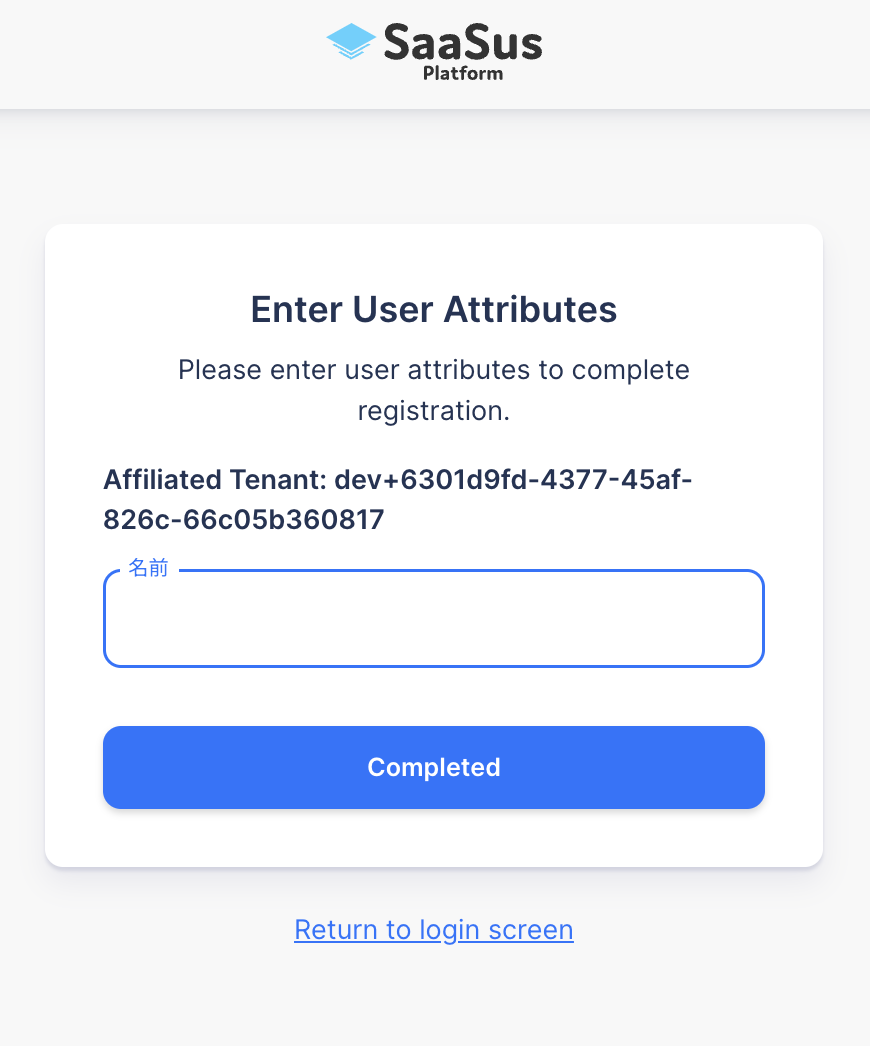
After the tenant is created, when you log in, you will be prompted to enter user attributes like this.
After filling in the information, the transition page to each console of the tenant is displayed.
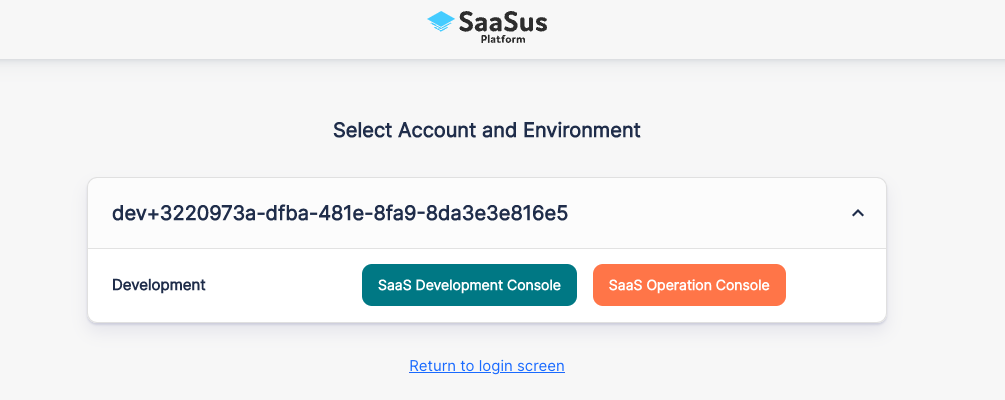
SaaS Development Console is a console for setting up SaaS construction.
SaaS Management Console is a console for managing SaaS.
Details on registration will be provided later.
First, in order to set up SaaS creation settings log into the SaaS Development Console.
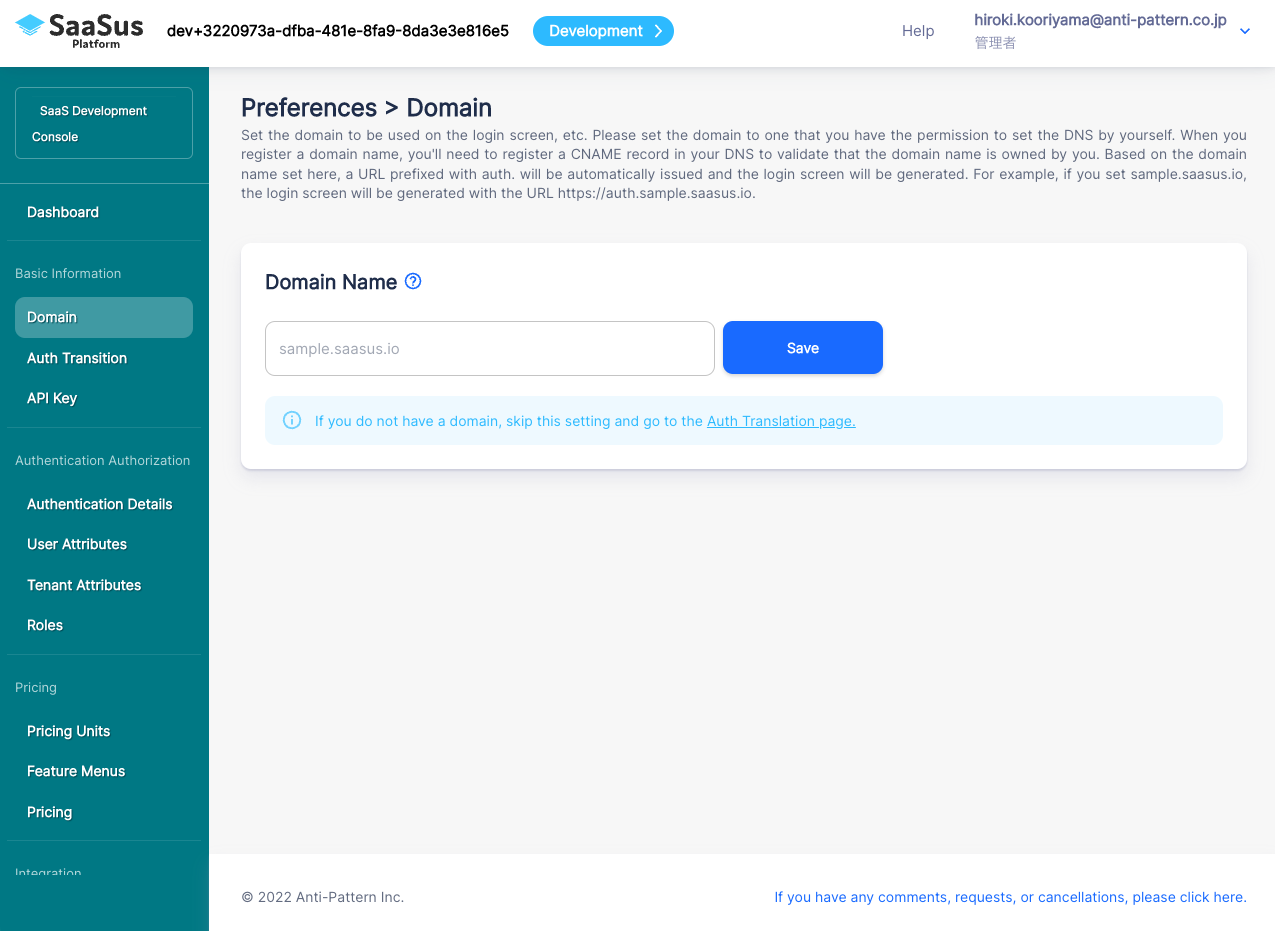
Setting the Domain Name
*If you do not have a domain name, skip this item and click Next.
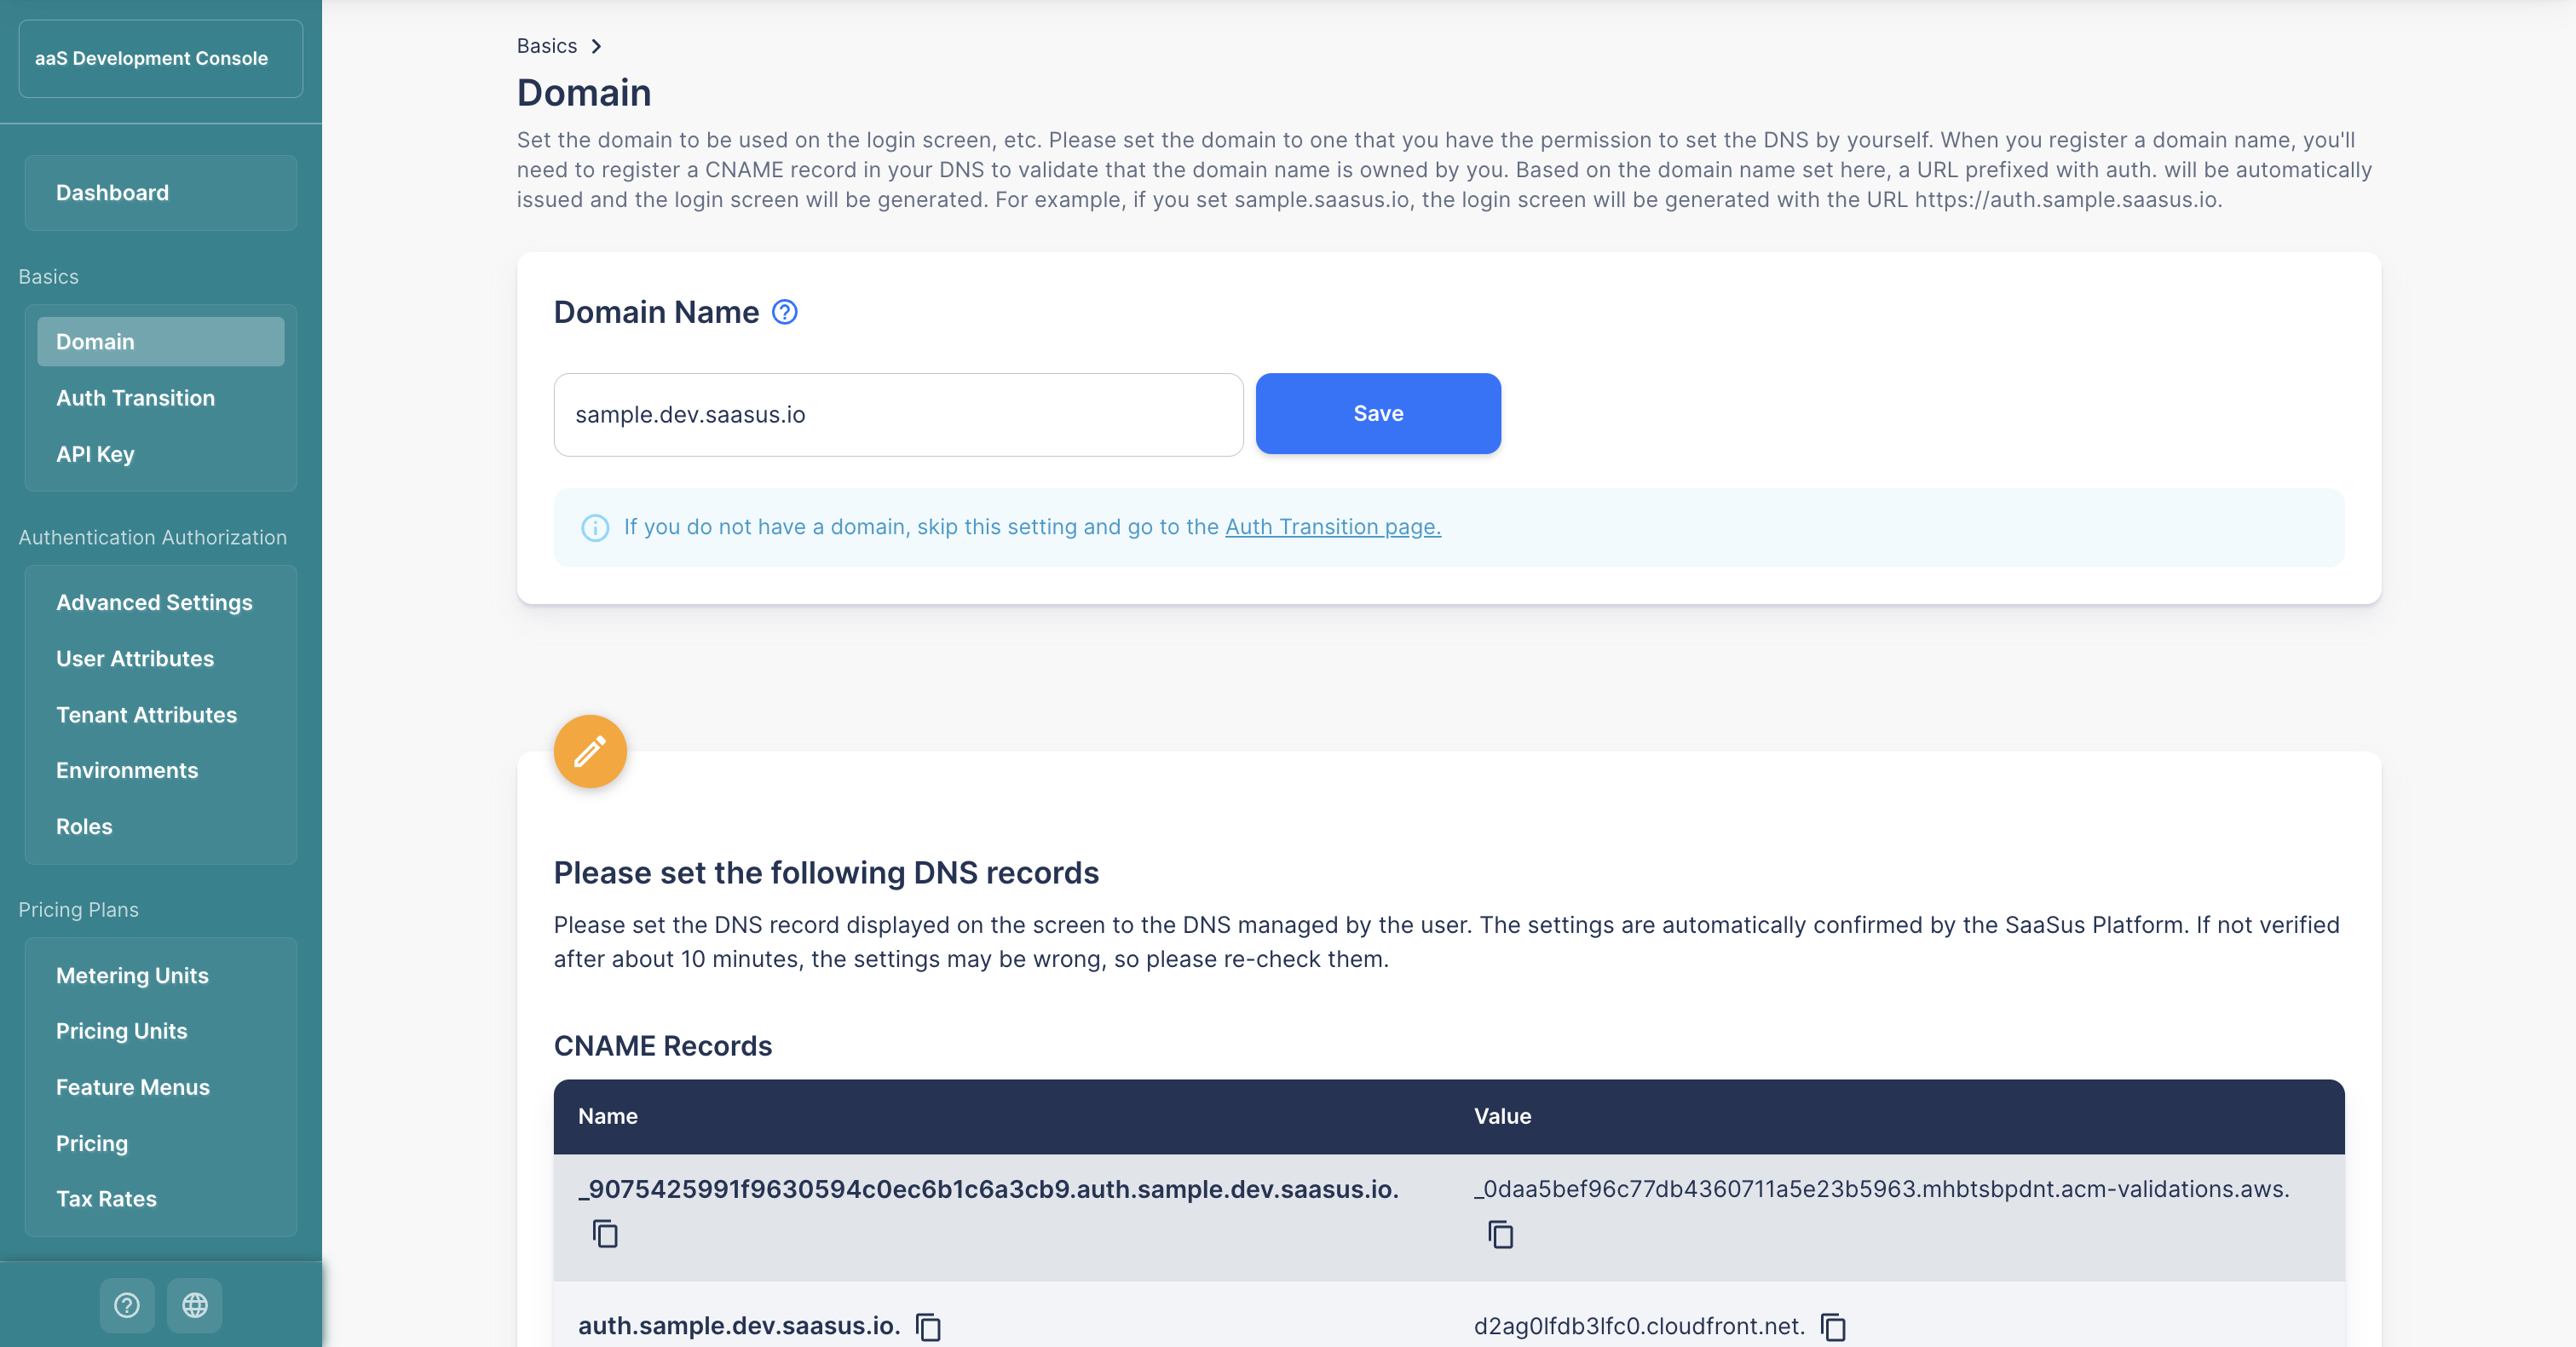
After logging in to the SaaS Development Console, register the domain name used for SaaS. Click "Domain" on the side menu to display the domain registration page. This domain name will be used as the base domain for the login page and for emails. After that, you will be asked to create a DNS record, so please register a domain name that you can operate.
After registering your domain name, a CNAME record will appear at the bottom of the screen after a few seconds for DNS verification (confirming that you do indeed own the domain name). Register this value in your DNS.
Login to your domain registrar's account, select the domain and edit the CNAME records. (GoDaddy, Namecheap, Domain.com, Name.com, AWS Route53, Azure DNS, Cloud DNS, .etc)
After registering your DNS, the verification will be completed momentarily and "The following DNS information has been verified and is working properly." will be displayed. You are now ready to set up the SaaSus Platform.

Based on this domain, the SaaSus Platform automatically generates a login screen.
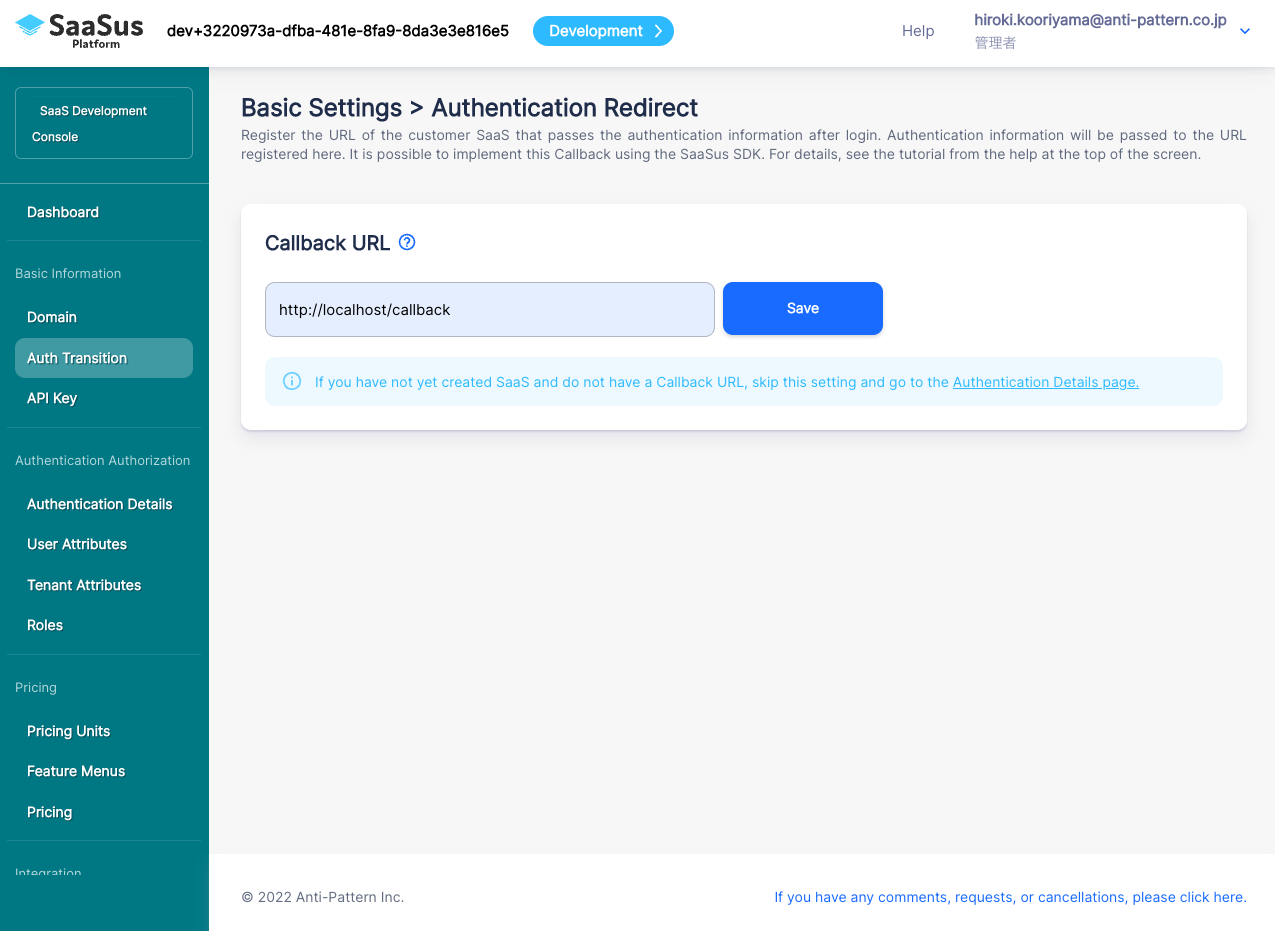
Authentication Redirect URL Setting
The SaaSus Platform will generate a login page based on the domain name you just set. After logging in through this login page, the authentication information will be handed over to the SaaS side. It is necessary to register the SaaS redirect URL as the Callback URL.
Click "Auth Transition" on the side menu to display the Callback URL setting page.
Normally, set the Callback URL based on the URL that provides SaaS. This time, we will run the sample application locally, so set it as follows.
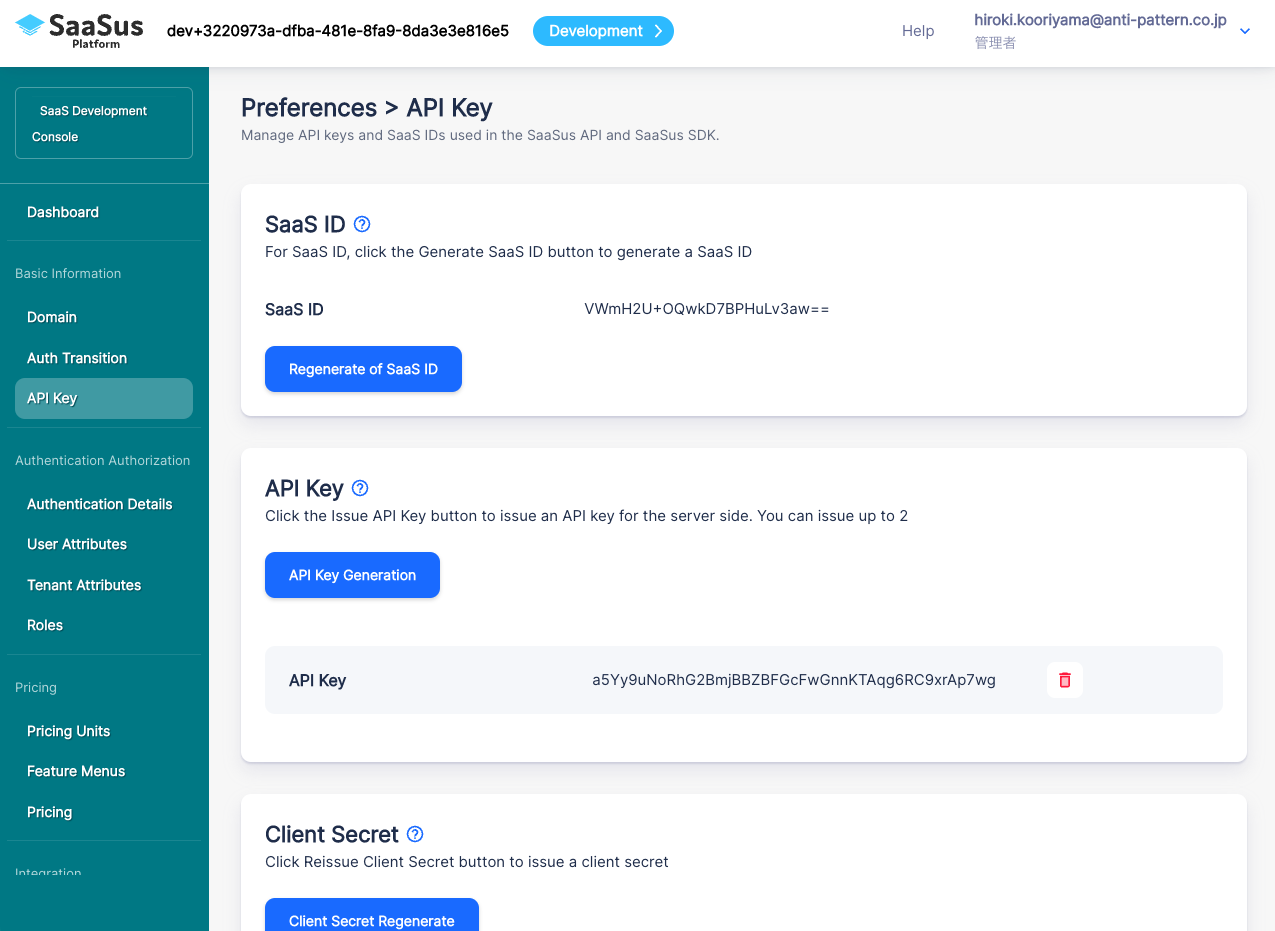
SaaS ID and API Key Confirmation
Next, check the "SaaS ID" and "API key" that will be used when implementing SaaS.
"SaaS ID" is issued by default. You can use it as it is, or you can reissue it by pressing the "Reissue SaaS ID" button.
Since an "API Key" is not issued by default, press "Issue API Key" to issue one.
*Please note that if you reissue a SaaS ID after the actual SaaS operation has started, you will also need to modify the SaaS ID set on the SaaS application side.
At this time you can check this information anytime on this page, however for enhanced security we plan to change it so that the the API key will not be displayed.
Customizing Authentication Pages such as Login Pages
Next, customize the login pages generated earlier.
Click "Authentication Details" on the side menu
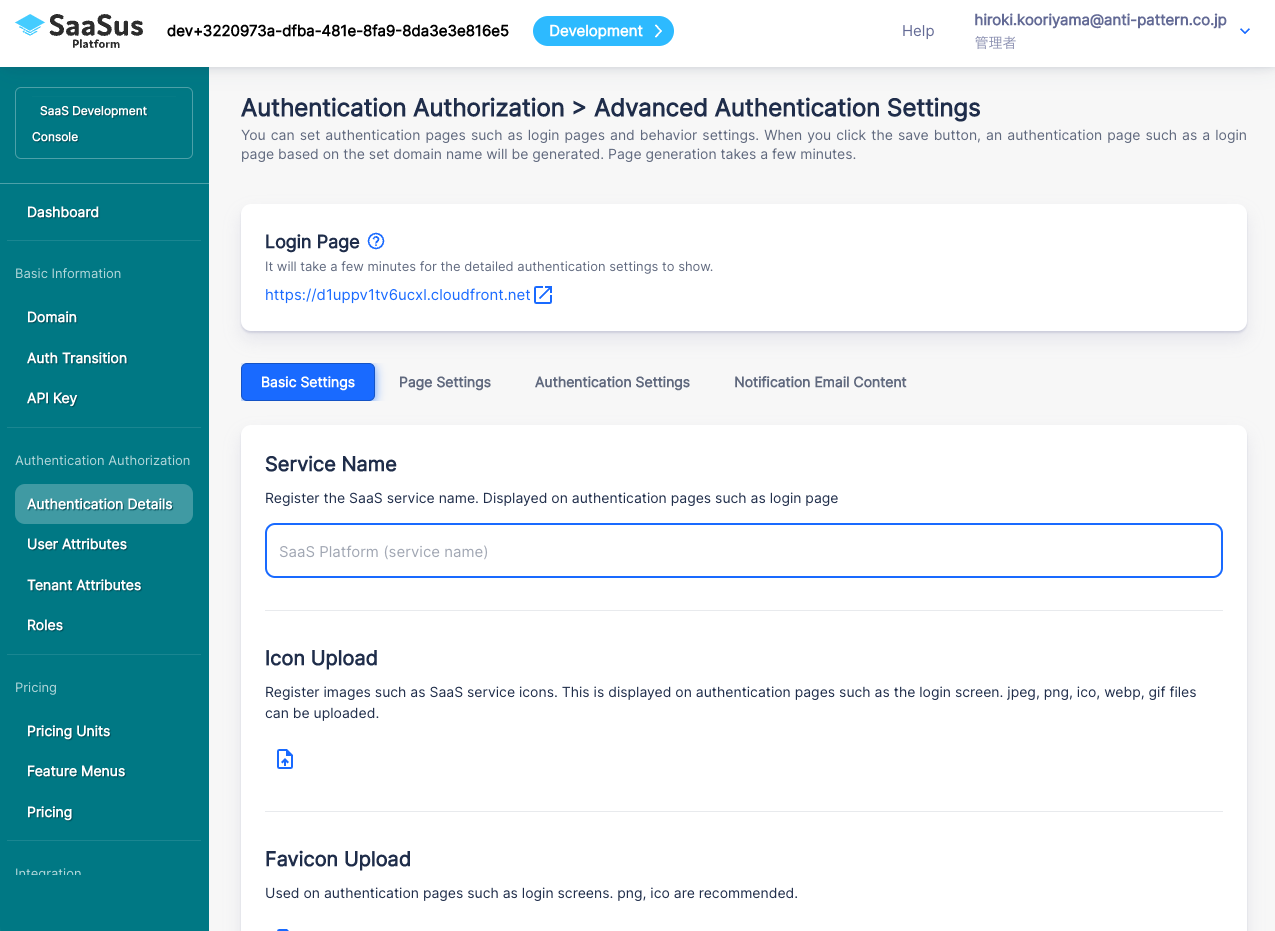
In Basic Information, edit the various information used on the authentication page.
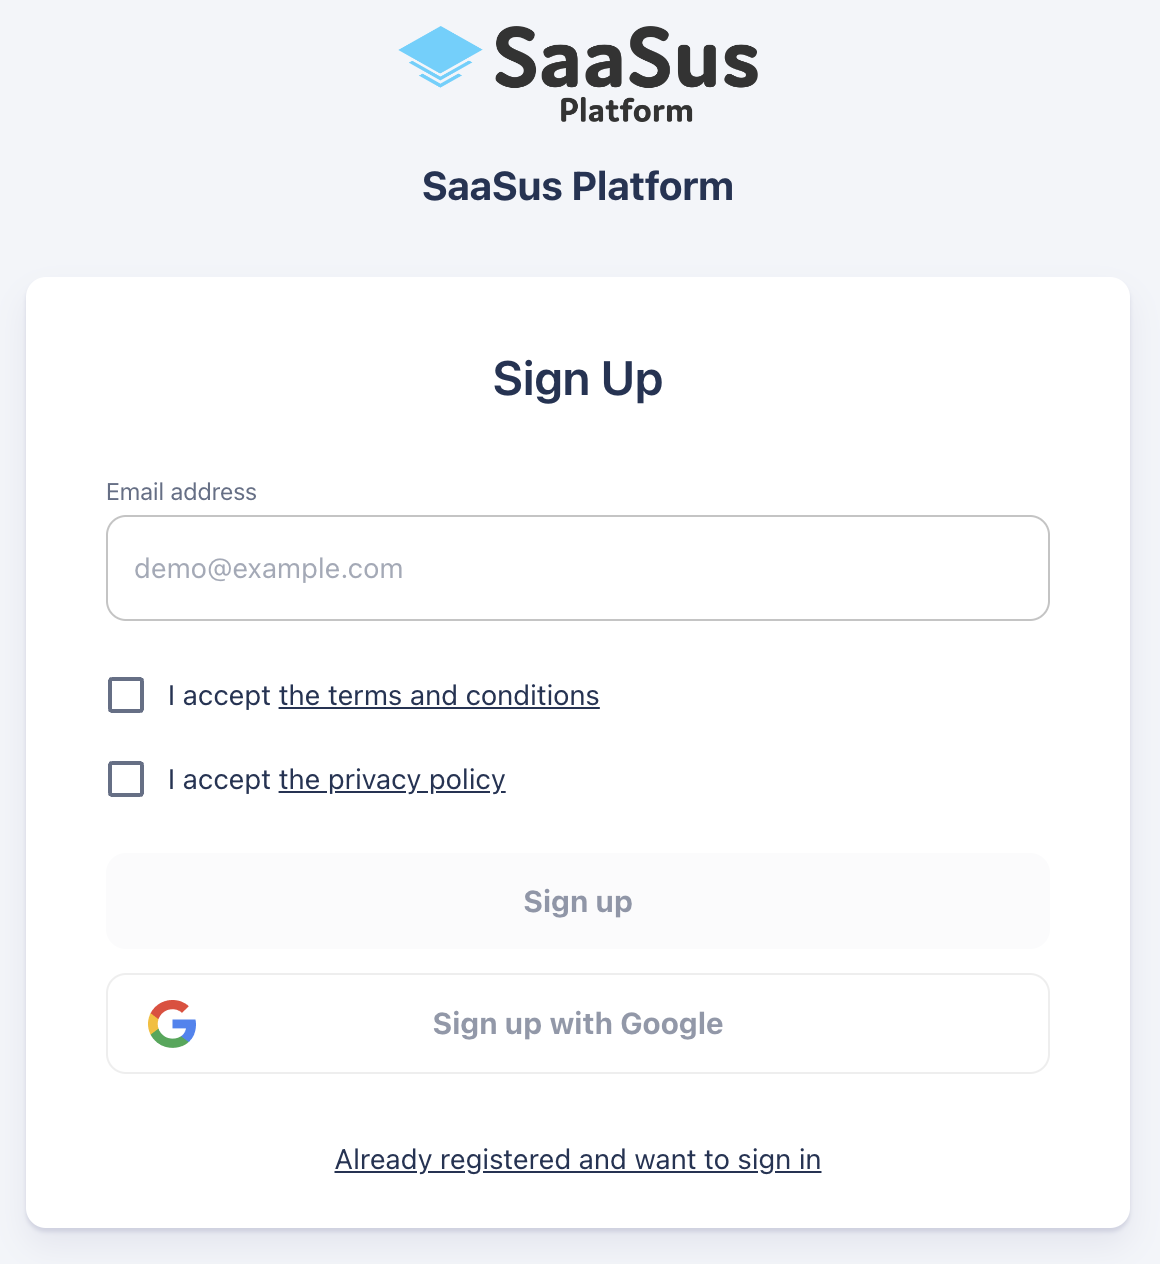
For example, on the previous login page,
- "Welcome to the SaaSus Platform" is the service name
- The icon at the top is icon upload
- The Terms of Use URL and privacy policy URL are Terms of Use and Privacy Policy Link
becomes:
Click the "Save" button to apply the changes
On the "Page Settings" tab, you can select whether to display the terms of use and privacy policy on the following pages new registration, login, and password change.
On the "Authentication Settings" tab, you can configure various detailed authentication settings.
Once the settings are completed, the login page will be generated at the URL with “auth.” added to the domain name set earlier. Let's check if the login screen can actually be displayed
- When you save your changes, a new login page will be generated. It will take a few minutes to generate, so please try to access it after a few minutes to see what you last saved.
The login page will be generated with a URL that adds “auth.” to the beginning of the domain name you set earlier.
For example, if the domain name is set to “sample.saasus.jp”, a login page at https://auth.sample.saasus.jp/ is provided.
After confirming the login page, let's return to the SaaSus console
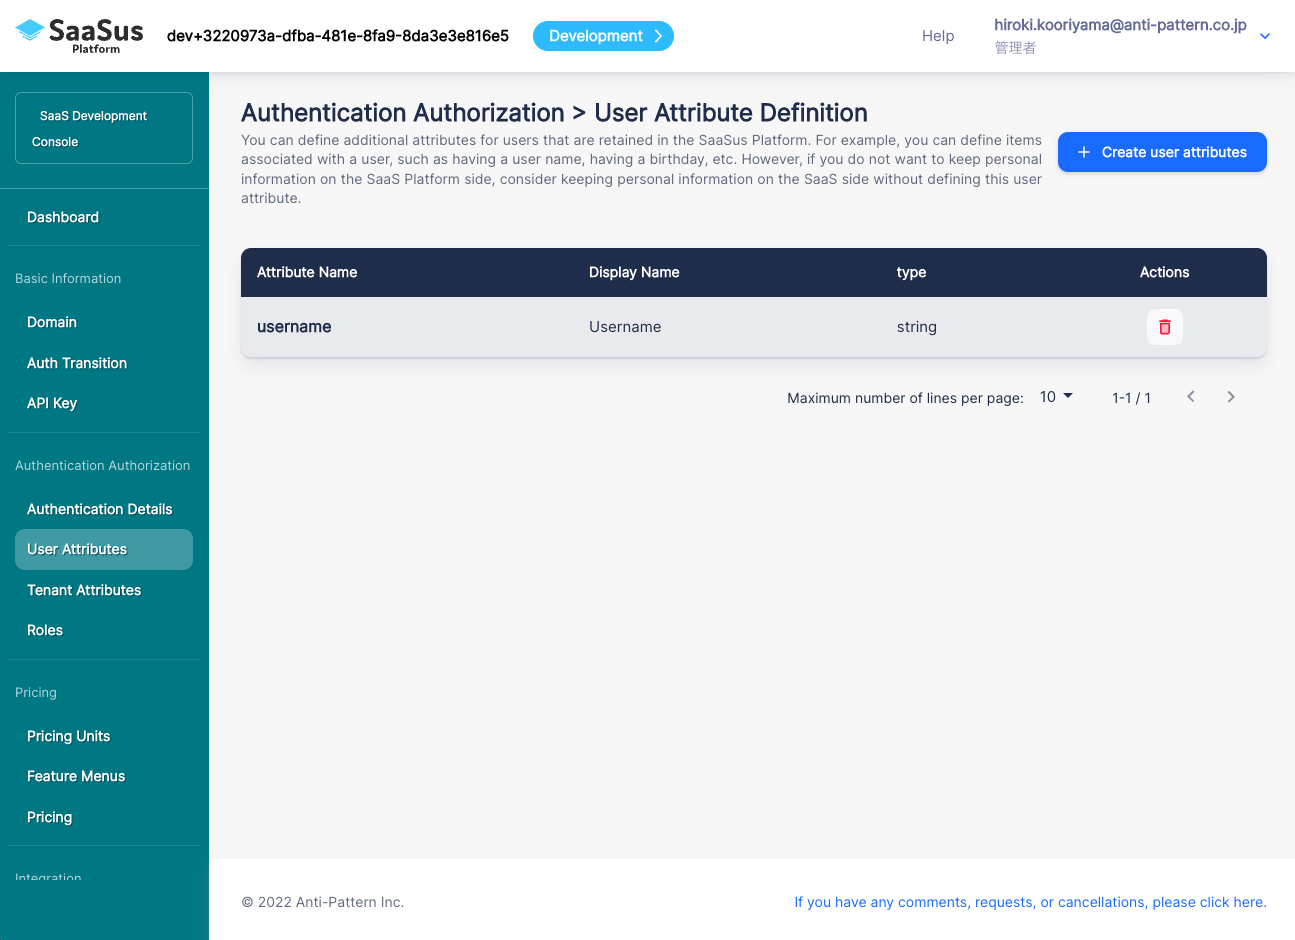
Define Additional Attributes for Users
Next, define user attributes.
Click "User Attribute Definition" on the side menu.
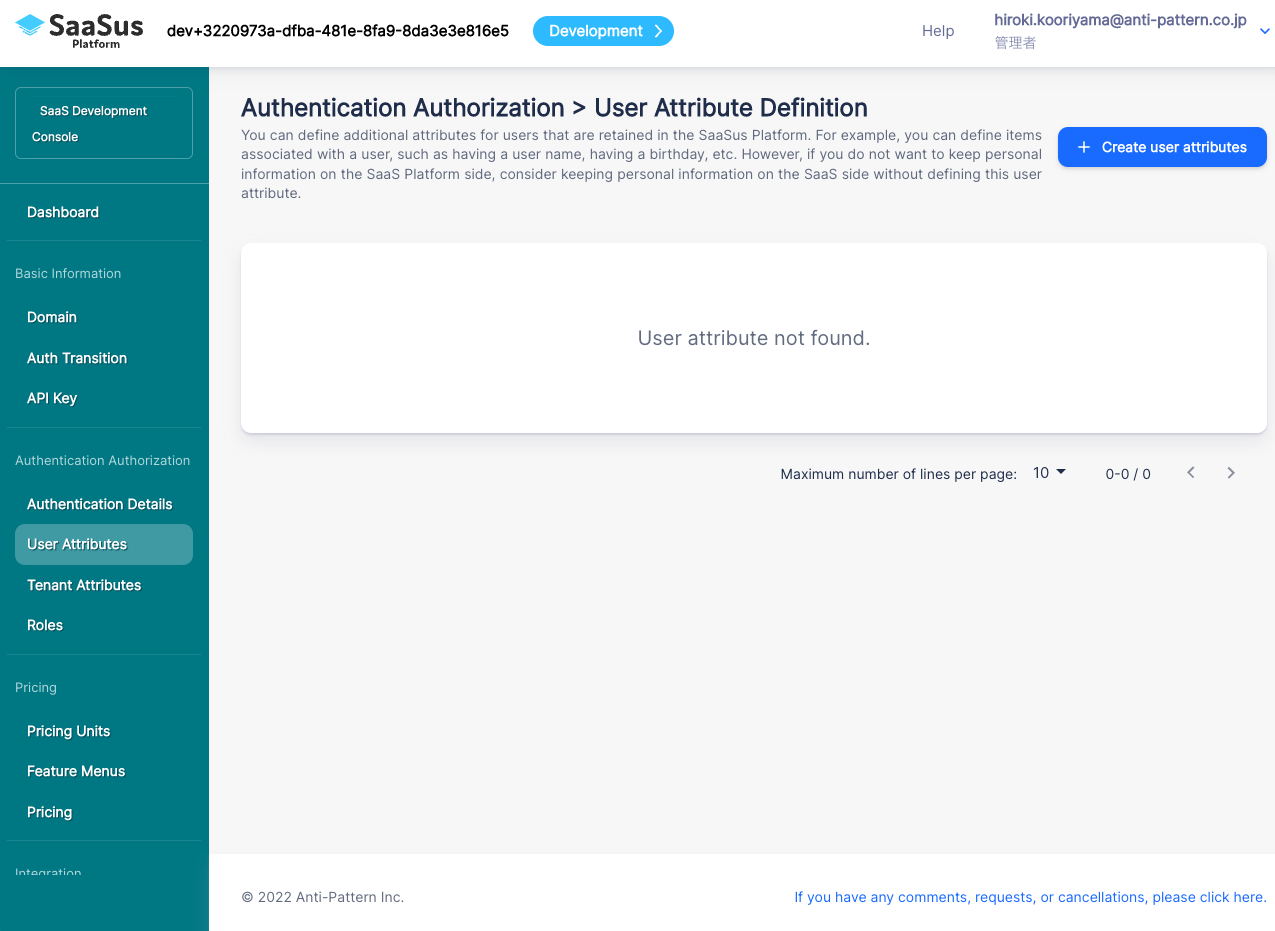
On the default SaaS Platform managed SaaS users only have user IDs (UUIDs) and email addresses. If this is not enough, users can be assigned additional attributes.
SaaS designers need to consider which user attributes should be on the SaaS Platform side and which attributes should be on the SaaS side.
For example, if you want to manage all user information on the SaaS Platform side, define the required additional attributes in the SaaS Platform. However, there are cases where you do not want to manage important information such as personal information on the SaaS Platform side, or you want to perform various aggregations based on additional user attributes. In that case, it is more flexible to require only authentication on the SaaS Platform side, manage user information on the SaaS side based on the user master, and associate the UUID with the authentication information on the SaaS Platform side.
For this example, the sample application requires a username, so let's define an attribute called "username".
Click the "+ Create User Attribute" to display the dialog for creating user attributes
The attribute name is used as a key for identification on the SaaS application (code) side. Therefore, it is important to enter in English.
Display name is described so that the attribute can be easily understood
Type specifies the data type.
For the sample application, set as follows
- Attribute Name: username
- Display Name: Username
- Type: String
After entering, press the "Create" button

User attributes added.
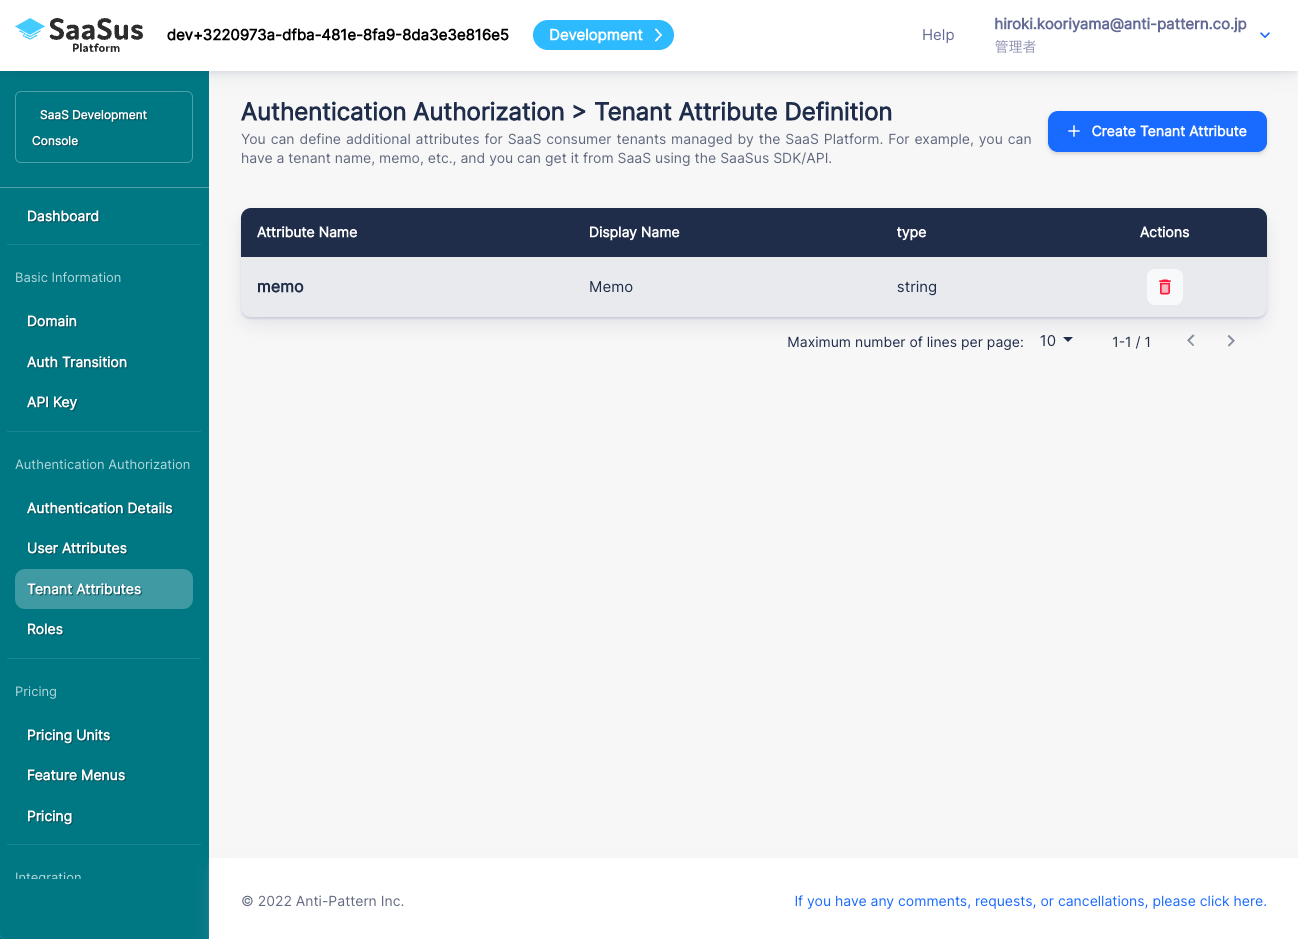
Defining Additional Attributes for a Tenant
Then click “Tenant Attribute Definition” to define additional attributes for the tenant.
Here "Tenant" refers to the tenants in a multi-tenant SaaS. In other words, the organizational unit (contracting unit) of the SaaS is called a tenant.
Define any additional attributes that may be required for each tenant.
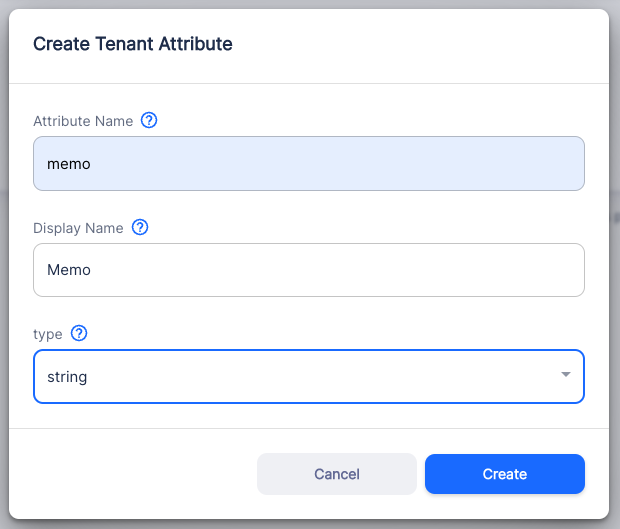
Click “+ Create Tenant Attribute” to add it in the same way as for user attributes.
This time, let's make it possible to add a memo for the tenant.
- Attribute Name: memo
- Display Name: Memo
- Type: String
After entering, press the "Create" button
Tenant attribute added.
Role Definition
Next, we will define the roles.
This role becomes a role in various SaaS and is used as the basis for authorization.
For example, if you have administrator privileges for each tenant, define a role such as admin, and for general users, assign a role such as user.
This time, we will define admin and user for the sample application.
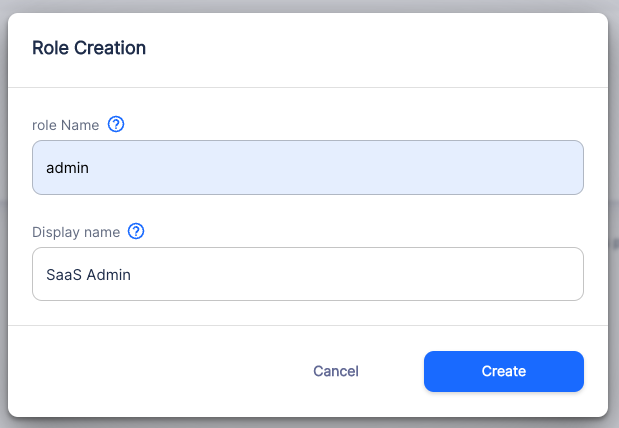
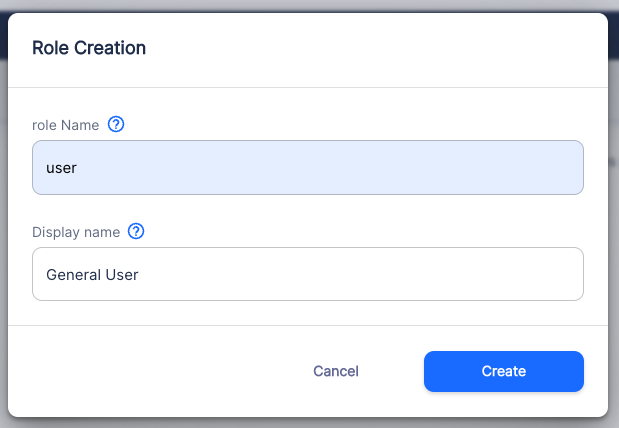
Click the "+ Create Role" button to display the Create Role dialog.
The role name is used to identify the role on the SaaS application side.
The display name is for easy recognition per role.
Enter,
- Role Name: admin
- Display Name: SaaS Admin
and click the Create button.
Similarly,
- Role Name: user
- Display Name: General User
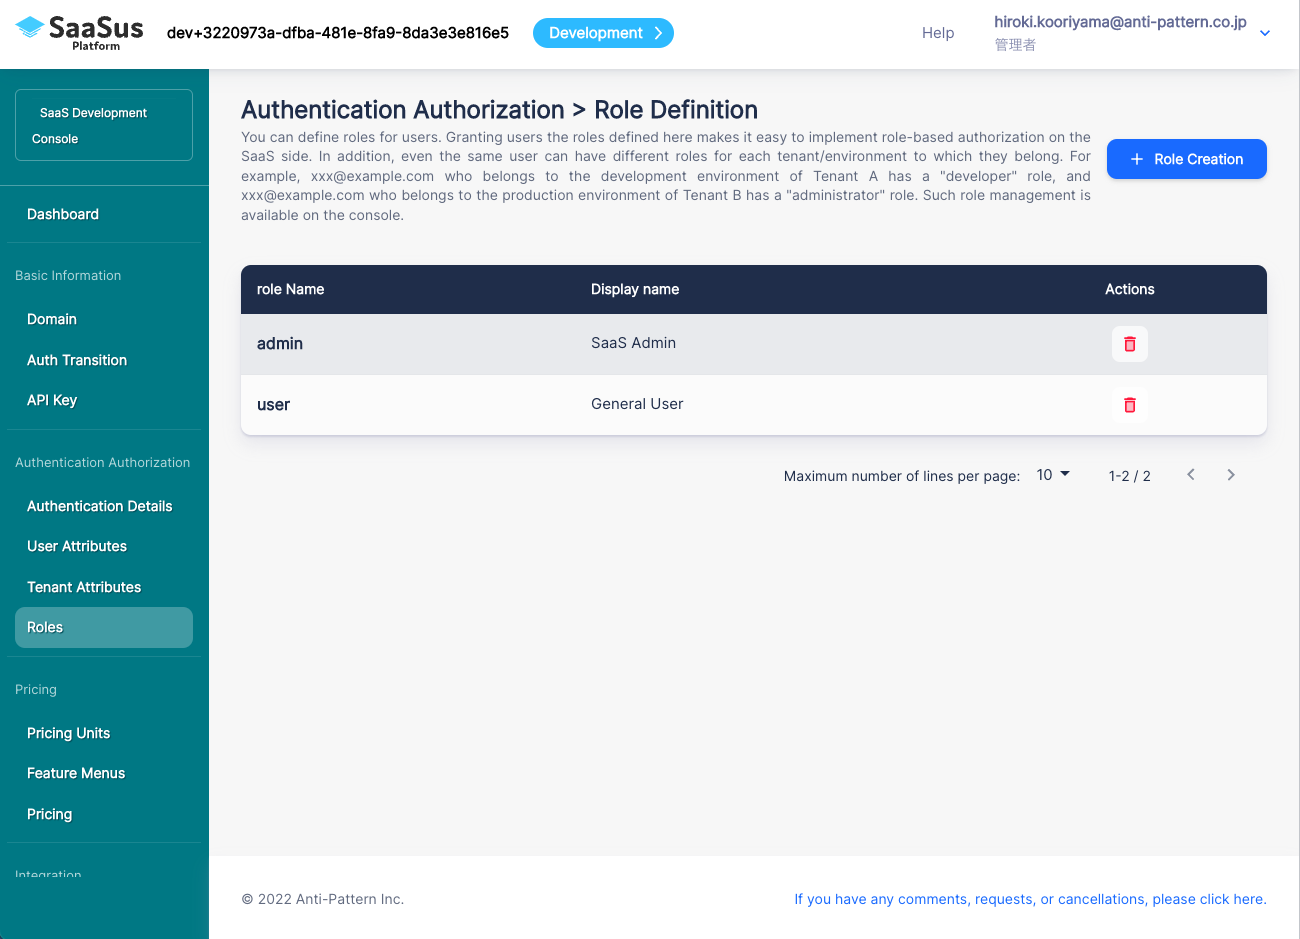
Now you are ready to create a multi-tenant SaaS.
Now let's switch to the SaaS Operation Console and create SaaS tenants and users!